


I have previously posted some of this information in other threads. I thought I would put this togehter in one place as a guide for others that might be interested in aquirining more WWII planes that are not yet available as minis by WoW.
I have searched and the best option I have found for 1/200 planes are the unpainted AIR200 models. I know some shy away from painting their own models, but it really is quite easy even if you currently have little or no modeling experience. In the end it is very economical and rewarding to use something you made.
I purchase mine form a store called "the Last Square" in Madison, WI. They are local for me, but I know they do quite a bit of online business as well.
Link for "The Last Square:
http://www.lastsquare.com/
Look under historical miniatures -> 1/200 -> Nobel Miniatures -> AIR200
They also have other scales available such as 1/300 which is popular with some.
Prices are very reasonable. A 2 pack of fighters runs $6.99 and a single engine bomber $5.99 for a single plane. If you are not a painter I know they do offer a painting service as well.
I also use the I-95 decals they sell as well.
Here is what I do for my models:
1. Clean them-wash in a soap and water solution to remove any residue from the casting process so paint with stick.
2. Add the antena which is totally optional using a thin piece of styrene cut at and angle and super glued on.
3. Assemble if required. Most require no assembly, but some of the bombers (Val/stuka) require the fixed landing gear to be mounted.
4. Prime the model. Hobby primer is great, but any metal primer will work from the hardware store.
5. Paint to desired scheme. I use acrylic paints as it dries fast, flows well into small details and is easy to clean up. You do not have to use the expensive model acylics either. Many of the paints I use I get in the craft are for less than $1/bottle which lasts a long time.
6. Once completely dry apply decals as desired.
7. Once everything is to your satisfaction apply 1-2 light coats of sealer. I use a spray called Testors "Dull coat". This gives a nice flat military finish and protects the paint and decals. Usually let it dry 30 minutes and then apply the 2nd coat top and bottom.
I can usually paint several planes in an evening and them let them dry overnight.
That is all there is to it!
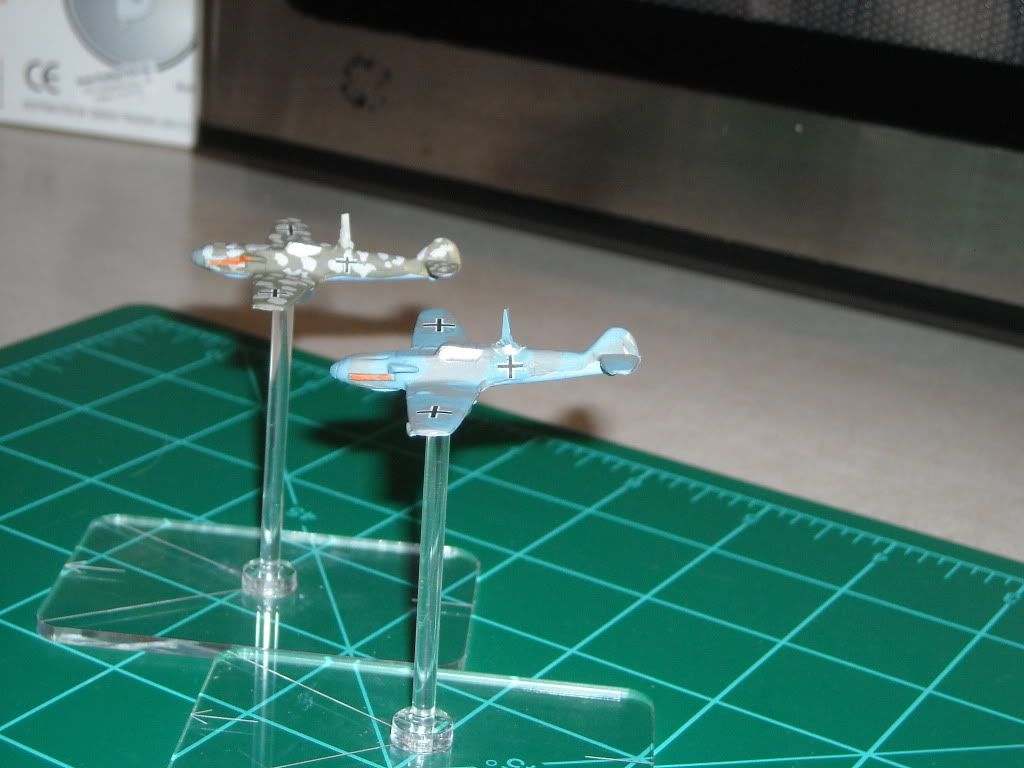
Here are some pics comparing the AIR200 to WoW models:
The pictures above are using the WoW stands. At first I thought I would make my own stands using the clear acrylic in the first pic. Then I discover Litko flight stands. I now have found that I prefer to use the flight stands made by Litko even over the WoW stands. Thet are sturdy and do not fall apart.
Link to Liko stands and flight accessories:
http://www.litkoaero.com/page/LAI/CTGY/AFS
All of my custom planes have a small cicle piece glued to the bottom called a "peg topper" which then easily attaches them to any size Litko peg. They also make a convestion peg topper which allows you to attah the WoW models to the Litko stands whithout any modification.
The only alteration I make to my Litko stands is to glue a peg topper to the base hole making sure it is lines up. I find that this makes the already sturdy stand even more so espeically when using taller 6" pegs.
Here you can see the models on the litko stand and the peg topper on the stand base:
Here is a pic of the WoW models mixed in with my custom models all on the Litko stands( note the conversion "peg topper" on the WoW spitfires in theforeground):
In the end an individual decaled fighter with a complete Litko stand ends up costing me less than $7 once you break down the cost of planes, decals, stands per plane.
Finally some pics of my mixed collection ready for action:
Hopefully you find this helpful.
Aaron


 Reply With Quote


 I was trying to find the post where you made your base decals.

")


Bookmarks