Looking good!
Karl


Looking good!
Karl
It is impossible for a man to begin to learn what he thinks he knows. -- Epictetus

The inaugural race at Captain Dobbs' Royal Flying Circus:
At the start of the 3 turn pre-start, both planes are at an altitude of 1 and flying away from the start line, climbing for all they're worth.
Two turns into the pre-start Suzanne is going for the line and I have yet to turn around, but I have climbed above her.
The last move of the pre-start takes Suzanne over early by a half inch. A ways back, with renewed confidence, my Spad thunders toward the start line.
Suzanne starts her penalty turn around the first pylon as the start looms for me.
My plane roars across the start and heads for the next pylon. Suzanne completes her penalty turn and sets off in pursuit.
I round the first pylon and Suzanne tries to cut inside my turn.
...a little too inside, as she flies through the pylon.
A similar fate awaits the second pylon at the hands of Suzanne. She's well on her way to being a pylon ace! ( We forgot to pull damage for the plane, distracted as we were by it being the first race.)
Ignoring the trail of wreckage, cutting corners has paid off for Suzanne, as she has closed the gap.
We both clear the next pylon with no challenges. Suzanne is hot on my tail, so I burn an altitude peg to pull away from her and open the gap.
Due to the late hour, we call the race at pylon #5. Suzanne's Abatros crosses the finish one card behind and a half an altitude above my Spad.
The initial results of the racing rules were satisfactory and play was fun. Updated rules to reflect what was learned will soon be uploaded. Also, at Suzanne's suggestion, audience will be added to the bleachers.
No bullets were exchanged in this competition, though technically one plane probably got pretty roughed up.
Nice! I really like what you have done here!
I do have a question on the wind rules. The +1 and -1? is that for the wind intensity? Or, is it 1 unit wind direction clockwise or 1 unit wind direction counter clockwise?
The Zoom dive? I take it you have two cards played for that movement phase?
Last edited by camelbeagle; 09-08-2019 at 08:19.


Always good to watch at the Doncaster Con
I'm learning to fly, but I ain't got wings
Coming down is the hardest thing
The +1 and -1 is for direction to encourage the wind to trend toward starting direction.Originally Posted by camelbeagle

In a Zoom dive, on that movement phase, in addition to the dive card, a non-stall straight, turn, or side slip is chosen and played off of the dive arrow instead of the plane's base. The plane's base is placed at the end of the chosen movement card.
Last edited by Dobbs; 12-29-2019 at 06:19.
OK, so If I have a 1:00 light wind. I roll a d6. I get a 6. Then I have a 2:00 wind. Then I am making the assumption that the next turn I have a -1 modifier to my roll. Next round I roll a 4. I have a -1 modifier which makes it a 3 which is no change. Next round I will have a 0 modifier. Am I correct in my thinking here?
Thanks,
Dan
At the beginning of the race, players determine the Initial wind direction. The modifiers apply whenever the wind has shifted either clockwise or counterclockwise from the Initial wind direction. There is no modifier only if the wind returns to blowing from the initial direction.
My idea was to have the wind wander, but trend toward the starting direction.
Gotcha! I was overthinking it.
Here are the newest take on Air Racing Rules, incorporating what we learned.
Air Racing Rules 9-9-2019.pdf
The main thing is that slower planes or planes with a poorer climb rate should get a pre-start altitude advantage to help them compensate. I left it arbitrary, as there's a lot of wiggle room for handicapping.
Suzanne felt that the bleachers needed people, so here's a bleacher front with fans.
Bleacher Front Fans.pdf
Race #2 begins, 3 turns to start...a few souls can be seen in the bleachers at Captain Dobbs' Royal Flying Circus.
It's an Albatros DVa vs. a Spad VII (I just grabbed the wrong mini). The Albatros starts at level 2 due to its slower rate of climb. In the Spad, I immediately start climbing to catch up.
2 turns to start...
I climb above the Albatros and level off.
1 turn...
Oh no! Will Dobbs hit the bleachers? Will Suzanne add to her pylon score?
The Start! Suzanne banks hard to the right and Dobbs banks hard to the left.
...Across the start line, a close call.
The race is on!
Last edited by Dobbs; 09-16-2019 at 16:43.
...heading for the first pylon...
Some confusion at the first pylon since we put it in place as an inside turn, we decided going outside was penalty enough.
Suzanne starts to climb while worrying about adding another pylon to her collision collection, and I pull a zoom dive with a turn and my Spad thunders into the lead.
It was a figure 8 course, so the next pylon was behind the start.
I underestimate my approach and clip the pylon, my first kill! Bits of wood and fabric whip past my cockpit as the pylon goes down and my plane gets roughed up.
Suzanne cuts inside my turn and takes the lead...
More to come!....
Last edited by Dobbs; 09-16-2019 at 17:22.
Having fallen behind, I decide to use my Spad's superior climb rate and go for altitude.
Suzanne starts her turn for the run to the finish line.
A close call!

We both begin the final dash before the turn for the finish.
Suzanne starts her turn toward the finish...
...and turns too tightly, missing the line. I barely squeak over, sideslipping after clipping the pylon as I go by!

Last edited by Dobbs; 09-22-2019 at 06:36.
I've been having so much fun designing and building cardstock air racing structures, I decided my airfield needed some hangars (Suzanne wants a water tower too, so that's in the works).


Well done, Dobbs!
Nice hanger!


Nicely done - you're a pro at this.


Very impressive structures Dobbs, a tough course to navigate by the looks of things.
Sapiens qui vigilat... "He is wise who watches"


An excelent idea and very well performed, looks to be loads of fun.
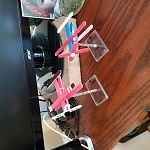
I recognized your none spilling thermal mugs, we have a pair as well.
Cheers
Thanks, John, good eye on the mugs. The second race took place on our boat on an evening during our Fall cruise, hence the tight racecourse.
New structures:
Racing Pylon Starting Line.pdf
Hangar, German 2.pdf
Hangar, American 2.pdf
Three more hangars:
Hangar, British 2.pdf
Hangar, French 2.pdf
Hangar, Italian 2.pdf
Do you print the hangers out on cardstock?
Thanks for sharing!

Better and better! Lovin' it!
The Hangars are printed on 110lb cardstock. In fact, everything except the pylons is printed on that.
The pylons are printed on 65lb cardstock. It's what I had before I found the 110. I'm not sure the weight of the 110 is necessary, and it may even make things more challenging, but I haven't taken the time to experiment yet.
On a related note, if anyone has any tricks for reducing or eliminating the curl of flat printed paper, I'd love to hear them. The refusal of my pylon stripes to lay flat bugs Suzanne.
Thank you!
Maybe print on full sheet label paper and stick it on a sheet of Styrene plastic?
That would definitely do it; on the other hand, label paper with 110 cardstock should do it too.
Karl
It is impossible for a man to begin to learn what he thinks he knows. -- Epictetus
It could be that you only printed one side on uncoated paper. You could try protective print spray on both sides, to even out the curl, and protect the ink.
PS: Krylon Preserve It, perhaps?
Or: Hahnemuhle Protective Spray for Fine Art Digital Prints
Last edited by OldGuy59; 09-28-2019 at 04:30.
Mike
"Flying is learning to throw yourself at the ground and miss" Douglas Adams
"Wings of Glory won't skin your elbows and knees while practicing." OldGuy59
These are all good suggestions. I was considering laminating to thin aircraft plywood, but the styrene sheets are a better idea. I think I'll try the Krylon first, as that'll keep it as thin as possible and protect the print.
Suzanne felt that our Flying Circus needed a water tower, because if you see one in a movie, by the end of the film, someone is going to knock it over, and so far, our air racing has been somewhat of an obstacle course.
The Watertower:
Watertower.pdf
Nice!
The new, improved, bleachers, with a small audience, with the original for comparison.
I made an underside for the roof to make it more rigid as well as adding some reinforcing here and there and tweaking tabs for better alignment. I also added a strip of basswood along the front of the bleachers to strengthen them and give me something to glue wedges to to lock down the stairs.
I've also lengthened the starting line in anticipation of racing more planes, and shortened the pylon stripes to make it more challenging to score a point rounding them.
I've also changed collision damage from the A deck to C, as I hadn't realized that the game already had a deck for collisions.
If anyone has tried assembling my structures or tried my racing rules, I'd love to see or hear about what level of success you've had.
Last edited by Dobbs; 10-13-2019 at 12:33.

You have done a great job in developing the air race, Dobbs!
I have printed out and used some of your pylons. They work wonderfully! I haven't tried to assembly your bleachers yet. Thanks for sharing all this! My wife doesn't care much for the war game aspect, but she likes using the planes to race with!
Yup, it was my wife, Suzanne, who suggested air racing. She loves the biplanes, but preferred competition without violence.
Of course, when she's behind, she does ponder that the planes DO have machine guns...
I will upload the latest bleachers and pylon stripes when I get home (we're out for our Fall sailing cruise).


If you're interested, this is how I do it WITH machine-guns!
https://www.wingsofwar.org/forums/sh...nnen-im-Himmel
I laugh in the face of danger - then I hide until it goes away!
Here are the lengthened starting line and shortened pylon lines.
Start-Finish Line Lengthened.pdf
Standard Pylon Line Shortened.pdf
Here are the 3 PDFs for building the new improved bleachers.
Bleacher Front Fans.pdf
Bleacher Roof.pdf
Bleacher Roof Underside.pdf
If anyone wants to give assembly a try and has any questions, just drop me a PM.
Bleacher Roof Dayton.pdf
Here is the bleacher roof for Dayton, Ohio. Near as I can figure, towns didn't include the state name after the town name, as, if a pilot was that lost, he was probably doomed.
Awesome!
Assembling a Hangar (part 1):
First, I fold all of the eaves in. I line up a metal ruler along the edge to be folded and run my finger along the edge to make a crisp fold.
I then spread a small amount of glue along the seam to be glued, lay the ruler down with its edge along the edge being glued (being careful not to put it past the edge and get it in the glue). Then I add the clamps and clean up any glue that squeezes out (wiping away from the ruler). I use a short stick to wipe the glue then wipe it on a paper towel. I found that wiping directly with the towel got glue on the ruler and on the print and smeared the ink.

Assembling a Hangar (part 2):
With the eaves all glued, I then fold the sides in. I make sure the three bottom edges are all in line on the front. This will encourage the building to sit level when finished.
Now I fold the roof supports on the top of the sides inward. The three grass panels get folded outwards. The back ground panel gets folded inward and will be inside the hangar when completed. The ground panels are mainly to make the walls more rigid.
Here I am gluing and clamping the first side. All folds have been made at this point, and just straightened temporarily for ease of clamping.
Assembling a Hangar (part 3):
Attaching the roof is merely a question of applying glue to the tabs at the top of the side walls, then bracing until dry. I discovered that the glue does permeate the paper a little and cause a subtle discoloration in the roof. On my next hangar I will spray it with a fixative first.
The finished hangar:

Last edited by Dobbs; 11-01-2019 at 04:04.
I less-than-three this whole series of scenery and buildings!
Bleacher Roof Dayton 2.pdf
Dayton, Ohio's roof, now with latitude and longitude and an arrow indicating the direction to the nearest municipal airfield.
This is getting out of hand, way too awesome!! I am printing it out for my trip to NZ to play with my grandsons with their home made planes:
 Posting Permissions


 Reply With Quote


Bookmarks