Ares Games
Results 1 to 39 of 39

Thread: Repaint suggestions please

  1. #1

    Default Repaint suggestions please

    I find myself owning two Albatros DIII (Brumowski) the all red bird. I am unsure which way to go with a repaint. Do a generic purple/green upper wing surface. Light blue underside on the wings and leave the fusalage red with painted out details. Or do the Promo card Bonsch which appears to be a solid green aircraft. I did some online research and have found no details for the Bonsch aircraft. Any help out there on the Bonsch aircraft or any suggestions.
    Tony

  2. #2

    Default

    I've not found a profile for that plane yet, but I did find some info that might help you in your search...

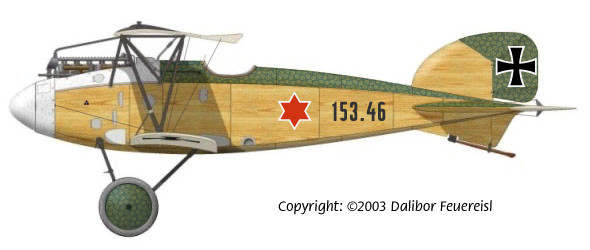
    In particular 253.31 has been one of the fighters flown by Austro-Hungarian ace Eugen Bonsch (in Bonsch's name-umlaut).On 23 September 1918 it was damaged in the collapse of the Ghirano airfield hangar caused by a storm .The aircraft suffered the cut of almost the entire rear fuselage section.Most probably it was not repaired before Nov.4,1918 and was then captured by advancing troops.
    There's a quite simplified colour profile of this aircraft at page 216 of the book "Die Flugzeuge der KuK Luftfahrtruppe und Seeflieger" (AAVV;H.Weishaupt Werlag,Graz,1988).A more detailed one (by Ray Rimell) is among the colour plates of the famous Martin O'Connor's book about Austro-Hungarian aces.Maybe both these profiles have been drawn from the photo of 253.31 stored in damaged conditions at Ghirano after the storm.This photo is also shown on Dr.O'Connors book.
    Also, someone on the World War I Model site might be able to help you out.

    Good luck!

  3. #3

    Default

    Hello!

    True that the plane I had in mind for that promo card has a profile in O'Connor's book (#26 at page 247) but it is not 253.31, it is 153.46. A perfectly equivalent profile is #19 at page 31 of Osprey's "Austro-Hungarian Aces of World War 1" by Cristopher Chant. Here at page 93 the author says that it is the plane he flew from September 1917 to October 1918. You should find the book here:

    http://tinyurl.com/m4rcth

    (it should give you two results for the search just above the page, with forward/back to go from one to the other - profile and comment).

    You can also find the same plane there:

    http://www.feudal.cz/html/albatrosy_...fag__v_bar.htm

    The profile is this one:


    Here the nose looks white, while on the other two (and on our card) is silver. Here in this image also undersurface looks white, while on the other two they are given as pale canvas.

    Please post pictures of the repaint when you have done it!
    Last edited by Angiolillo; 09-18-2009 at 23:09.

  4. #4

    Default

    Quote Originally Posted by Angiolillo View Post
    A perfectly equivalent profile is #19 at page 31 of Osprey's "Austro-Hungarian Aces of World War 1" by Cristopher Chant. !
    I've got to agree with Angiolillo, the Osprey range of books is fantastic, especialy if your into re-paints.

    They've got loads of books, covering different aircraft with tons of colour pictures of colour schemes. So if you after re-painting your existing aircraft or editing some aircraft cards, there is a gold mine of info to be had with the Ospray books............and no, before anyone ask's, i dont work for them!! (Although, after this little rant, maybe I should approach them for some commission on advitising there products?? )

  5. #5

    Default Bonsch DIII WIP

    Clear coat over base, camo to follow.Click image for larger version. 

Name:	Airplains 3 018.jpg 
Views:	111 
Size:	82.2 KB 
ID:	65

  6. #6

    Default

    Thats looking realy neat and crisp on the paint work. Is it a scheme you've made up or have you copied from a historical paint job?

  7. #7

  8. #8

    Default

    Quote Originally Posted by aarondpjames View Post
    Thats looking realy neat and crisp on the paint work. Is it a scheme you've made up or have you copied from a historical paint job?
    Sorry, just relised that the picture is at the top of the page, duh!! When I wrote it, I was on the computer at work and it could'nt open the picure. Now having seen it on my home computer I relise that I've probably just won the title of "Stupidest Comment" award!!!

  9. #9

    Default Bonsch WIP w/dot camo

    Bonsch w/camo
    Attached Thumbnails Attached Thumbnails Airplains 3 053.jpg   Airplains 3 061.jpg  

  10. #10


    Users Country Flag


    Name
    Desaix
    Location
    Fix the bugs plz
    Sorties Flown
    90
    Join Date
    Sep 2009

    Default

    Very nice !

  11. #11

    Default

    Wow, did you hand paint that? It must have taken forever!

  12. #12

    Default repaint

    Took a while I used the blunt end of a toothpick. I am working on the Sqd. insignia and aircraft number now. I started this thread a couple of days before I began so there is a time frame. Would have been around the 23rd or 24th of last month so 10 days but only a couple of hours a day during the week but maybe a few more on the weekend.

    Tony

  13. #13

    Default

    That is a great repaint!

  14. #14

    Default Repaint

    Question for any in the know. How would the raw plywood be finished. More importantly how much would it reflect light. Would flat, semi gloss or gloss be the best topcoat. At this point in my repaint I will be doing a couple of clear coats for durability then spray topcoat of Testors Dulcoat. At that point I usually go back over the aluminum with semigloss and I am done. If some other finish would be appropriate for the plywood it would be the time to apply it.
    Thanks
    Tony

  15. #15

    Default

    I would think the semigloss would be the best. Exposed wood on these planes would have been both sealed and polished/waxed to cut down on drag. I would go for a look just a little less glossy then your aluminum.

  16. #16

    Default Bonsch DIII WIP Testors Dulcoat overall

    Dulcoat overall with new spandaus. The next photos will be of completed ship.

    Tony
    Attached Thumbnails Attached Thumbnails Airplains 3 motor 005.jpg   Airplains 3 motor 009.jpg  

  17. #17

    Default

    Looking great! Are you using Dom's Decals for the crosses and such?

  18. #18

    Default

    Thanks its been an experience that I enjoyed.
    The decals I purchased on ebay from a vendor in Great Britian. I dont think they are Dom's. These were not very well indexed I had to paint the lower margins by hand. They also did not react to Micro Sol very well. The color by the way is a light gray rather than white. If you look close you can see my unsteady hand and the color difference (could have been even darker). The Sqdn. insignia and aircraft number were done by my hand.
    I hope that others tracking this thread or casually viewing have also enjoyed themselves. This is a part of WOW that many of us like to do. I would encourage others to give it a try. We all have tricks or have experienced nightmares that we can share. Ask for advice (see where it took me) or give it.

    Tony

  19. #19

    Default

    It has been a great thread to follow! Eager to see a photo of the assembled plane at the end!

  20. #20

    Default Finished tonight!

    Thanks to all for your assistance. Finished tonight all touched up and ready to go. More photos in my photo page.

    Tony
    Attached Thumbnails Attached Thumbnails Airplains 3 b&a 011.jpg   Airplains 3 b&a 004.jpg   Airplains 3 b&a 006.jpg   Airplains 3 b&a 012.jpg  

  21. #21

    Default

    Very impressive Tony! What is your technique for the plywood?

  22. #22

    Gauntlet's Avatar
    Users Country Flag


    Name
    Chris
    Location
    Sussex, England
    Sorties Flown
    40
    Join Date
    Oct 2009

    Default

    Stunning result. It deserves never to be shot down.

  23. #23

    Default Repaint plywood

    First of all thank you all for the kind words.
    The plywood sections were the first part of the repaint that I did. If it just did not look ok then plan "B" or "C". I sprayed the entire aircraft with flat white. I used a drafting pencil with a hard sharp point to lay out the plywood pannels. I used four different "craft" acrylic paints. Two in the butternut/cream color range and two in the darker brown tones. When I do 15mm terrain features I usually start dark for the base and then lighter shades picking the highlights. On the plane I did the reverse. Started light, remarked the pannel lines. Then within the pannels I used the brown tones to make irregular streaks before the streaks cured i went over the pannel with a thined coat of the darker cream color. You can blend the colors or leave them in stark contrast. (muted I think looks best in this scale).
    I started on the belly (learning as I went) and worked my way up and around. By marking the pannel lines you can attempt to make each pannel a little different. It helps in the overall apperance. You dont need a lot just the hint of streaking.
    I tried to do some "V" streaks found them to be too difficult for my hand to accomplish. They were just too big. I dont think the plywood used would have looked like what we see at the lumberyard anyway. It probably would have been blemish free. Years ago I worked in a lumber yard that specialized in plywood and hardwoods, (For you Canadians it was the first Windsor Plywood in the US) we carried a Baltic Birch. It is a creamy white color and the surface is blemish free a knot might be only 1/4" nothing much bigger. There were no core voids each fletch was hand layed any knots cut and plugged. This is what I would have expected to see on aircraft and what I aimed at visually.
    I refreshed my pannel lines and painted thin lines to cover what I assume would be fabric covering the fasteners. I dont think butt joints would have been used but rather scarf joints. This type of joining would have been much stronger.
    In short, pick a color range varry the tones and see what happens.

    Tony

  24. #24

    Default

    Very nice work, Tony! How long have you been modeling aircraft, then? Your results would indicate that you have done this sort of thing before.

  25. #25

    Default

    Brilliant!! I only have one question...how long did you see spots on everything you looked at?

  26. #26

    Default

    Amazing job!

  27. #27

    Default Repaint

    Thank You Gentlemen, you are too kind. The spots were applied over a gloss finish if I had a bad one I scraped it off with a sharp toothpick and reapplied. It didnt really bother me as it was repeating rows of dots. Only when done with an area did I see the spots. Not too bad mentally I only had a few that just WOULD NOT WORK . I was first accuainted to WOW in May of this year at the North Wests best wargame convention Enfilade. This is the fifth repaint that I have done since then. I have photos of all of them over in my photo section. I have however painted a couple of thousand 15mm Napoloenics over the last 10 years. So I guess I have some experience just not with aircraft.
    Tony

  28. #28

    Default

    great work Tony. Very inspirational....

    Cheers
    GW

  29. #29

    Default

    Great indeed! And with a very warlike reptyle look!

  30. #30

    b_fortner
    Guest


    Default

    Simply some of the best artistic work I've seen on these 1/144th scale warbirds. You've created a real treasure.

    Brent.

  31. #31

    Default

    Wow, great work!

    I have a question though: do all of you disassemple the planes when repainting?

  32. #32

    Default

    Blue Baron
    For me it depends on what I plan on doing to the plane. I have "popped" the top wings off two different WOW aircraft and have been succesful both times. It can be an adventure getting them back properly however. Come to think of it dropping them from about three feet just before a game usually works as well.
    Tony
    Last edited by pflanzer; 11-09-2009 at 20:32.

  33. #33

    Default

    Quote Originally Posted by pflanzer View Post
    Come to think of it dropping them from about three feet just before a game usuall works as well.
    Tony
    Yes it does!

  34. #34

    Default

    Fantastic repaint, well done indeed!

  35. #35

    Default repaints addon details

    has anyone printed some decals of details off their computer?
    i know several that make them for model cars and railroad items, but were would you look for items to fit our planes? <read as: ww1>

  36. #36

    Default

    Quote Originally Posted by boomerpete53 View Post
    has anyone printed some decals of details off their computer?
    i know several that make them for model cars and railroad items, but were would you look for items to fit our planes? <read as: ww1>
    Decalpaper.com produce all you need in the way of printer paper in the States. Make sure you get the right one for your printer. Lazerjet or inkjet etc. they also do sealing spray and solvent for application as far as I remember.
    As for the source material, it depends how good you are at lifting images from books and converting them. A few of the chaps on this site have some interesting ones they may let you nick. Also for ready mades ask Dom.
    Rob.
    "Courage is the art of being the only one who knows you're scared to death."

  37. #37

    Dom S's Avatar
    Users Country Flag


    Name
    Dom
    Location
    People's Republic of South Yorkshire
    Sorties Flown
    2,081
    Join Date
    Jun 2010

    Default

    Decalpaper.com (aka Bel decal) can be very hit and miss - I used to use their paper, but after a couple of batches that delaminated gave up on them. In the USA I'd recommend Tango Papa decal paper, in the UK Crafty Computer Paper.

  38. #38


    Users Country Flag


    Name
    Bruno_Stachel
    Location
    Somerset, England
    Sorties Flown
    85
    Join Date
    Sep 2009

    Default

    Absolutely stunning repaints! :-)

  39. #39

    Default

    Gorgeous job, an excellent scheme, superbly rendered.


Tags for this Thread

Bookmarks

Posting Permissions

  • You may not post new threads
  • You may not post replies
  • You may not post attachments
  • You may not edit your posts
  •