Ares Games
Results 1 to 37 of 37

Thread: Disc and magnet to P-51

  1. #1

    Default Disc and magnet to P-51

    So you start with a P-51

    Click image for larger version. 

Name:	DSCF2899 (800x600).jpg 
Views:	185 
Size:	219.4 KB 
ID:	135903

    Then you cut off the peg and props.

    Click image for larger version. 

Name:	DSCF2903 (800x600).jpg 
Views:	186 
Size:	212.4 KB 
ID:	135904

    Click image for larger version. 

Name:	DSCF2904 (800x600).jpg 
Views:	184 
Size:	159.9 KB 
ID:	135905

    Then you glue a magnet onto one of the flight pegs. I use super-glue gel.

    Click image for larger version. 

Name:	DSCF2901 (800x600).jpg 
Views:	183 
Size:	179.1 KB 
ID:	135906

    Now I use two tools on my Dremel.

    Click image for larger version. 

Name:	DSCF2909 (800x600).jpg 
Views:	185 
Size:	212.5 KB 
ID:	135907

    The sharp one to put a pilot hole in the spot where the peg was.

    Click image for larger version. 

Name:	DSCF2911 (800x600).jpg 
Views:	184 
Size:	225.5 KB 
ID:	135908

    Then the round tip one to put a concave into the surface.

    Click image for larger version. 

Name:	DSCF2912 (800x600).jpg 
Views:	184 
Size:	212.0 KB 
ID:	135910

    Make sure to rough up the metal ball before gluing it to the plane. Then place a drop of super-glue to the hole.

    Click image for larger version. 

Name:	DSCF2914 (800x600).jpg 
Views:	186 
Size:	210.9 KB 
ID:	135909

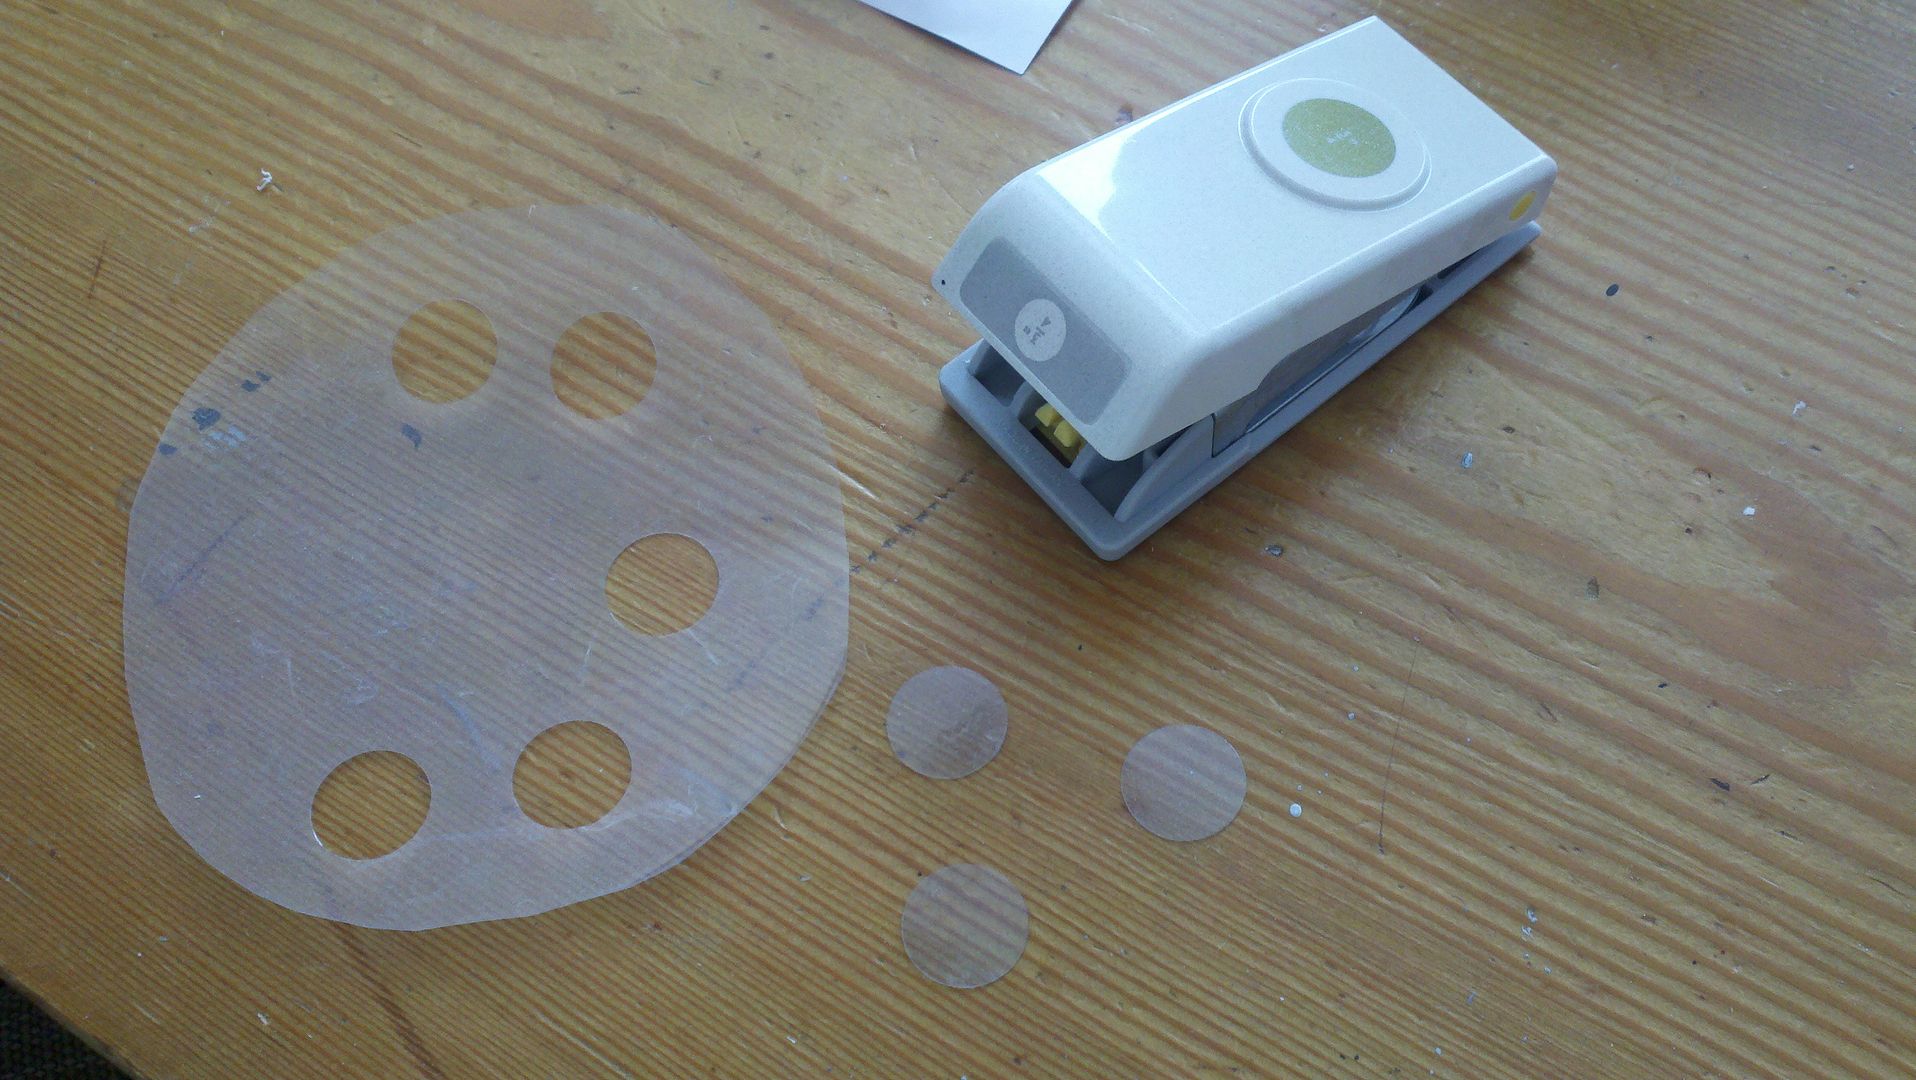
    Now onto the prop. I use 1/2 inch punch to make the props and then I just eyeball the center with a tack.

    Click image for larger version. 

Name:	DSCF2905 (800x600).jpg 
Views:	183 
Size:	203.5 KB 
ID:	135911

    Click image for larger version. 

Name:	DSCF2906 (800x600).jpg 
Views:	183 
Size:	205.9 KB 
ID:	135912

    I then use a rat-tail file to widen the hole till it fits over the prop nose.

    Click image for larger version. 

Name:	DSCF2907 (800x600).jpg 
Views:	183 
Size:	129.3 KB 
ID:	135913

    Click image for larger version. 

Name:	DSCF2908 (800x600).jpg 
Views:	181 
Size:	215.4 KB 
ID:	135914

    This will take time and patience as you get closer to a perfect fit. Then you glue it using super-glue liquid. Just a small drop.

    Click image for larger version. 

Name:	DSCF2916 (800x600).jpg 
Views:	184 
Size:	226.2 KB 
ID:	135915

    You have to set it up right or the prop will lean one way or the other. Just set it straight then let it dry.
    There you have it a fighter ready to go.

    Click image for larger version. 

Name:	DSCF2918 (800x600).jpg 
Views:	184 
Size:	190.9 KB 
ID:	135916

    Click image for larger version. 

Name:	DSCF2920 (800x600).jpg 
Views:	183 
Size:	217.9 KB 
ID:	135917


    Thomas

  2. #2

  3. #3

    Default

    Do you give in home tutoring?

  4. #4

    Default

    Quote Originally Posted by Black Sheep One View Post
    Do you give in home tutoring?
    You got it buddy. Just bring your planes with ya.

    Thomas

  5. #5

    Default

    Yep, that works for me. What do you use to rough up the ballbearing?
    Run for your life - there are stupid people everywhere!

  6. #6

    Default

    Pretty well the way I do all my aircraft which need a ball Thomas, except I use a drill where you Dremel and tack. You are spot on, it works a treat.
    Rob.
    "Courage is the art of being the only one who knows you're scared to death."

  7. #7

    Default

    Nice write up Tom. At Origins I was thinking you clipped off the nose cones and re-attached them after you put the prop on. This is much easier! So you use the same diameter prop from all your WGS minis?

  8. #8

    Default

    Fiddlers Green has a free download for prop disks.
    Print them on the clear plastic for overhead projectors.
    Cut with scissors or modeling knife if you do not have a punch.
    http://www.fiddlersgreen.net/other/F...ners/Props.htm

  9. #9

    Default

    The AA site also has laser cut and engraved spinning props. No printing or cutting required Although for WGS, they would need to be filed to fit over the nose cones. But perhaps I could do something about that on the next batch I make (since they are currently sold out).

    Tom, what do you think? I'm going to be going to a thinner acrylic on this next production run and I could easily lase some to fit better with the WGS planes. What size should the prop be and how large of a hole should I put in the center? I'm thinking it might be a little difficult to make a prop for each of the minis out there, so maybe a single size for the fighters with a set center hole size that would make it easier for folks to file to a custom fit?

  10. #10

    Default

    Quote Originally Posted by Guntruck View Post
    Yep, that works for me. What do you use to rough up the ballbearing?
    I use a flat file and put the ball on a magnet with my finger next to it then rub rub rub till its dull.

  11. #11

    Default

    Quote Originally Posted by Oberst Hajj View Post
    Nice write up Tom. At Origins I was thinking you clipped off the nose cones and re-attached them after you put the prop on. This is much easier! So you use the same diameter prop from all your WGS minis?
    For all the fighters yes. The medium bombers I use 1 inch and I'm thinking on using a little larger for the big bombers. I like your props but getting them to fit my birds is a lot of filing.

    Thomas

  12. #12

    Default

    Quote Originally Posted by Oberst Hajj View Post
    The AA site also has laser cut and engraved spinning props. No printing or cutting required Although for WGS, they would need to be filed to fit over the nose cones. But perhaps I could do something about that on the next batch I make (since they are currently sold out).

    Tom, what do you think? I'm going to be going to a thinner acrylic on this next production run and I could easily lase some to fit better with the WGS planes. What size should the prop be and how large of a hole should I put in the center? I'm thinking it might be a little difficult to make a prop for each of the minis out there, so maybe a single size for the fighters with a set center hole size that would make it easier for folks to file to a custom fit?
    If you look at the different planes each nose is different. The Spit and Hurricane have big ones.

  13. #13

    Default

    Quote Originally Posted by Zakopious View Post
    Fiddlers Green has a free download for prop disks.
    Print them on the clear plastic for overhead projectors.
    Cut with scissors or modeling knife if you do not have a punch.
    http://www.fiddlersgreen.net/other/F...ners/Props.htm
    Nice find!

    I love the warning note on the bottom:

    'Not for use on models of jets'...

  14. #14

    Default

    That's just awesome, Thomas. This is the way the model is upgraded two levels! I. it can bank, dive, etc. II. It does not look like ran out of fuel any more! It just looks like "in action".
    The rat-tail file is the real solution I was not thinking about.

    Mate, now I have a plan for the next ...months... What bothers me is the disk punch. What to use?

    BTW, how this game incites peoples creativity! On the other hand - others wouldn't like to play it
    <img src=http://www.wingsofwar.org/forums/image.php?type=sigpic&userid=2554&dateline=1409073309 border=0 alt= />
    "We do not stop playing when we get old, but we get old when we stop playing."

  15. #15

    Default

    Quote Originally Posted by Nightbomber View Post
    That's just awesome, Thomas. This is the way the model is upgraded two levels! I. it can bank, dive, etc. II. It does not look like ran out of fuel any more! It just looks like "in action".
    The rat-tail file is the real solution I was not thinking about.

    Mate, now I have a plan for the next ...months... What bothers me is the disk punch. What to use?

    BTW, how this game incites peoples creativity! On the other hand - others wouldn't like to play it
    I went to Harbor Freight to get the punches.

    Click image for larger version. 

Name:	DSCF2934.jpg 
Views:	139 
Size:	145.0 KB 
ID:	136021

    Here is the box they came in. They just cost me around $5.00.

    Thomas

  16. #16

    Default

    Nice work Thomas, simple and effective!

  17. #17

    Default

    Thanks for the idea, Tom. Must go to a hobby store here.
    <img src=http://www.wingsofwar.org/forums/image.php?type=sigpic&userid=2554&dateline=1409073309 border=0 alt= />
    "We do not stop playing when we get old, but we get old when we stop playing."

  18. #18

    Default

    Quote Originally Posted by CappyTom View Post
    I went to Harbor Freight to get the punches.

    Click image for larger version. 

Name:	DSCF2934.jpg 
Views:	139 
Size:	145.0 KB 
ID:	136021

    Here is the box they came in. They just cost me around $5.00.

    Thomas
    Here is the link from Harbor Freight's website for the punch set: http://www.harborfreight.com/9-piece...-set-3838.html

  19. #19

    Default

    I use EK Tools hole punches available on Amazon and most paper crafting shops, they range in size from 1/2" - 2" and run from $5-$20 . . .


  20. #20

    Default

    Quote Originally Posted by clipper1801 View Post
    I use EK Tools hole punches available on Amazon and most paper crafting shops, they range in size from 1/2" - 2" and run from $5-$20 . . .
    Interesting idea, David. May have to take a trip to Hobby Lobby tonight.

  21. #21

    Default

    These are what I use as well Dave, and I find that the plastic windows in the aircraft boxes punch out very well for the prop discs.
    Rob.
    "Courage is the art of being the only one who knows you're scared to death."

  22. #22

    Default

    A good piece of work there, Thomas.

  23. #23

    Default

    Quote Originally Posted by Biggles downunder View Post
    Nice find!

    I love the warning note on the bottom:

    'Not for use on models of jets'...
    In fact, there were a few instances where jet airframes were tested with piston motors.

    "The first Me 262 test flights began on 18 April 1941, but since its intended BMW 003 turbojets were not ready for fitting, a conventional Junkers Jumo 210 engine was mounted in the Me 262 prototype's nose, driving a propeller, to test the Me 262 V1 airframe."

    See: http://en.wikipedia.org/wiki/Messerschmitt_Me_262

  24. #24

    Default

    Nice work there Thomas and a very detailed and complete tutorial, thanks.

  25. #25

    Default

    Thanks guys for all the encouragement. My pleasure to share.


  26. #26

    Default

    Nice write-up Tom; that should get me started.

    Karl
    It is impossible for a man to begin to learn what he thinks he knows. -- Epictetus

  27. #27

    Default

    I also did my first mission at Origins click here to read. And if you have anything to add please do as I was tired and might have forgot stuff.


    Thomas

  28. #28

    Default

    Quote Originally Posted by clipper1801 View Post
    I use EK Tools hole punches available on Amazon and most paper crafting shops, they range in size from 1/2" - 2" and run from $5-$20 . . .

    Got my EK Tools punches, and I love 'em! Thanks for the heads up, David!

  29. #29

    Thumbs up

    Great work & tutorial Thomas!

  30. #30

    Default

    Great info. Glad there a Harbor Freight by my house (2 miles). I have to check it out once again and see what goodies there are. I was looking for ball bearing to mount the 1/144 planes I have but they didn't have any. Now have another reason to go there.

  31. #31

    Default

    Click image for larger version. 

Name:	DCP_6930.jpg 
Views:	63 
Size:	133.7 KB 
ID:	137094

    Click image for larger version. 

Name:	DCP_6937.jpg 
Views:	62 
Size:	170.1 KB 
ID:	137095

    Here are pics of how I mount the F-Toys (1/144) planes that I have.

  32. #32

    Default

    Click image for larger version. 

Name:	DCP_6940.jpg 
Views:	61 
Size:	185.6 KB 
ID:	137096

    Here is a finished model and thanks for the tip on where to get the BB's.

  33. #33

    Default

    Nice tutorial. I've just done my first few 1/144 scale aircraft and it works great. Can you get larger magnets/BB's for heavier aircraft?

  34. #34

    Default

    If I remember rightly somebody has already sourced some larger ones Nigel.
    I'm sure they will be along soon to give you chapter and verse.
    Rob.
    "Courage is the art of being the only one who knows you're scared to death."

  35. #35

    Default

    Quote Originally Posted by Dowters View Post
    Nice tutorial. I've just done my first few 1/144 scale aircraft and it works great. Can you get larger magnets/BB's for heavier aircraft?
    I'm sure Keith is already working on it.

  36. #36


    Users Country Flag


    Name
    Lutz
    Location
    Singapur
    Sorties Flown
    50
    Join Date
    Aug 2020

    Default

    I know, this is a very old topic....

    but now I want to improve my WW1 WoG models too

    2 small qs I have
    1.) where to get the magnet and matching metal balls?
    2.) and for spare....where to get the acryl (/) pegs? (for fighters and bombers)

    Thank you

    Best from Singapore
    Lutz

  37. #37

    Default

    Magnets and ball bearings from ebay - make sure you buy "recessed" magnets, with a shallow "bowl" to accept the ball.

    Multiple different sizes of both available all over the world; just search "Magnets" and "Ball bearings".


    As for Flight pegs, "bomber" pegs are still in stock in some outlets, but the "Fighter" pegs have all but disappeared.
    I laugh in the face of danger - then I hide until it goes away!


Similar Missions

  1. Props - leave as is, replace with disc or none at all...
    By RichJ in forum WGS: General Discussions
    Replies: 14
    Last Post: 06-30-2014, 02:43

Bookmarks

Posting Permissions

  • You may not post new threads
  • You may not post replies
  • You may not post attachments
  • You may not edit your posts
  •