Gaming Resources
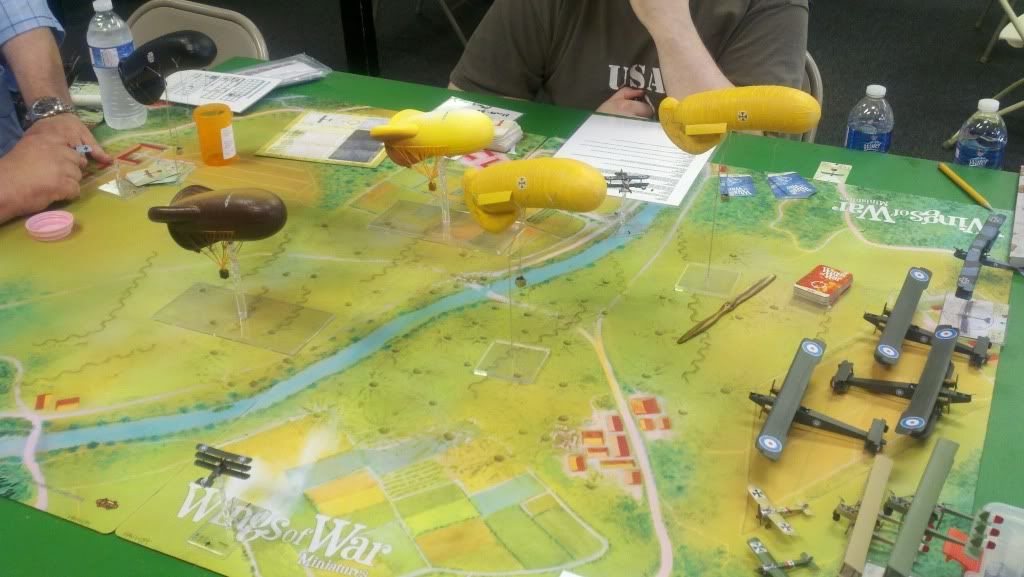
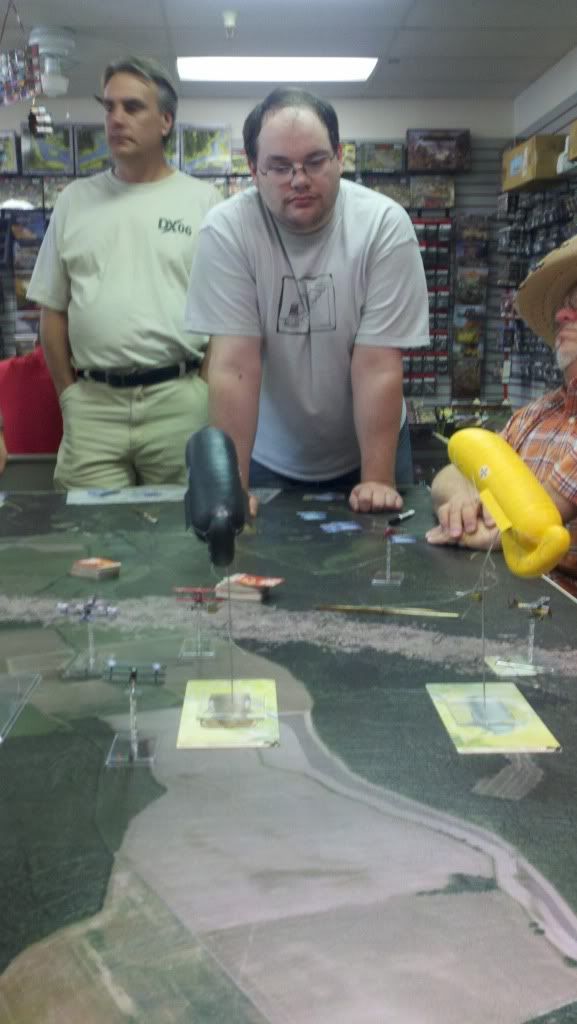
There is nothing sweeter than a line of no less than six balloons to weave through to get to the enemy targets! We had a lot of fun one Saturday as we did just that, then the guns got turned on the balloons! Havoc!
Alas the balloon beasties are rare, expensive and hard to find. So make them yourself from scratch? Why not? My drachen fleet of 8 cost a whopping $20 complete with plex bases and dangling baskets. Over a weekend you too could join the fray!
First you need a nice set of drawings, check the web, I found great WWI vintage drawings. Copy them to 1/144" scale, glue them to some card stock, or if you are clever have them copied onto card stock to start with.
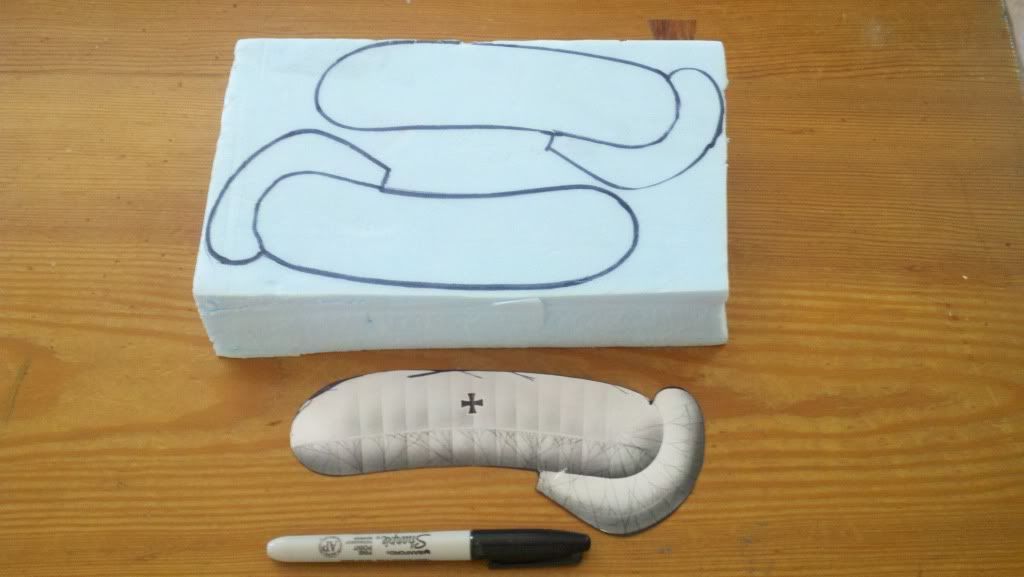
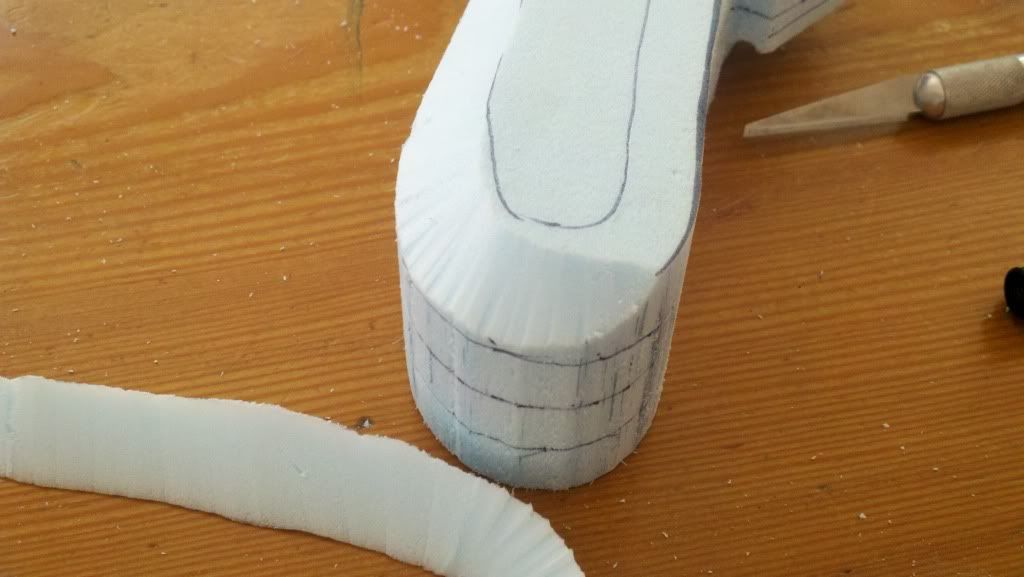
Obtain a sheet of 2" foam insulation, not the white kind that crumbles but the expanded styrene variety made by Dow/Corning. You may have to use 2 sheets of 1" glued together to get the sheet up to 2" thick. Use a spray contact adhesive to glue them together. Cut out a side view pattern from card stock and trace around the pattern right onto the foam with a marker.
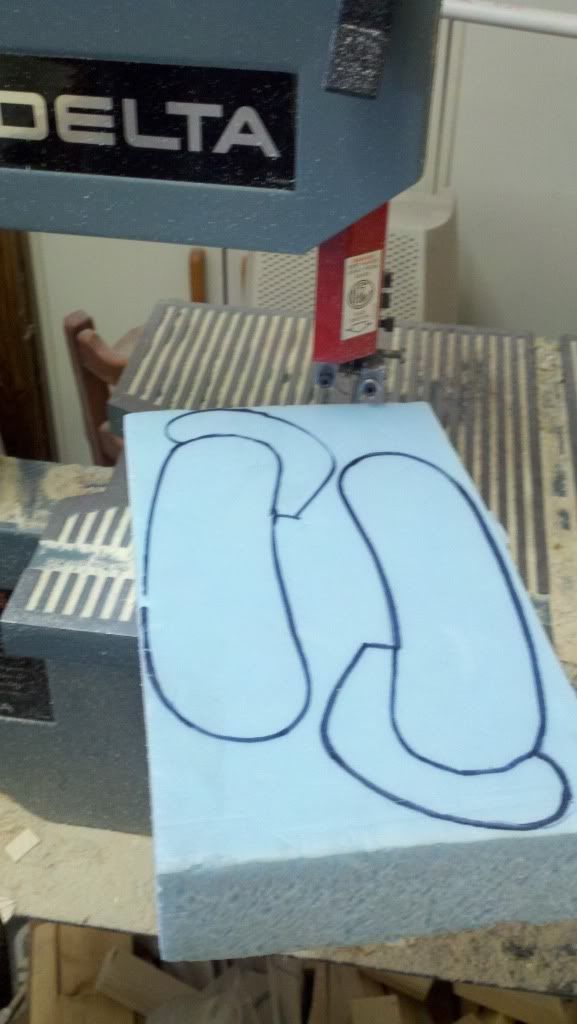
I used a small band saw to cut out the drachen body, a hand held coping saw would work as well. Next mark the tail tube onto the body, this will be cut narrower than the body, look close at the photos for the process. I used an X-acto saw to cut the edge, then a knife to cut down to the saw curf. Repeat on the other side.
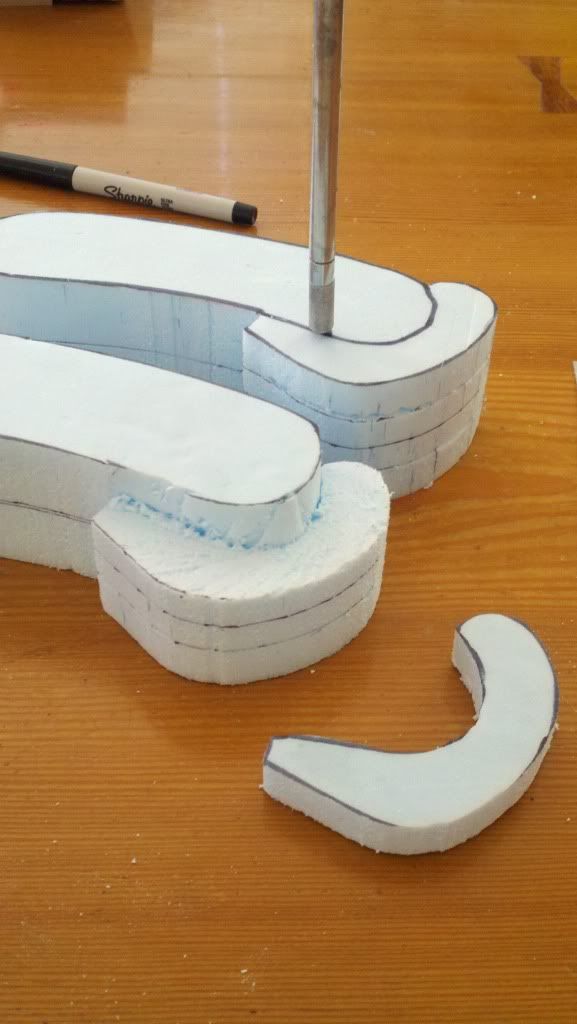
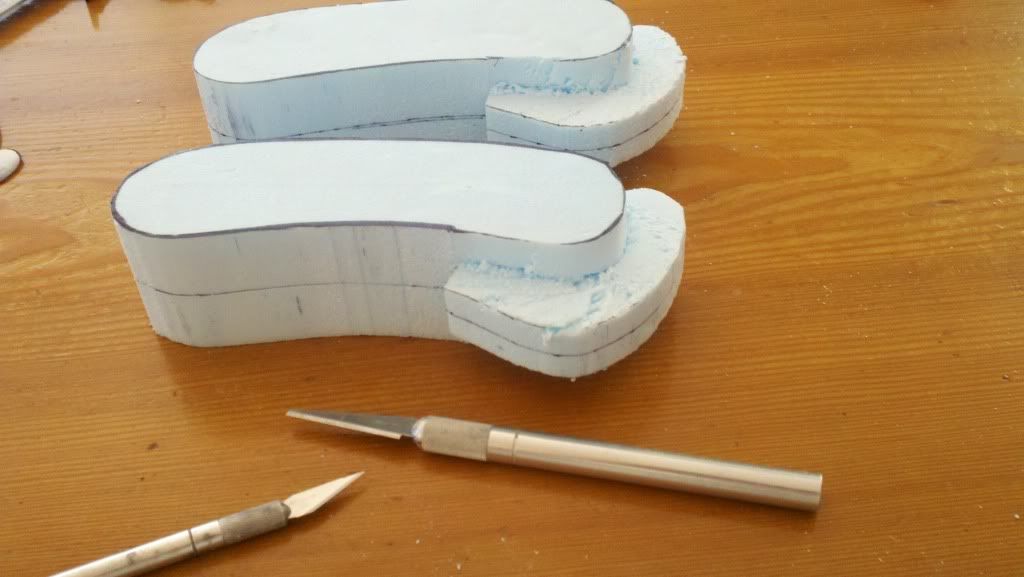
This step is very important.
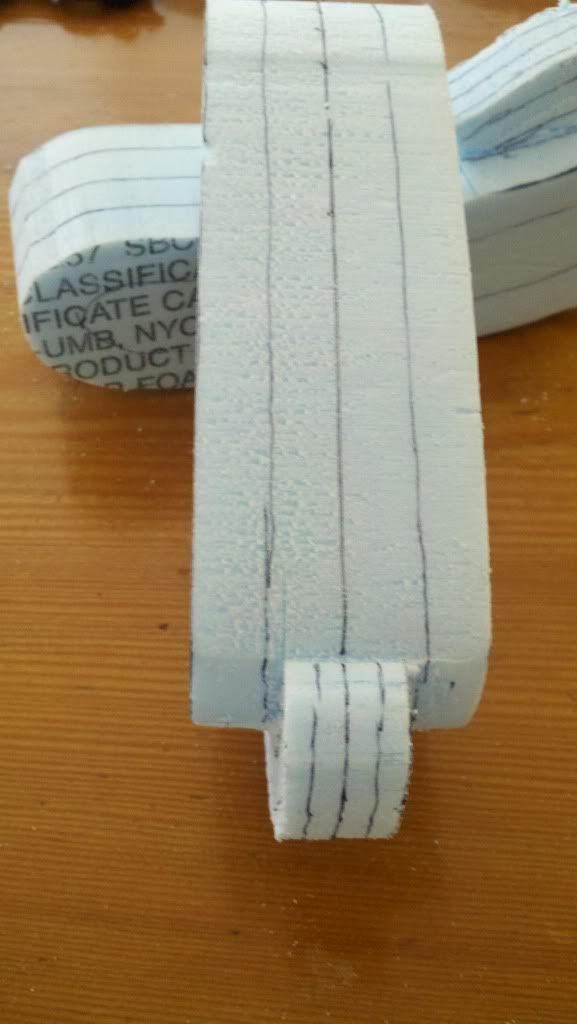
Since we will be carving the balloon to a round cross section, it is good to have a guide for keeping it symetrical. To do this I mark a line one fourth of the distance of the total thickness of the final part. What did I just say? Check out the photos, they explain it better.
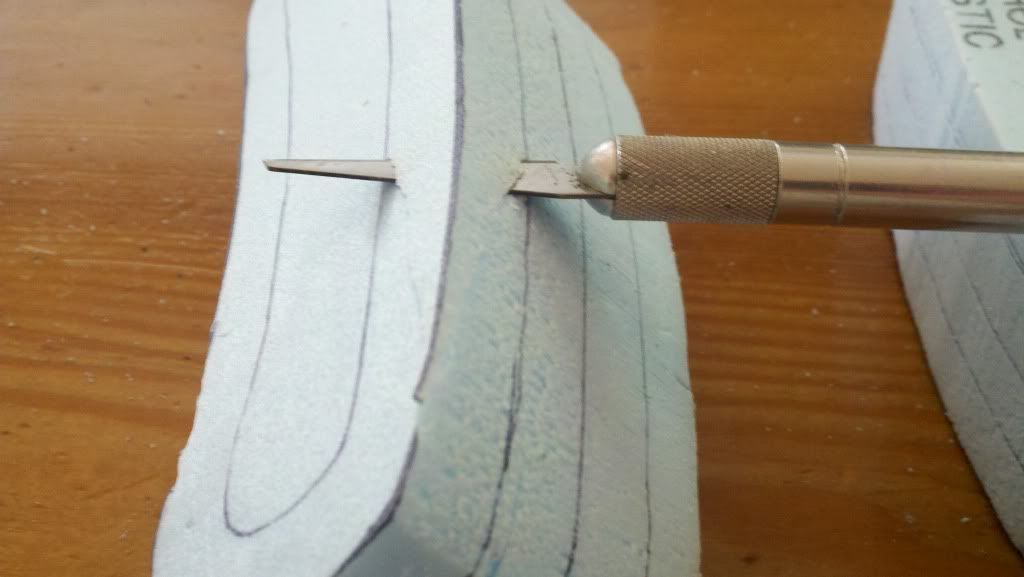
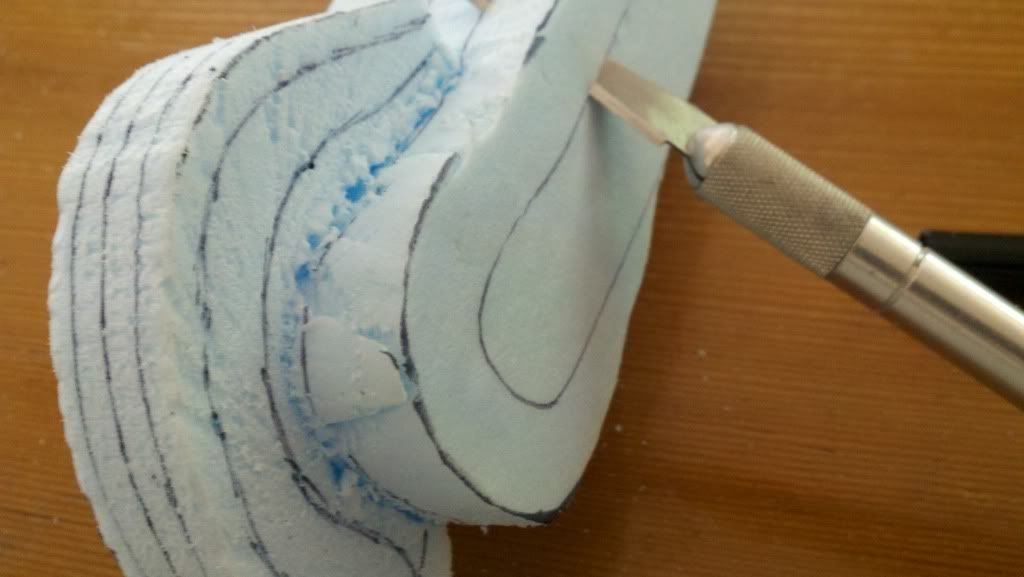
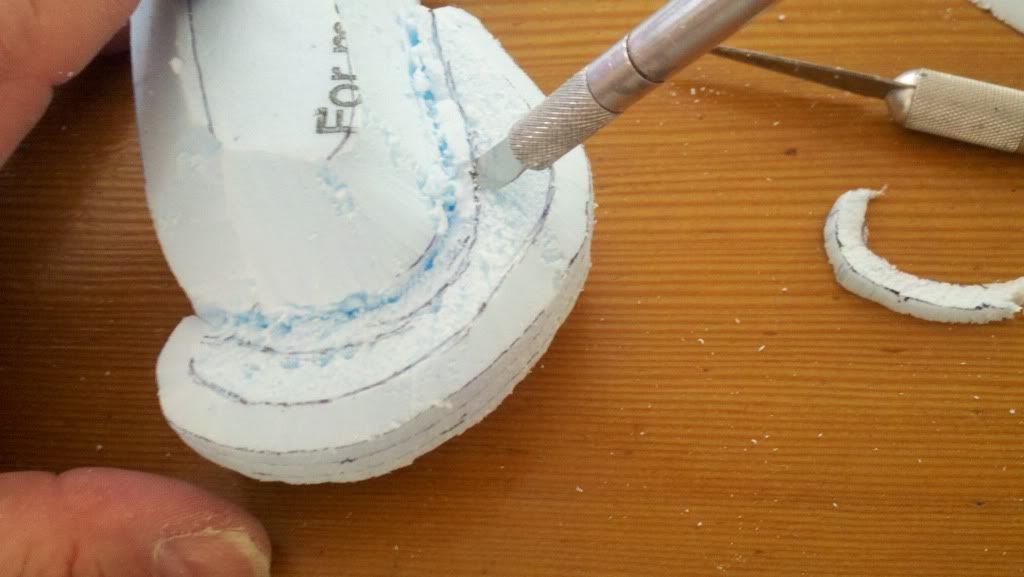
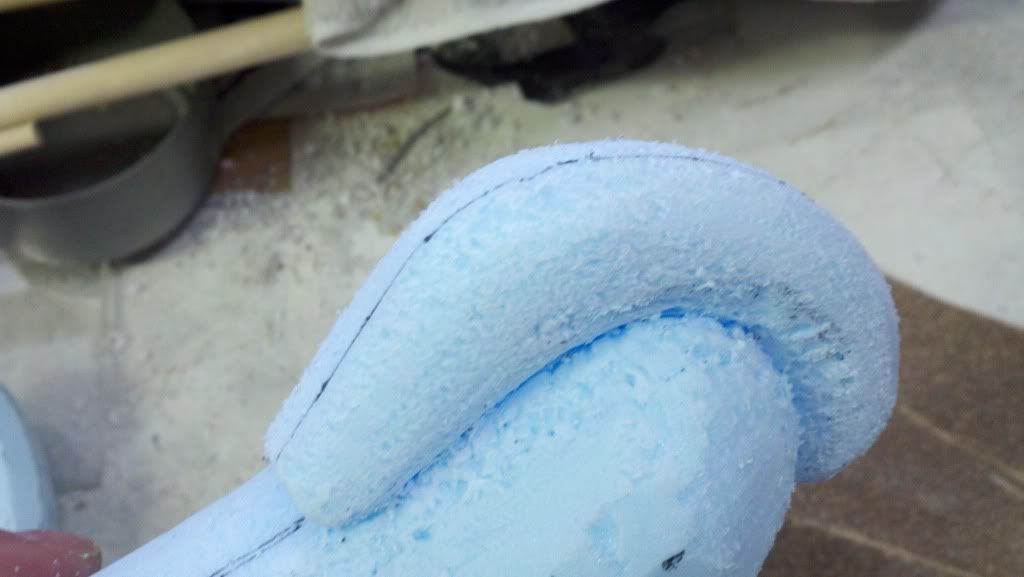
You will be carving away a 45 degree corner off of every corner. For this you will want a sharp carving blade. Knock off all the corners, even the rudder bits as well. Here you will need to do some carving into the join between body and rudder.
Do not worry about crumbly bits and jagged holes, they can be filled and fixed, we are going for symetry here.
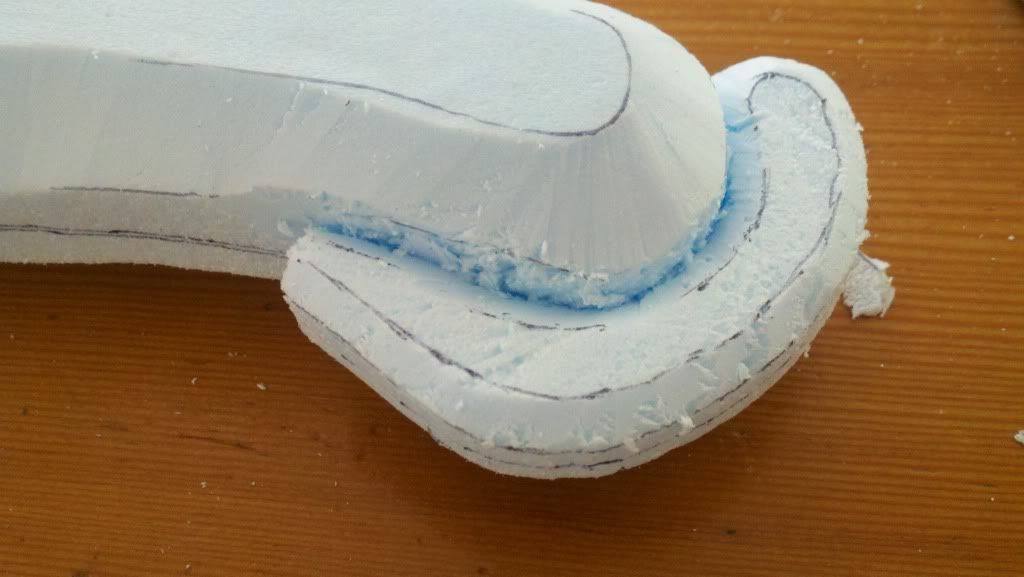
Once things are trimmed at 45 degrees, you can start to carve the corners off and begin to make the whole thing look rounder. Once the beastie looks pretty good I break our the 80 grit course sand paper and have at it. Did I mention to do this outside or in the workshop? This part is very messy!
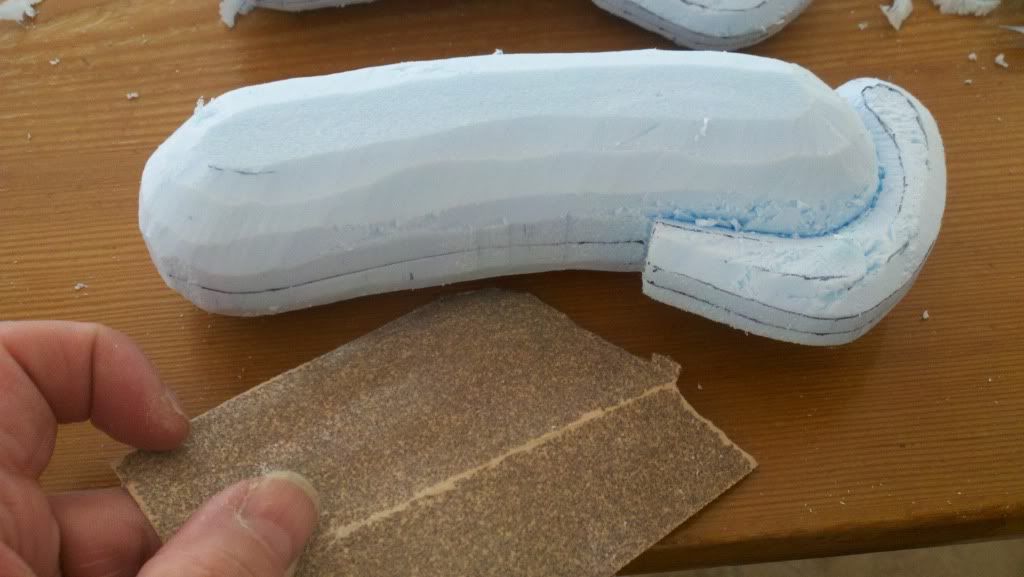
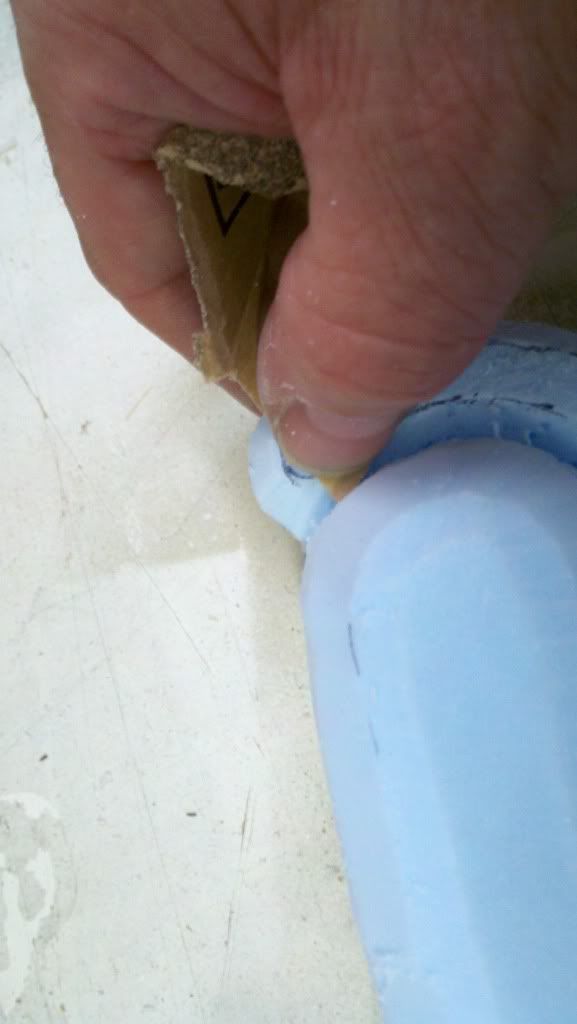
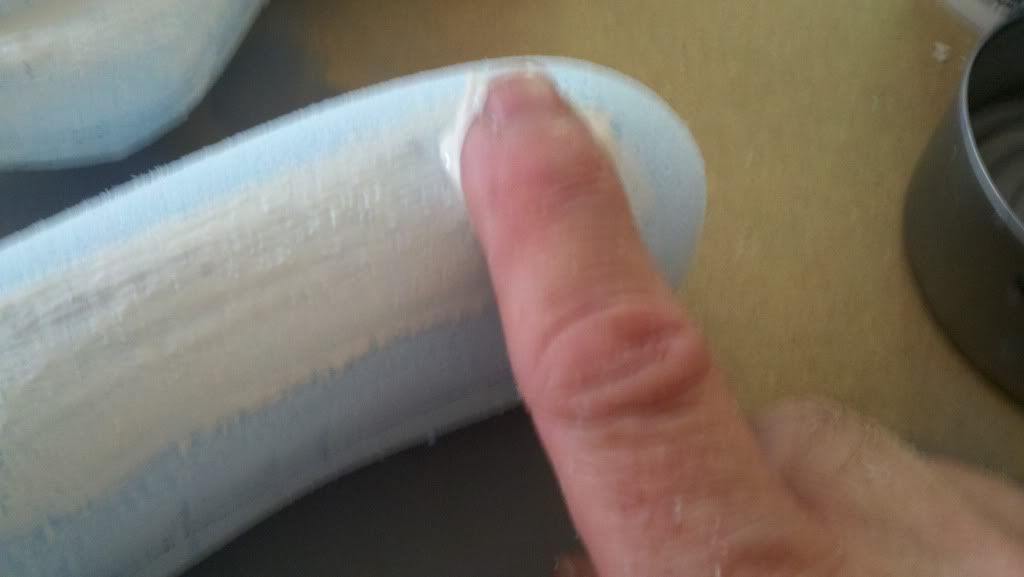
Curl a small piece of sandpaper around your thumb to sand the inner spaces around the rudder join.
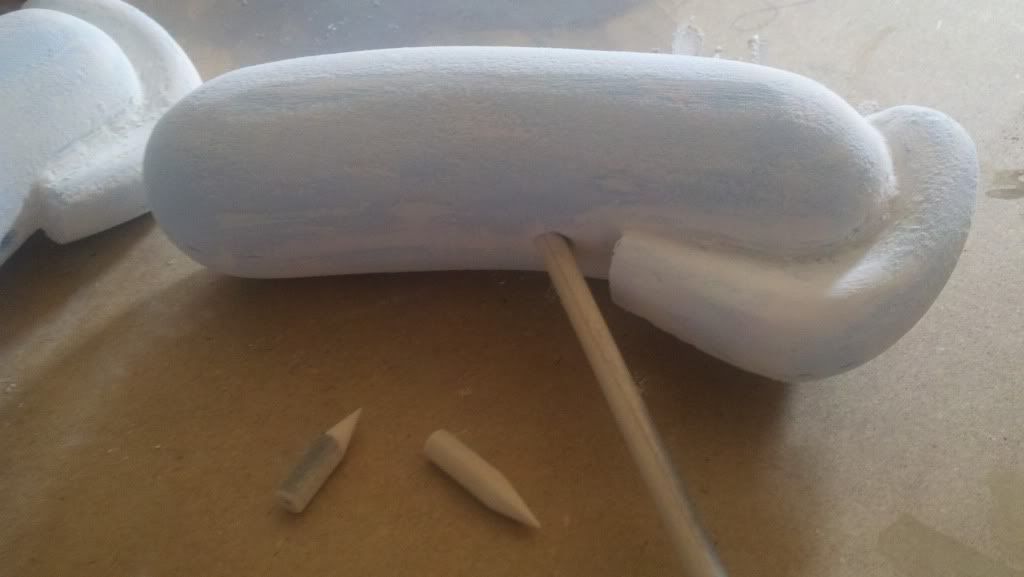
Finish sand with 220 grit paper, vacuum or brush off all the dust. Now you will need to drill a hole for the mounting point. I used a 1" length of 3/8" dowel for this. Cut one end to a point to poke into the foam while in the other end drill a 1/16" dia hole to receive the wire stand. Locate where you want to have the stand join your drachen, drill a hole add carpenter's glue and push it into place.
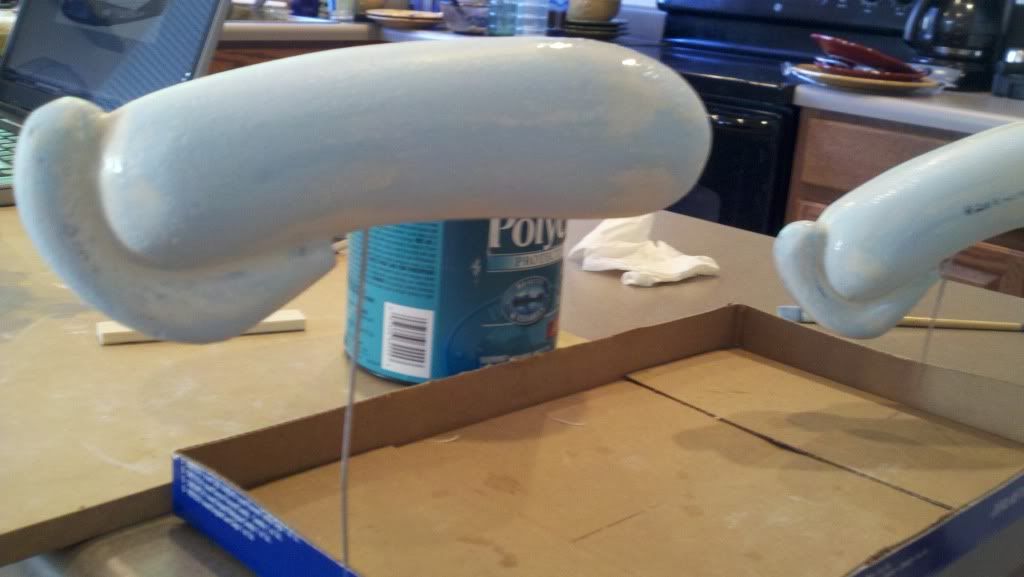
Now its time to start the finish work. Give the entire model a light coat of Polyacrylic sealer, or if you are frugel, water down some carpenter wood glue 50% and brush it onto the foam. This will accomplish two things for us, the glue will harden the foam a bit and it will allow our next layer of filler to securely attach to the foam.
Let this dry completely, then sand it lightly and get ready to get your fingers all muddy! I use a water based wall filler spackle thinned just enough with water to make it into a thick paste.
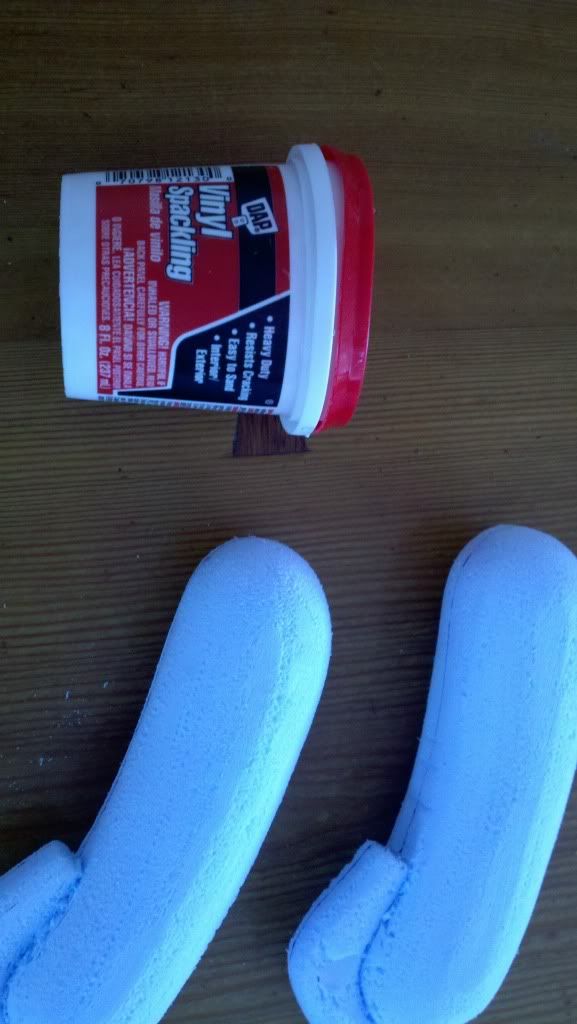
This is generously pressed into the foam, filling in all the dents and pores on the surface. Most of it will be sanded off, and it sands quite quickly when dry!
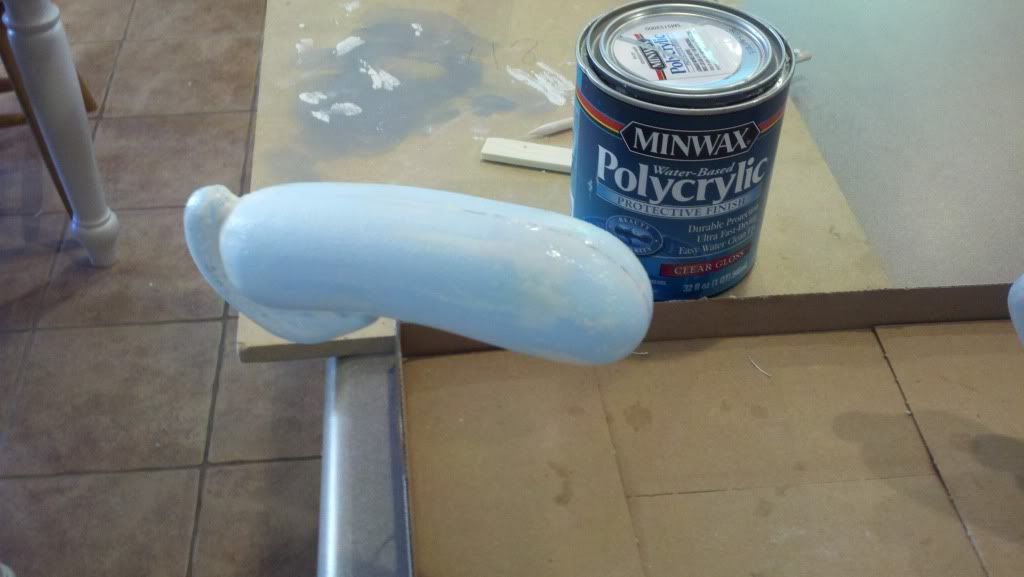
Once dry, sand most of the filler off and repeat where ever you have sanded through to the foam. Then give the final surface a light sanding and a coat or two of polyacrylic.
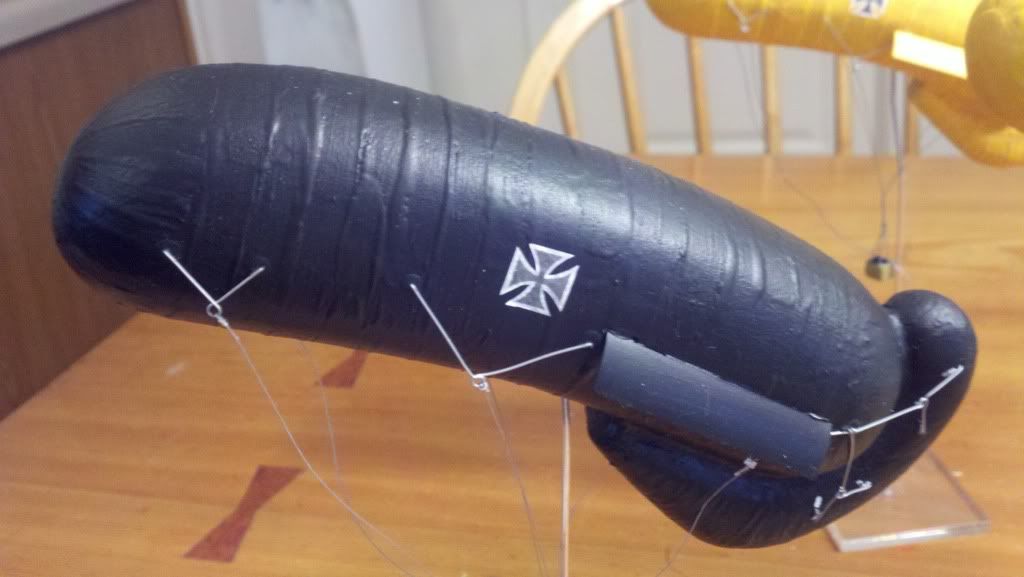
Now for the final texture. If you look at the photos of the real things, the fabric was taunt and held on shape by ropes and cables. I took the same mud used to fill foam pore and coated the surface of the balloon, let it partially dry, then carefully grooved it with a wooden tool to replicate the grooves from the cables. It takes a bit to make it look right, but it is well worth in. You can skip this step if you want.

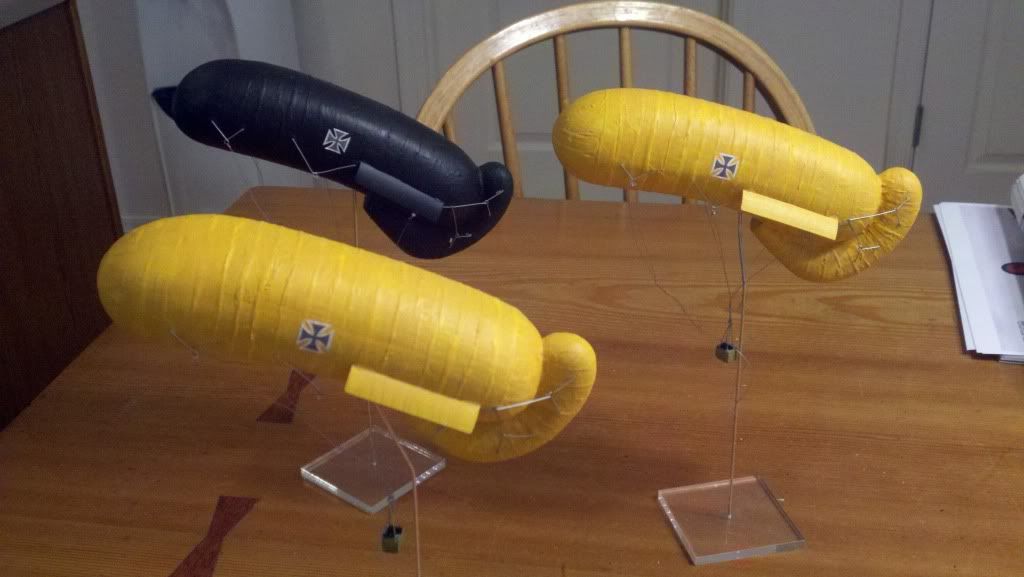
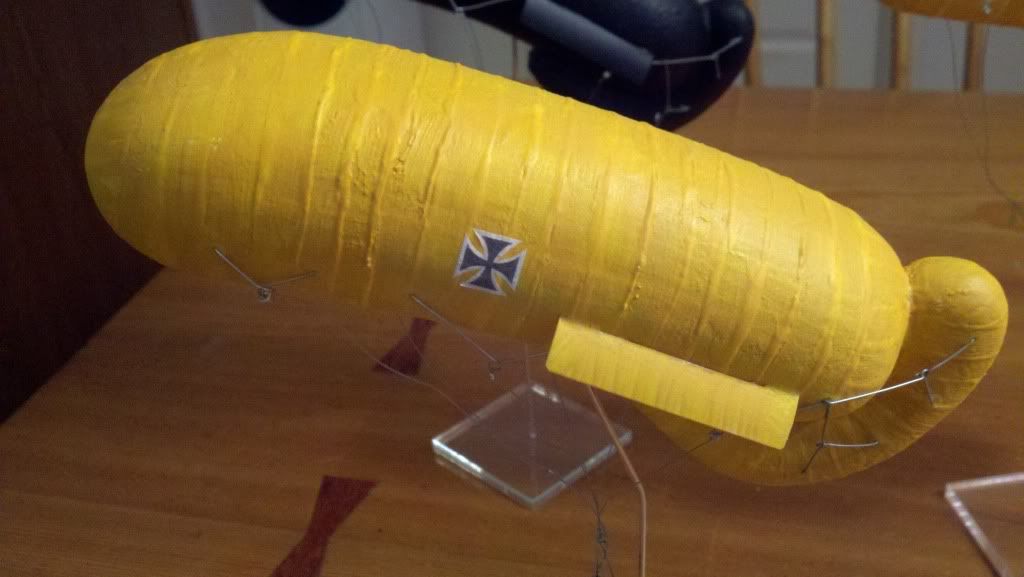
I cut out the wing/fin things from mini blind plastic and glued them into place as shown. Color is the next decision. There are color pictures out there of tan, black, gray, and brown. Do one of each for fun! I particularly like the black one.
Then comes the rigging and the baskets. Consult the drawings and photos and determine how much time you want to drop into this area. The cables add a lot to the final appearance, but you can loose a year here. I simplified the rigging out of .005" aluminum wire and attached it to the balloon with sewing pins.
The longer cables were made from waxed thread, varnished thread, and more wire to different effects. Choose your path. For the basket I used oven fired plastic clay. This stuff is great! Buy a block of white for $5 and you are set! Cut a few 5/16" cubes, tool them a bit with your knife so they look like they were woven from straw, poke a few attachment holes in the corners and bake them as directed. When cool they can be painted and attached to your guy wires.
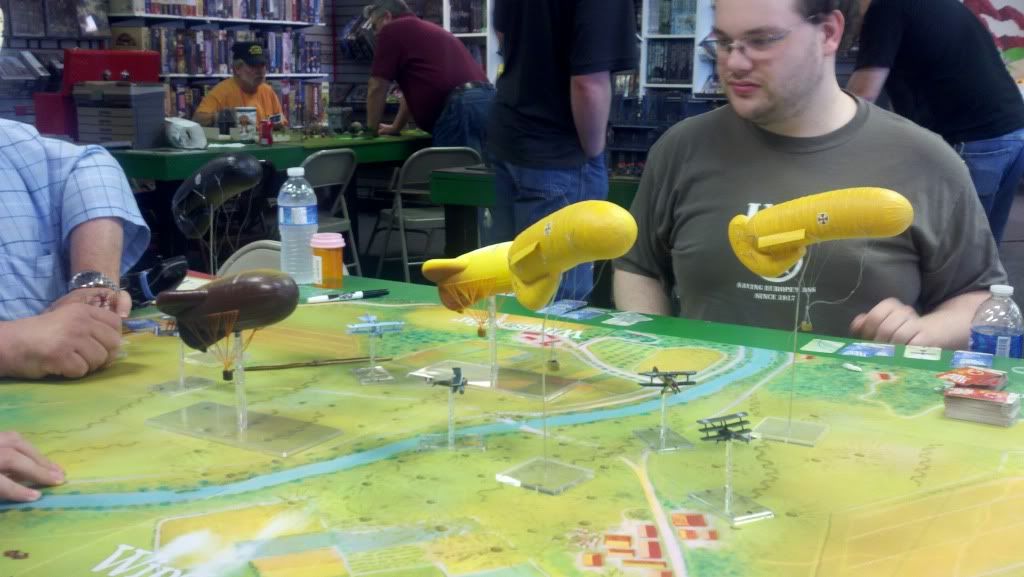
1/16" music wire stands allow the drachens to sway with the wind, a base of plexi glass makes a nice stand. Our group discovered the need to make a full size balloon base for each of them to make them real obsticals for the aircraft. Review the altitude rules of engagement before you fly them, and don't forget to check the wind . . .