


The Day of the Dirigibles by Clipper 1801 aka Dave Haught
As soon as I saw the Wings of War Deluxe starter game I was hooked on the game and at the same time in the back of my mind something awoke, long dormant, a dream of dirigibles joining the fray. My dirigible thing goes way back to childhood, as I dreamily drew Snoopy flying his red dog house against the Red Baron I began to extend and expand his dog house into a huge red white and blue dirigible, taking on the whole Flying Circus. In the 60s I made zeppelins out of the carpet tubes from the groovy shag carpet my dad was installing in the family room, even equipped G.I Joe with one to fly out of my second floor bedroom window to rescue Barbie and her friends from the apple tree across the yard. I guess I should get some therapy.
Back to the reality at hand. As my son Andrew and I played a few games of Wings of War, I kept thinking there has to be some lighter than air action out there on the front lines. The observation balloons were cool, and added some great scenery, but they could not move or fight back. After watching Flyboys a third and forth time I realized what we needed, a pair of airships that could fly through the airspace, make a bombing run and fly back off into the great beyond. I did some digging and found my library had some great books and specifications on many potential airships.
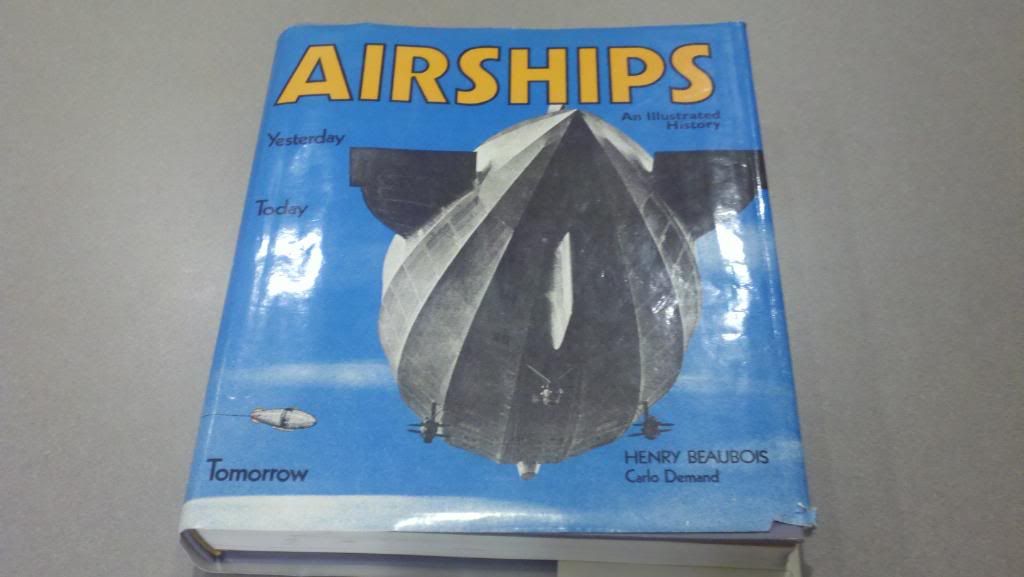
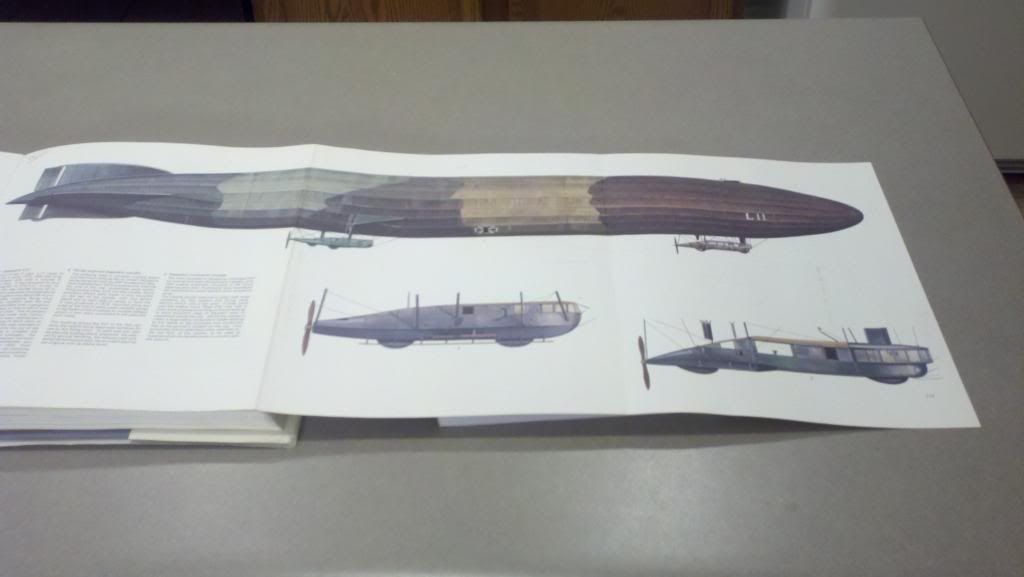
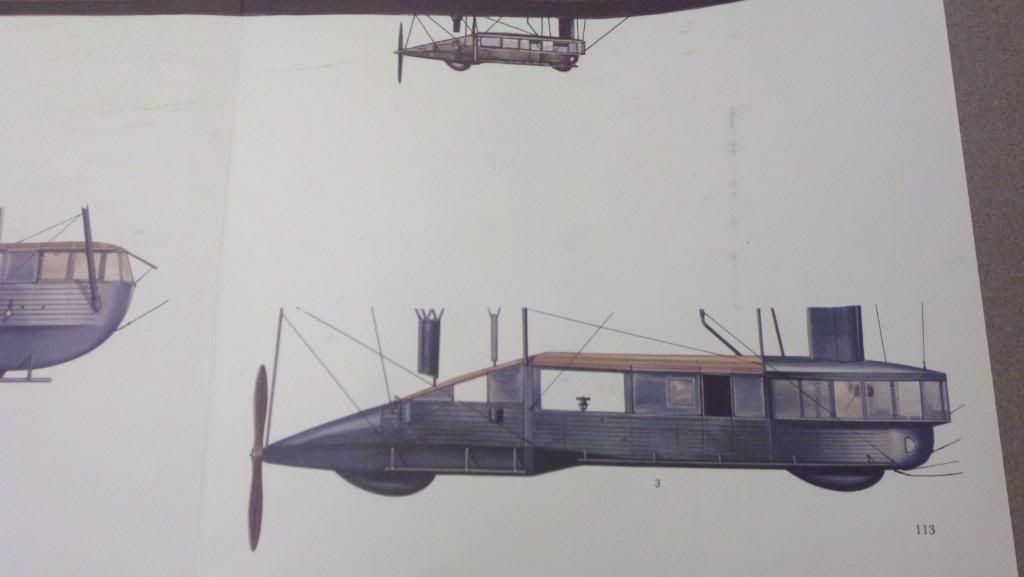
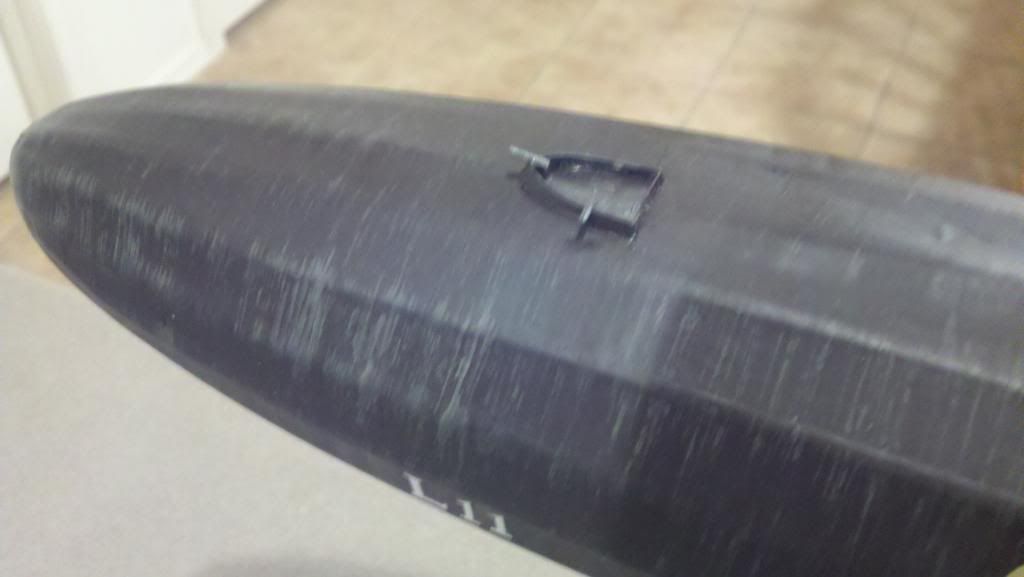
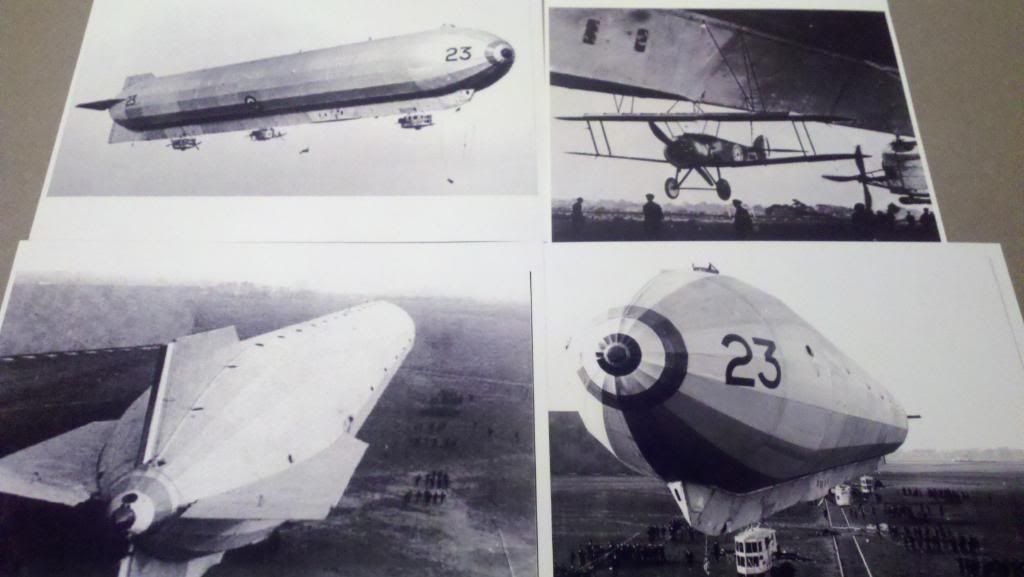
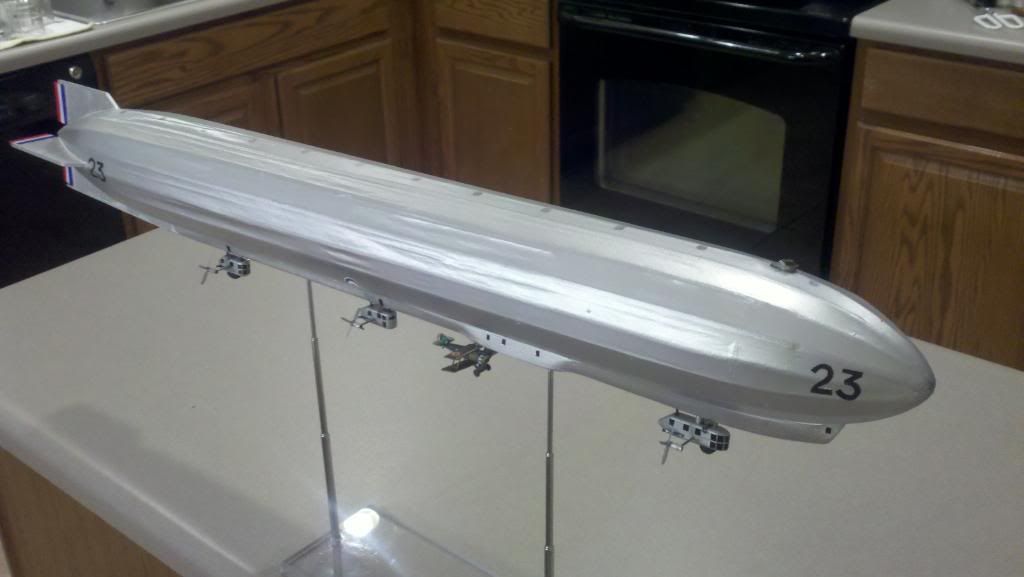
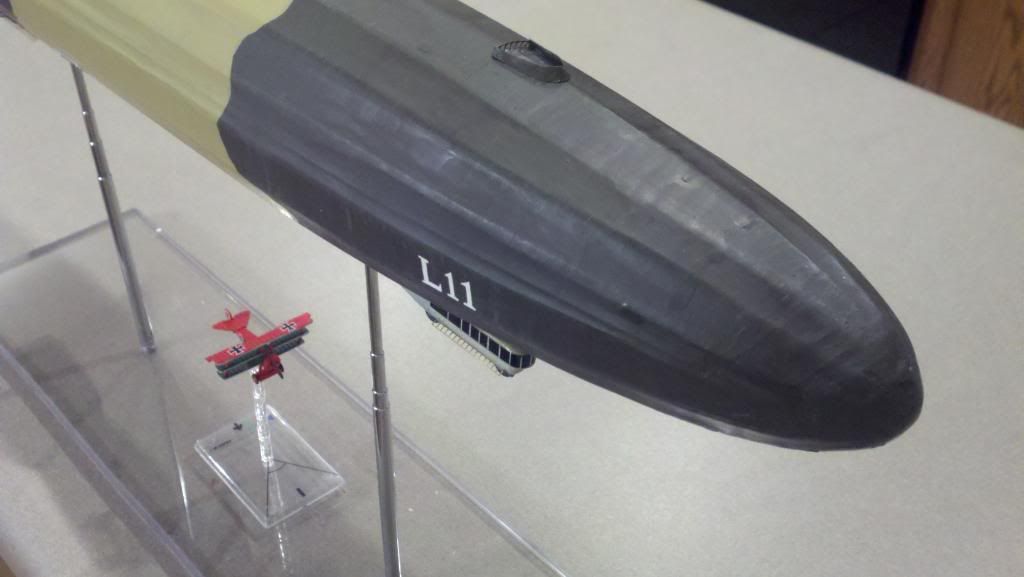
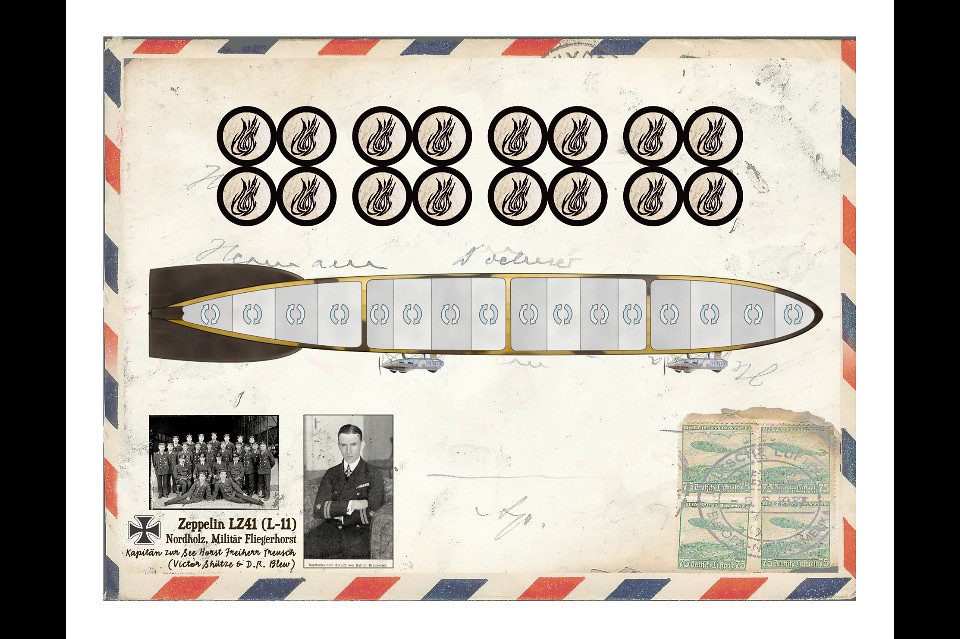
The challenge then was which ones. I knew one had to be German and one British. They also had to be early models, they had so much more character than the later designs. In my research I discovered the L-11 Zeppelin fit the requirements on the German side. It had the transitional high rider rear engines and the first of the fully elliptical profile. My archives came up with some interesting photos and even excerpts from the real flight logs. Then I dug out a long lost tome from the dusty back shelf of oversized books. Airships, An Illustrated History, by Henry Beaubois and published back in 1973. As I thumbed through its 200 plus pages and zillions of large cool photos and drawings, a fold out color print of the L-11 flipped open and I was totally convinced. It had enlarged line drawings of the nacelles, the gunner positions, all the numbers and even cross sections! That was easy!
Then a few pages later were the same details for the British R-34! I started doing the numbers for 1/144 scale versions of both and discovered they were going to be well over 42 long. I had to do some re-thinking. As I pondered size I also thought about altitude issues in the game, the dirigibles were high altitude creatures and many of the fighters were on tiny stands for max altitude, at scale the airships would overwhelm the airplanes. Then I started making some scale size cutouts and began comparing other relative scales. I decided they would be better to be smaller that 1/144 scale, and finally settled on 1/233 scale. It looked right for the planes and game tables, so the size was set. I also determined they had to be well detailed, but also pretty rugged for game handling.
Meanwhile on the other side of my brain I was engineering the possible construction scenarios. In the midst of running the numbers I came across the R-23. As one studies the actual construction and design of the airships, one quickly sees how advanced the Zeppelins were to any others. The Vickers R-23 was the old style straight cylinder design with elliptical the nose and tail sections spliced on. That made the engineering easier, and the resulting airship looking rather crude compared to the elegant German designs. What really caught my eye was the even more primitive Vickers R-23s deep ventral keel. It was very cool enough, then of course I discovered the Sopwith Camel tests they conducted on it. That sold me on the Vickers R-23!
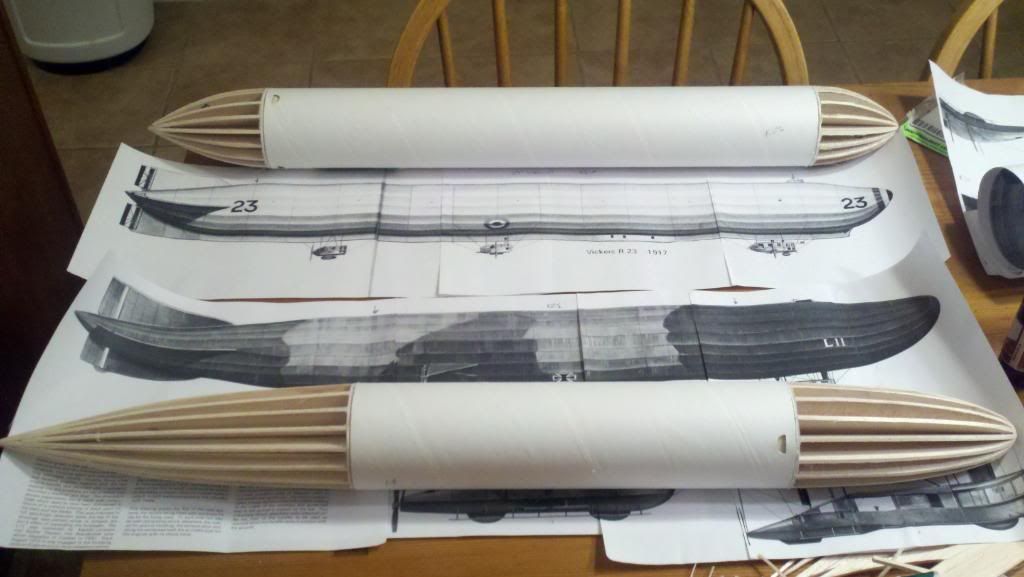
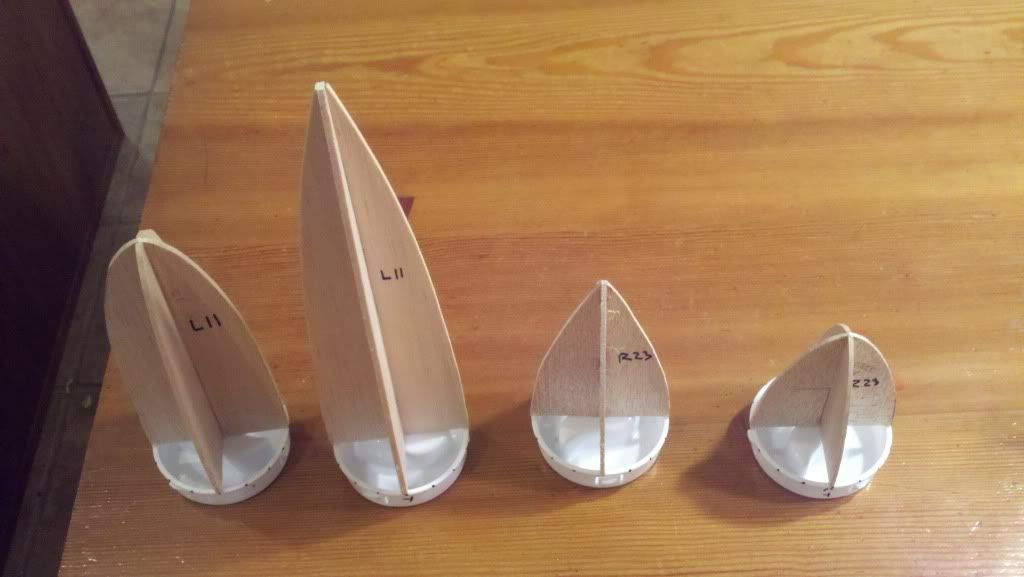
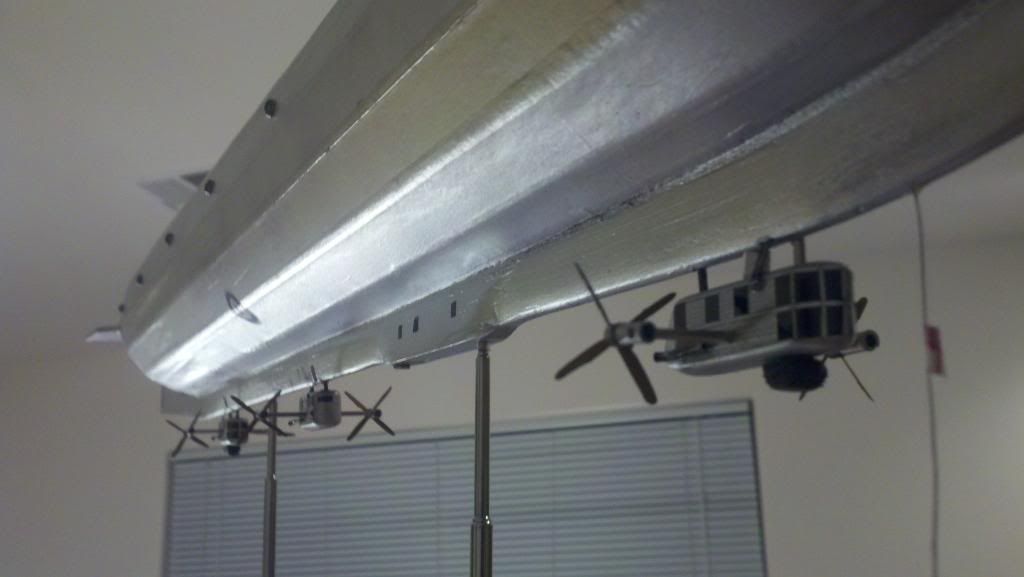
Now I had two airships that were distinctive and well matched. Next was how to build them strong enough and realistic. As I crunched the overall size the L-11 would be 27 long and 3 ½ in diameter and the R-23 around 26 long and 3 ¼ in diameter. I had just finished a rocket building class where we built the rocket body tubes from 3 diameter mailing tubes 48 long, I just happened to have a few extra tubes laying around. So if you added stringers to the tubes you could get to my target diameters with very little fussing around. The tubes came with nice heavy plastic caps that snapped onto the tubes, to which I could attach the nose and tail cone formers. The pictures should tell the story.
I used firm 3/32 balsa sheet for the formers with triangular spacers to keep them spaced apart. A quick cross section was laid out with 17 sections giving me a scale spacing for the longerons. Using CA glue I tacked the vertical and horizontal formers to the end caps, then added the inbetweeners. Once I liked them, I drenched the joints with more CA, let them cure over night.
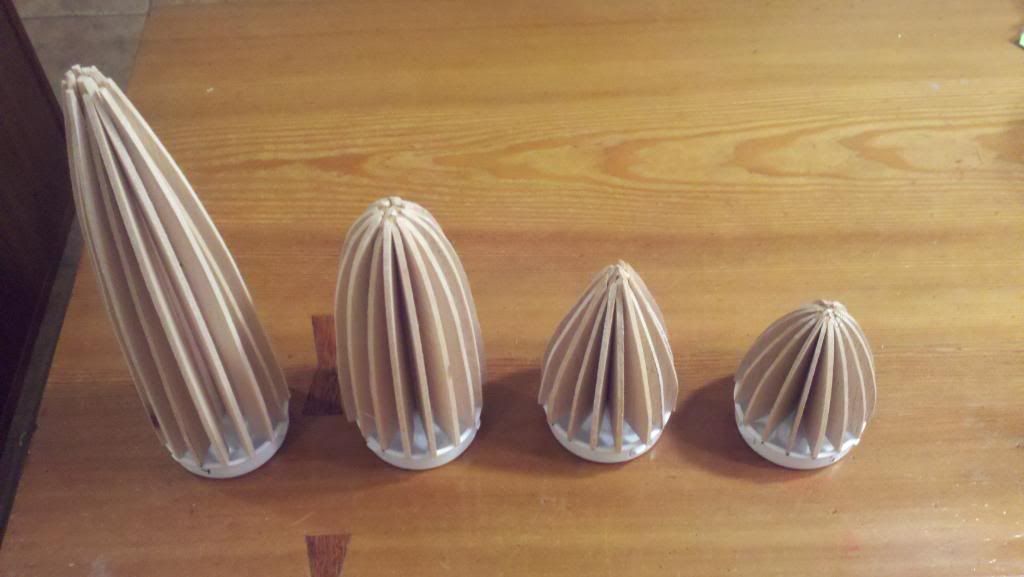
Next day I snapped the end caps to a spare tube and used my belt sander to blend the straight tube section into the formers using the main vertical and horizontal formers as guides. The second construction shot shows the results.
Then the tricky part. A pine 1 x 2 x 12 was sanded and glued inside the tube on what would become the bottom of the airships. This will later be drilled into to receive the mounting posts for the finished models.
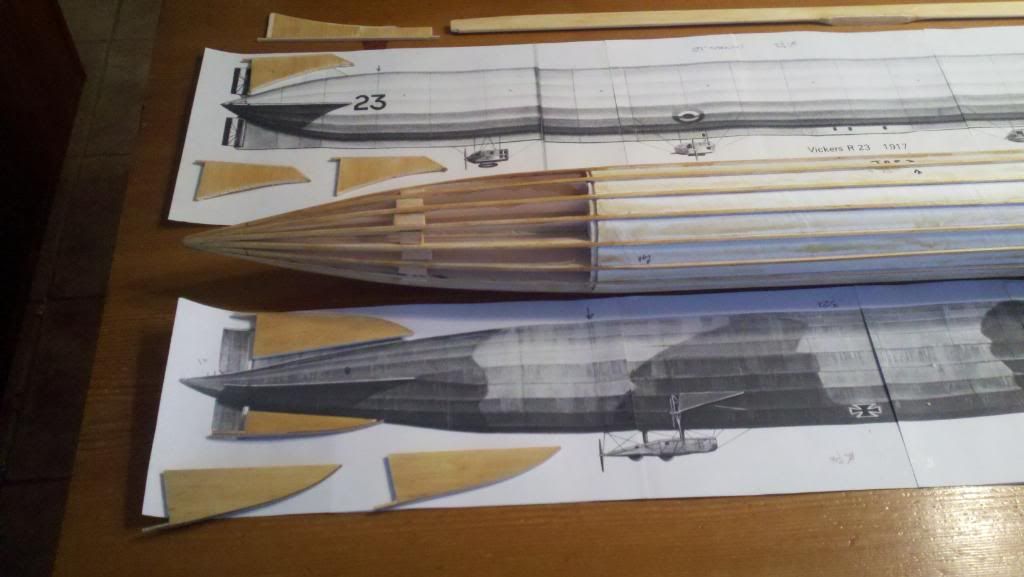
Now the full length stingers were added running from the rear curved formers, across the straight tube section and onto the nose formers. These were first pinned into place on the rear formers, pulled tight and pinned to the front formers. Tack glue them to the formers and use a straight edge to make sure they are straight and parallel to each other on the tube before using CA to glue them to the tubes. Takes a lot of time-but take it to get the job done right! Set aside to cure, locate and cut sheet balsa fillers to span between the stringers where the top gun emplacement go and the nacelles. Sand them flush with the stringers and blend the stringers into the curve of the nose and tail formers. Now wasnt that easy?
The fins, rudders, and keel are made from firm 1/8 balsa, fitted carefully to match the contours of the tail formers, but not attached until after the covering is put on.
The covering is the tricky part. I chose heavy weight silk span tissue. This comes from a good hobby shop or Sig Manufacturing in Iowa. You could use heavy craft tissue, but it is not as strong as silk span and does not shrink uniformly. I looked at using silk or another fabric to get the fabric effect on the finished models, but at this scale I would be wasting my time. The tissue is cut into ¾ wide strips 3 longer than the model. The stringers and formers were given 4 coats of model airplane dope to seal the wood and to build up a layer of dope. Each strip is then placed in position on the stringers and acetone is brushed through the tissue, which begins to soften the dope on the stringers, sticking the tissue to them.
You have to proceed slowly and carefully, trimming off any excess tissue as you go. The last bay will need to be trimmed to size before it is stuck down. After the covering is done, give the tissue a light misting of water to shrink it tight. Small wrinkles are ok and even scale! Once the tissue is dry apply 4 to 5 coats of thinned dope (50% dope-50% acetone). If you puncture it or have bad sections you can cut them out, trim a patch and dope it in place, just like they did on the real things.
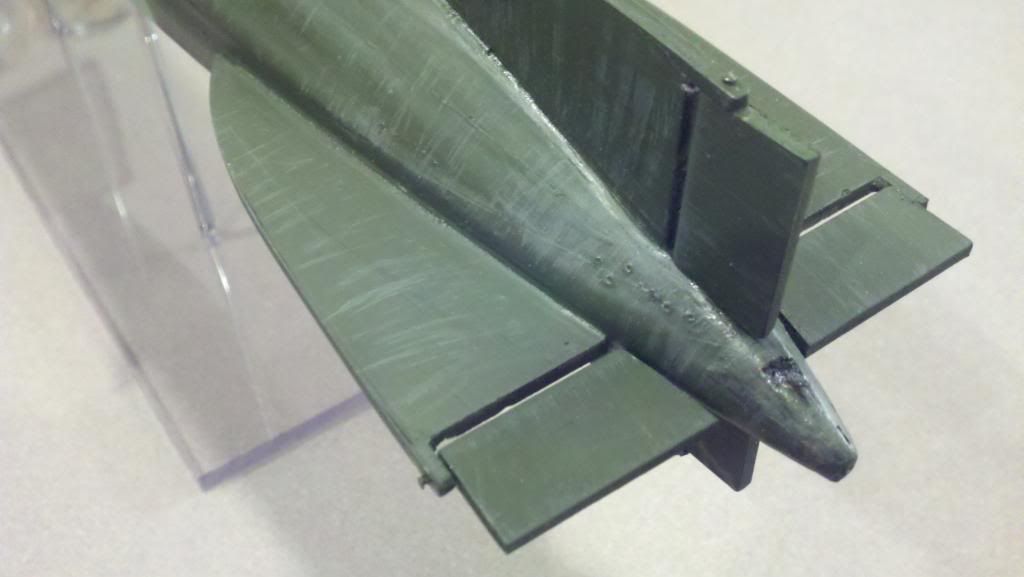
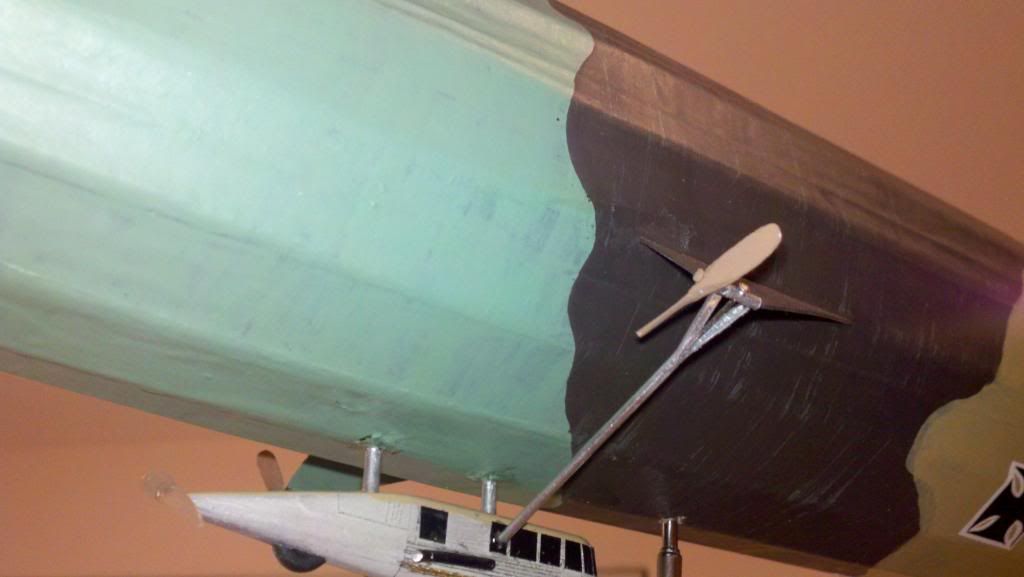
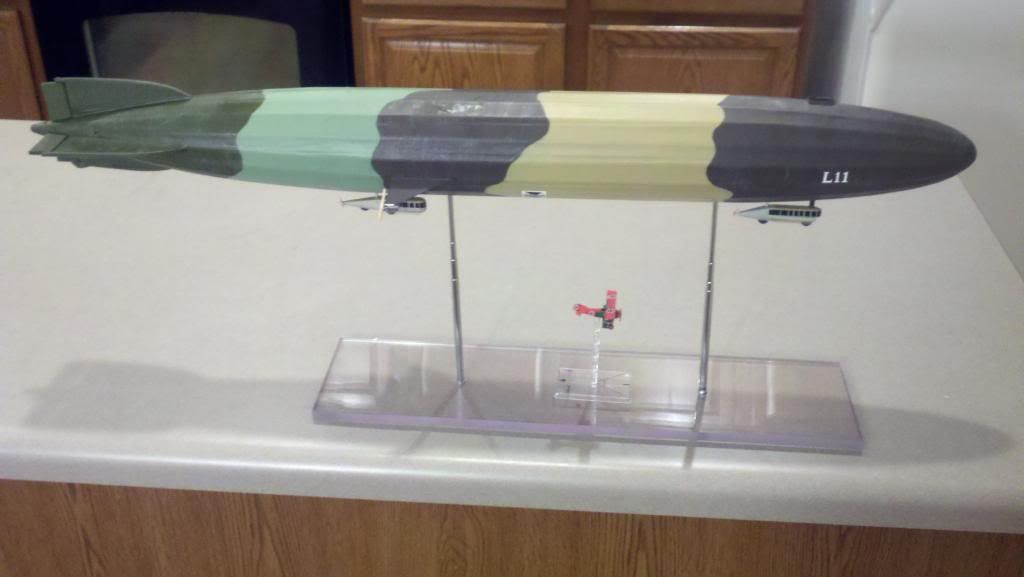
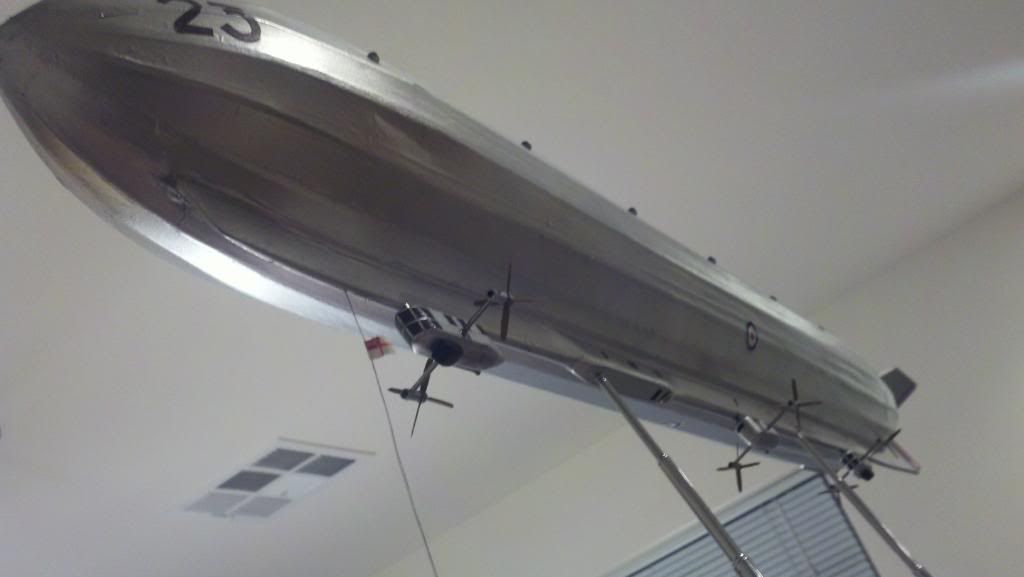
Finally scan the ships, fill any gaps with water based wall spackle, sand, and attach the fins and keel. I put two light coats of automotive primer on mine, sanding lightly between coats. The Vickers gets a bright aluminum enamel spray whilst the Zeppelin gets a four color camo treatment of black green, light pale green, light sand brown and dark earth brown.
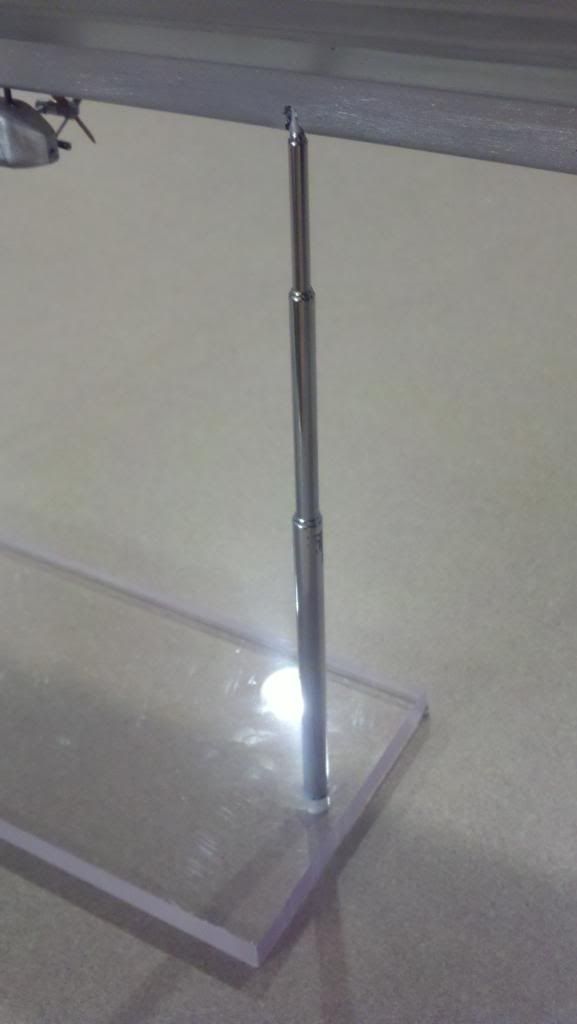
Rudders and elevators are attached with short strips of copper wire to act as bendable hinges, holes are drilled for the base mount wires. I used pairs of telescoping tubing so I could adjust altitude and attitude on the finished airships. A trip to the local auto parts store with $10 will buy you 4-5 of these units with rare earth magnets on the ends to pick up dropped bolts. I clipped off the magnets and drilled holes the same size into the bottom of each model on 9 centers (remember to hit the pine blocks).
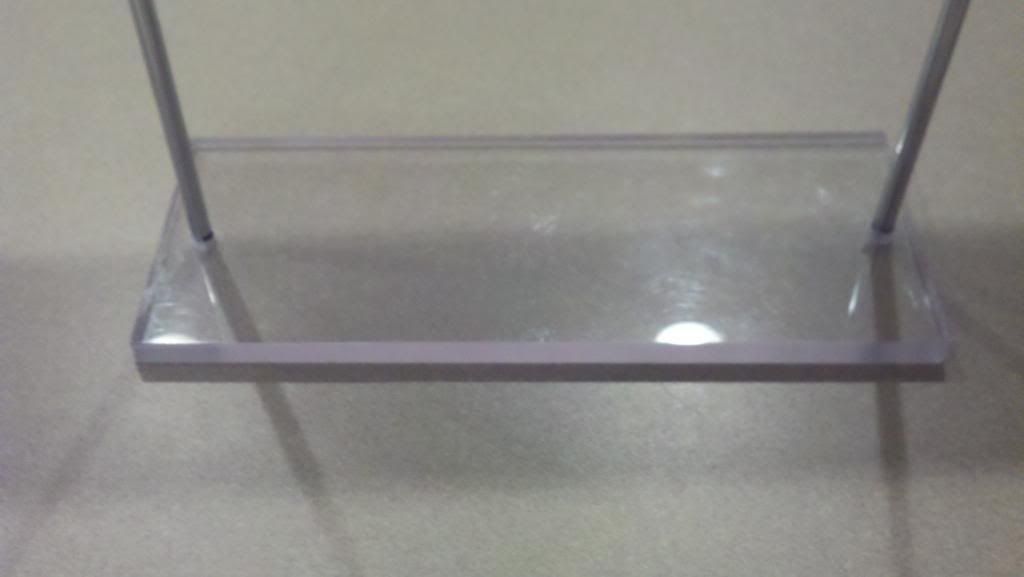
Bases were made from 3/8 thick Plexiglas blocks 4 x 12 that I had laying around, ¼ would suffice. You will have to drill it to receive the thick ends of the telescoping tubes, and CA them in place. Make sure they are perpendicular on both axis! I will be scoring the gun arcs onto the plastic as soon as I work them out.
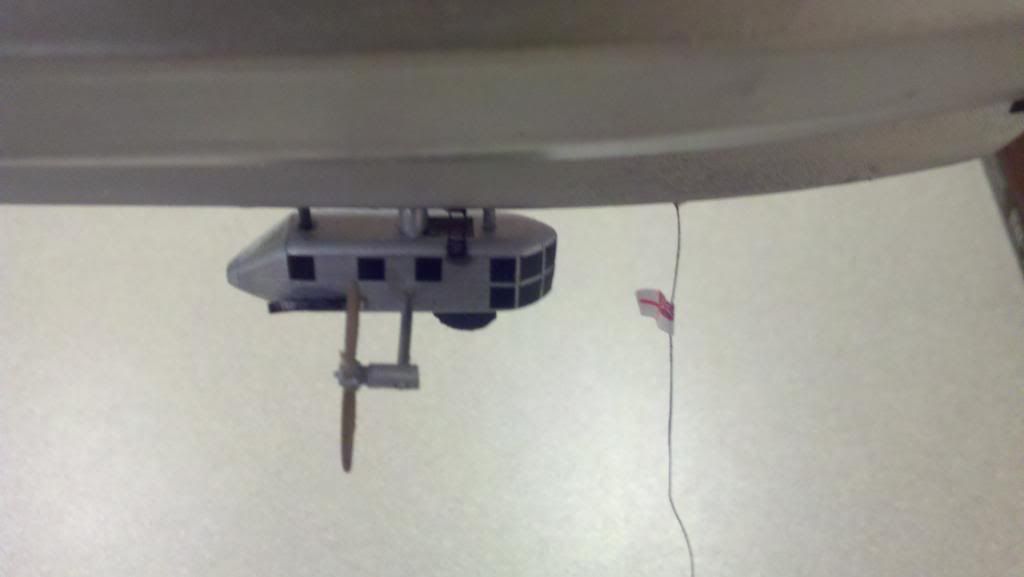
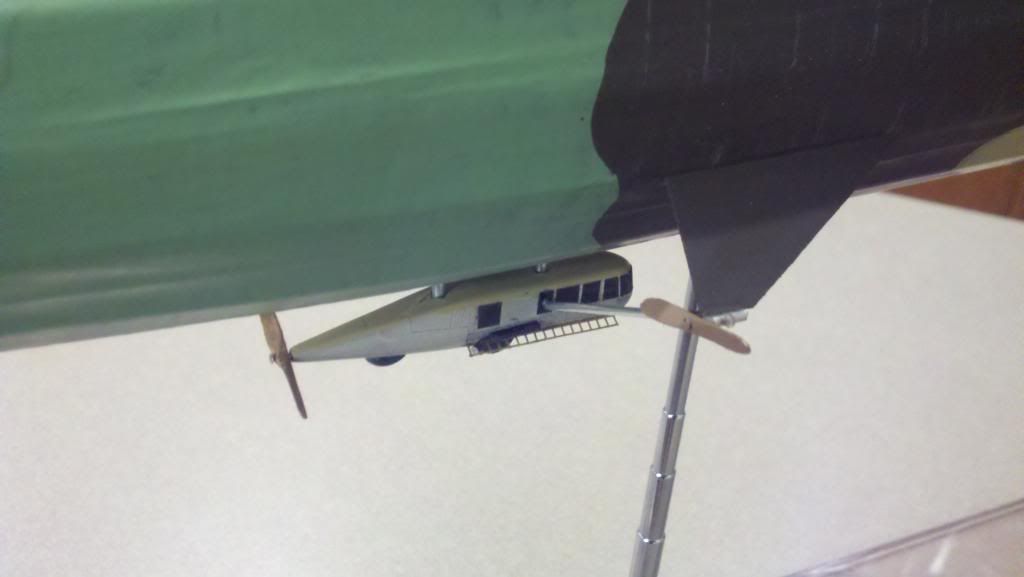
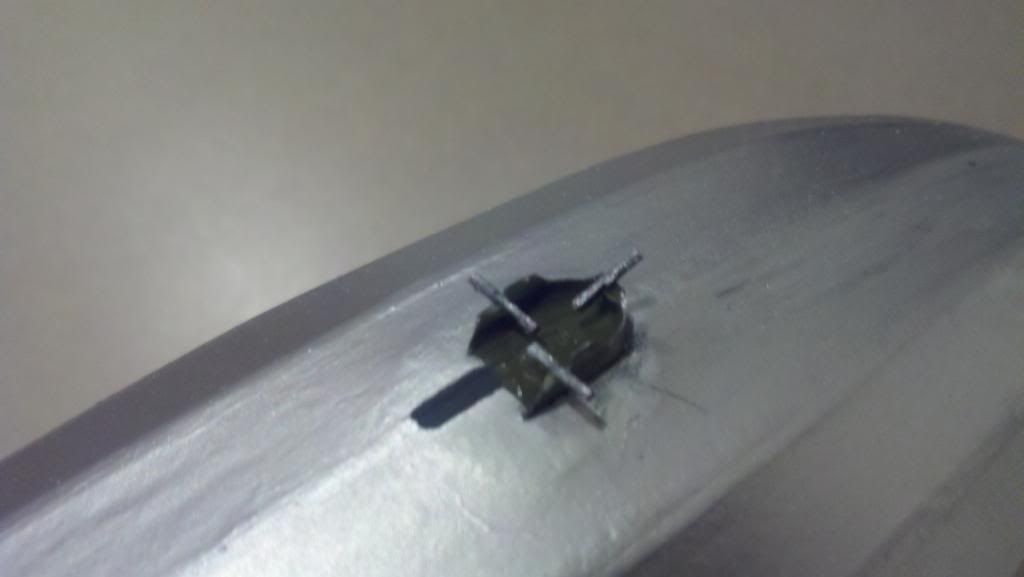
Back in the zeppelin works, you will need to form the nacelles or gondolas. Here I used 3/8 x ½ bass wood blocks carved to shape, given a few coats of dope, sand and paint. The windows were cut from black electrical tape on a sheet of glass, then moved into place on the nacelles. Panel lines, exhaust pipes, bumpers and ladders were added to each before they were added to the airships. Short bits of carbon fiber rod and aluminum tubing of the appropriate diameters were slipped into holes drilled in each nacelle and mating holes were drilled in the keels of the airships. A drop of CA holds them on.
Propellers were a challenge. The Vickers had four blade wood props 1 in diameter. I cheated here and swiped them from a 1/144 Dornier DoX flying boat kit I had not yet finished. Six props were required for the R-23. They were mounted on aluminum tubing of various diameters and attached to each nacelle. The L-11 had only four two bladed props of 1 diameter which I carved from 3/32 square bass wood. All props were painted brown since they were wood on the originals.
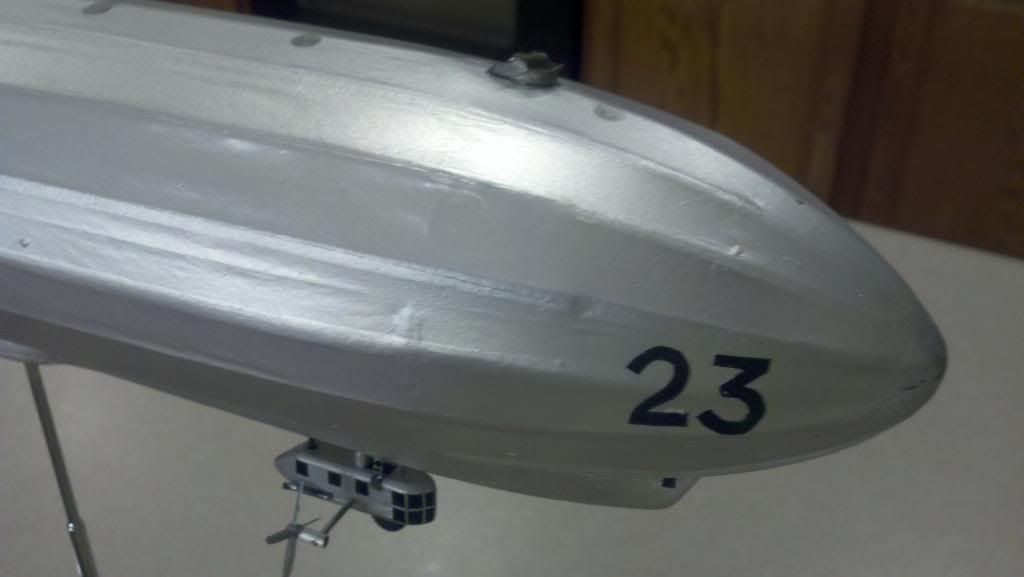
Insignias were made from decals robbed from other models, the numbers were cut from white electrical tape on the L-11 and black tape for the R-23, and stuck onto the models in their proper locations.
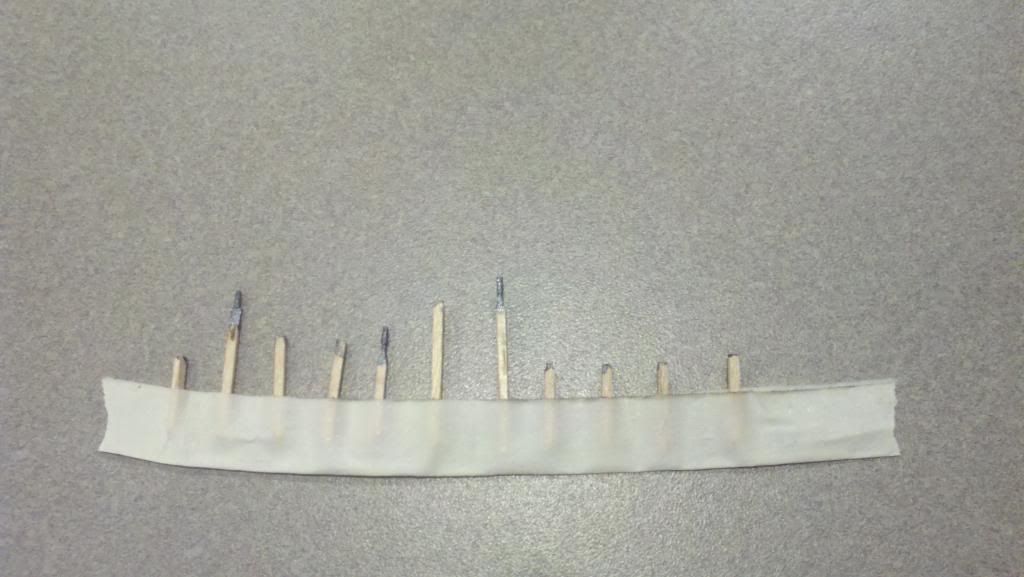
Both ships had top gun emplacements for three single machine guns. At scale they are only 1/8 long! This took a bit of thought, I used hard 1/16 square balsa, carving half the length round and the rear part rectangular. A quick wash of gun metal paint and they looked great! Both ships also had rear gunners as well, so ditto there. Side guns were left off; they could use any window for hand held guns on the keel and on the nacelles. Each ship has its own specs on number of guns and placements, have fun here.
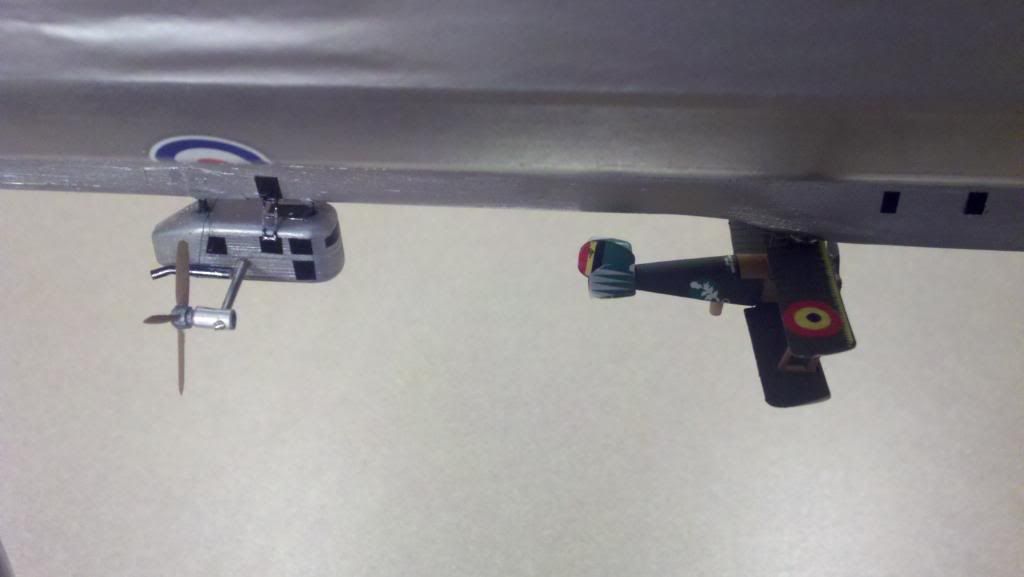
Whats left? Well the R-23 carried and Sopwith Camel between the front and middle nacelle locations. I used a tiny pair of rare earth magnets, one on the keel and one on the top wing of the Camel. A drop of CA glue, and presto! A removable escort fighter!
Oh yes on the L-11 there are the side prop mounts. They need to be fabricated from thin plastic sheet or plywood, attached to the appropriate longeron and drive shafts from the rear nacelle installed to connect the prop shafts to the propeller gear boxes. I used a bunch of 1/16 aluminum tubes with small copper wires to join them all together. Another quick wash of paint and your off!
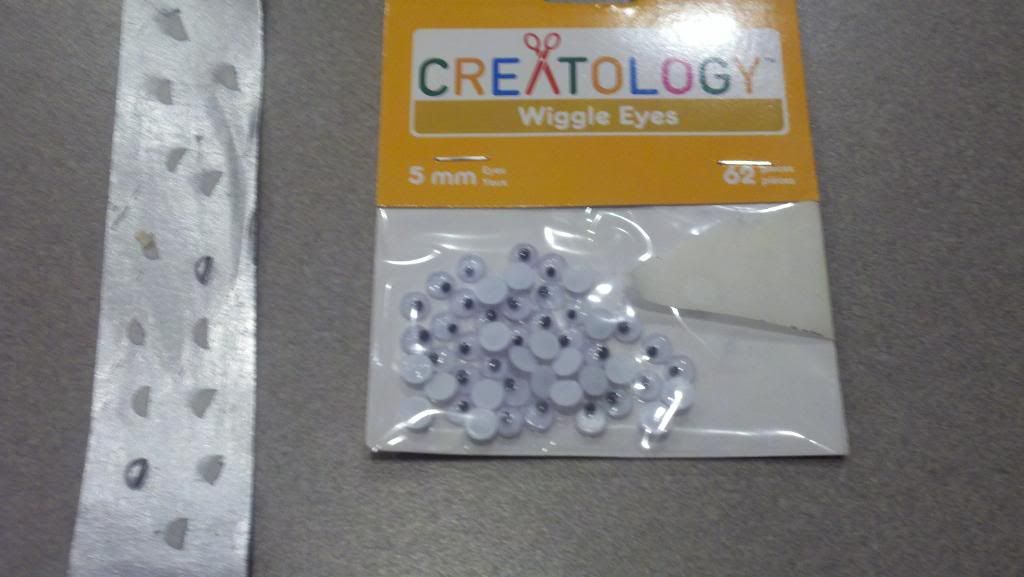
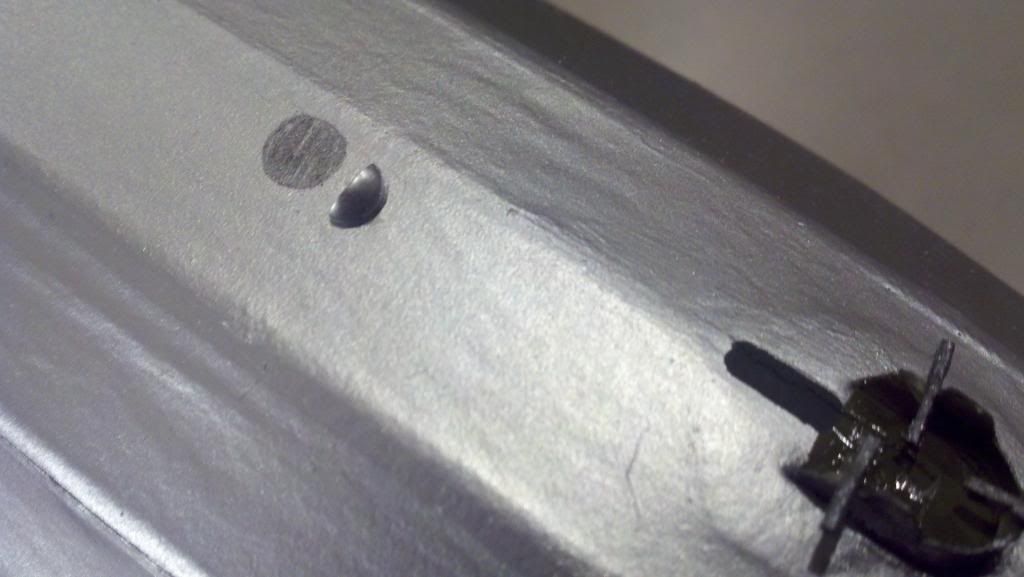
They are quite a handsome pair and have yet to be weathered and final detailed. I did make a tiny Royal Naval flag and attached it to the R-23 as in the original pictures. Other surface details include the hydrogen dump scoops on the R-23. They were made from 1/8 diameter googly eyes from the craft store. Carefully cut the eye in half and dig out the eyeball and you have two small half round scoops! Stick them to a strip of masking tape, spray with silver enamel and you have your scoops! You will need 14 of them by the way.
The surface details you can add are endless. I will likely weather mine, airbrush the seams on the canvas, add a few more bracing wires and call it a day, the missions are waiting! Next will be a transport box, lined with foam to protect the beasties, figure out a set of rules of engagement and get this war going! Have fun building yours! I have about 20 hours in mine total with a price tag for both of around $25-however I do have a huge supply of materials and bits to draw from!
And here a few more Pics!
Let me know if you endeavor to enter this realm of insanity and if you have any questions, comments or thoughts. Now onto that squadron of Staakens!
-David


 Reply With Quote


 I will look forward to your future projects!


 awaiting these zepps delivery! Next up rule development and...PLAY TESTING!


 Yes
Yes


Bookmarks