Ares Games
Page 1 of 2 12 LastLast
Results 1 to 50 of 77

Thread: Small collection 1:144. My gratitude to the forum.

  1. #1

    Default Small collection 1:144. My gratitude to the forum.

    Hi all. I will risk publishing some of my works. Maybe some points will be useful to you. Please don't judge harshly. I'll start with the general aspects of assembling the model.
    1. We reduce the original Fokker model from Marek Paczynski from a scale of 1:50. The easiest way to do this is by focusing on the wingspan. You will also need a drawing.
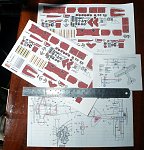
    2. We print several copies on thick and thin paper.
    3. I impregnate the capon with varnish.
    Click image for larger version. 

Name:	распечатанные &#10.jpg 
Views:	87 
Size:	142.3 KB 
ID:	335592
    Last edited by flash; 02-14-2024 at 01:36.

  2. #2

    Default

    4. I'll start by cutting out the wings. It is better to make them from 80 g paper. From the thicker one, the rough ends are very noticeable.Click image for larger version. 

Name:	торцы некрашен &#1.jpg 
Views:	86 
Size:	26.6 KB 
ID:	335593

  3. #3

    Default

    5. I give the aerodynamic shape of the wing by rolling it around the edge of the table.

    Click image for larger version. 

Name:	профилировани&#107.jpg 
Views:	85 
Size:	37.8 KB 
ID:	335595

    Click image for larger version. 

Name:	профилировани&#107.jpg 
Views:	85 
Size:	37.5 KB 
ID:	335594
    Last edited by flash; 02-14-2024 at 01:21. Reason: pic tidy

  4. #4

    Default

    6. I imitate the sagging of the fabric between the ribs. You can press the ribs with an empty pen, as in the photo of the test wing. Or you can do this by pressing it with your fingers and a bamboo skewer on a special pattern. I make it from a spare printout glued to cardboard and filled with baking soda and superglue.

    Click image for larger version. 

Name:	нервюры ручкой &#1.jpg 
Views:	88 
Size:	56.8 KB 
ID:	335596

    -I will fold the cardboard with the upper part of the wing glued on.
    Last edited by flash; 02-14-2024 at 01:23. Reason: pic tidy

  5. #5

    Default

    The photo was not attached. I'll try here.
    Click image for larger version. 

Name:	сода и суперкле&#1.jpg 
Views:	86 
Size:	49.2 KB 
ID:	335597

    Next, I pour in baking soda, soaked in superglue, and sand it.
    Click image for larger version. 

Name:	сода и суперкле&#1.jpg 
Views:	86 
Size:	61.6 KB 
ID:	335598

    Click image for larger version. 

Name:	сода и суперкле&#1.jpg 
Views:	86 
Size:	35.6 KB 
ID:	335599

    Now I glue the wire, cut and sand the edges:
    Click image for larger version. 

Name:	наклейка прово&#10.jpg 
Views:	86 
Size:	65.0 KB 
ID:	335600
    Last edited by flash; 02-14-2024 at 01:24.

  6. #6

    Default

    7. We press the protrusions on the finished matrix. Pre-color the end of the paper.
    Click image for larger version. 

Name:	продавливание &#10.jpg 
Views:	87 
Size:	60.0 KB 
ID:	335601

    8. On the lower half of the wing we glue the superglue-impregnated and slightly reduced part taken from a spare printout on thick paper. We cut the necessary grooves and use a needle from an insulin syringe to pierce holes for the braces.
    Click image for larger version. 

Name:	наклейка жёстк&#10.jpg 
Views:	86 
Size:	57.9 KB 
ID:	335602

    I do this with all the wings. I make the rudder and elevator without relief.
    Last edited by flash; 02-14-2024 at 01:25. Reason: pic tidy

  7. #7

    Default

    9. Making the cockpit. The photo is really bad. Sorry.
    Click image for larger version. 

Name:	салон.jpg 
Views:	86 
Size:	82.9 KB 
ID:	335603
    Last edited by flash; 02-14-2024 at 01:25. Reason: pic tidy

  8. #8

    Default

    10. Let's move on to the motor. In this case I took the motor from Nieuport 11 published by Kampflieger. It is also 9 cylinders, but fits this scale better. I imitate the cylinder cooling fins with thin copper wire.
    Click image for larger version. 

Name:	оребрение цили&#10.jpg 
Views:	87 
Size:	73.8 KB 
ID:	335604

    -I'm assembling the cylinder block. I bend and glue fuel supply pipes from 0.3mm wire.
    Click image for larger version. 

Name:	блок цилиндров &#1.jpg 
Views:	85 
Size:	71.2 KB 
ID:	335605

    Click image for larger version. 

Name:	мотор с бензопр&#1.jpg 
Views:	86 
Size:	86.9 KB 
ID:	335606
    In reality it doesn't look so scary...
    Last edited by flash; 02-14-2024 at 01:26. Reason: pic tidy

  9. #9

    Default

    11. I assemble a fairing around the finished motor. Alas, I didn’t guess the diameter correctly, so the motor doesn’t rotate.
    Click image for larger version. 

Name:	обтекатель мот&#10.jpg 
Views:	84 
Size:	50.4 KB 
ID:	335607
    I close the fairing. It is assembled from thin paper.
    Click image for larger version. 

Name:	обтекатель гот&#10.jpg 
Views:	82 
Size:	80.3 KB 
ID:	335608

  10. #10

    Default

    12. Assembling the body. The sides and bottom are made of thick paper. The top is made of thin material. I glue a magnet inside, at the bottom (I forgot to take a photo). I glue braces and control cables into the holes. They are made from a thread pulled from a child's bow. The same ones are in stockings.
    Click image for larger version. 

Name:	сборка корпуса 1.jpg 
Views:	82 
Size:	48.4 KB 
ID:	335609

    -I glue the steering wheels. To firmly install the wing I use a sewing needle. I paste it into all pairs of wings.
    Click image for larger version. 

Name:	сборка корпуса &#1.jpg 
Views:	84 
Size:	45.0 KB 
ID:	335610
    Last edited by flash; 02-14-2024 at 01:27. Reason: pic tidy

  11. #11

    Default

    13. I liked making the wheels from annealed copper wire. I fill the seam with glue and sand it. Then I painted it with gray paint. Spoke fairings - printed paper.Click image for larger version. 

Name:	колёса.jpg 
Views:	83 
Size:	82.3 KB 
ID:	335611

  12. #12

    Default

    14. I continue the assembly. Important! Mount the upper wing not closed. Pull all the braces through it, tighten and glue them. Only then close the upper wing. Luckily there are almost none here!
    Click image for larger version. 

Name:	натяжение расч&#10.jpg 
Views:	82 
Size:	78.1 KB 
ID:	335612

    Click image for larger version. 

Name:	закрывание кры&#10.jpg 
Views:	84 
Size:	63.9 KB 
ID:	335613

    Click image for larger version. 

Name:	всё без вмг.jpg 
Views:	80 
Size:	65.5 KB 
ID:	335614

    It is important to think in advance where to glue and how to tension the cables. I was wrong here too.
    Click image for larger version. 

Name:	Хвост с ошибкой &#.jpg 
Views:	82 
Size:	57.0 KB 
ID:	335615
    Last edited by flash; 02-14-2024 at 01:28. Reason: pic tidy

  13. #13

    Default

    Amazing work Alex! I thought I put a lot into my painting but this is very intensive.

  14. #14

  15. #15

    Default

    15. I make the screw from layers of yellow and brown paper soaked in superglue after cutting. For this scale, each layer consists of two layers of 80g/m2 paper. I draw the silhouette of the propeller in Corel according to the drawing and print it on an inkjet printer. I fill the reverse side of the printout with solid yellow or brown. Depending on the color of the silhouettes.
    Click image for larger version. 

Name:	пропеллер2 проф&#1.jpg 
Views:	78 
Size:	56.2 KB 
ID:	335617

    -I grind the profile and blades.
    Click image for larger version. 

Name:	пропеллер1.jpg 
Views:	83 
Size:	91.2 KB 
ID:	335616

    Click image for larger version. 

Name:	пропеллер3 обто&#1.jpg 
Views:	79 
Size:	74.9 KB 
ID:	335618

    Click image for larger version. 

Name:	пропеллер3-1 обто&.jpg 
Views:	79 
Size:	59.9 KB 
ID:	335619

    The photos are mixed up, but I hope you understand. The propeller is ready.
    Click image for larger version. 

Name:	пропеллер4 гото&#1.jpg 
Views:	76 
Size:	121.5 KB 
ID:	335620
    Last edited by flash; 02-13-2024 at 00:40. Reason: Tidy images

  16. #16

    Default

    I tired you, so now the model itself.
    Click image for larger version. 

Name:	Модель профиль.jpg 
Views:	75 
Size:	42.8 KB 
ID:	335621
    Click image for larger version. 

Name:	Модель фас.jpg 
Views:	75 
Size:	49.0 KB 
ID:	335622
    Click image for larger version. 

Name:	модель сзади.jpg 
Views:	76 
Size:	42.7 KB 
ID:	335623Click image for larger version. 

Name:	модель три четв&#1.jpg 
Views:	76 
Size:	48.6 KB 
ID:	335624Click image for larger version. 

Name:	магнит внутри м&#1.jpg 
Views:	77 
Size:	69.6 KB 
ID:	335625Click image for larger version. 

Name:	модель три четв&#1.jpg 
Views:	74 
Size:	46.4 KB 
ID:	335626

  17. #17

    Default

    First. Thanks everyone for your attention. I try to unleash the full potential laid down by the author of the model. And most importantly, it was all of you who inspired me to do the work I did. When I came here by chance, I was shocked.
    Further, I forgot to mention that if before final assembly you spray the parts with acrylic varnish from a can, the model will have a more correct shine for the given scale and there will be less paper fluff. Zapon varnish does not completely protect against them.
    Now a few photos to give you an idea of ​​the size against the background of the 1:50 Lothar model.Click image for larger version. 

Name:	Лотар и Манфред1.jpg 
Views:	75 
Size:	70.7 KB 
ID:	335627Click image for larger version. 

Name:	Лотар и Манфред2.jpg 
Views:	73 
Size:	44.1 KB 
ID:	335628Click image for larger version. 

Name:	Лотар и Манфред3.jpg 
Views:	75 
Size:	52.8 KB 
ID:	335629

  18. #18

    Default

    Since I have not yet made a stand for the game, I will immediately move on to a very important point for me. The fact is that I really don’t like cola collections hidden from human eyes. And if the models are in the closet, then no one except the author knows anything about them. I tried to solve this issue with the help of simple postcards where I write about the pilot and the plane. The model can be removed and played, and anyone can read everything. So to the point.
    - I’m preparing a postcard from printouts and some cardboard. Don't repeat my mistake. Print only on thick paper. Otherwise, unevenness may appear.Click image for larger version. 

Name:	Стенд1.jpg 
Views:	74 
Size:	96.2 KB 
ID:	335630

    We glue the display. I use popsicle sticks and a bamboo skewer to make a frame. In the picture I am attaching a wire with a magnet glued on it. The model is also fixed on a gaming stand.
    Click image for larger version. 

Name:	магнит на стенд&#1.jpg 
Views:	74 
Size:	80.4 KB 
ID:	335631

    Click image for larger version. 

Name:	магнит внутри м&#1.jpg 
Views:	75 
Size:	69.6 KB 
ID:	335632
    Last edited by flash; 02-14-2024 at 01:29. Reason: pic tidy

  19. #19

    Default

    That is amazing work, especially with the wires etc.

  20. #20

    Default

    Well done, Alex! Truly remarkable workmanship!

  21. #21

    Default

    Click image for larger version. 

Name:	стенд лицо.jpg 
Views:	77 
Size:	61.8 KB 
ID:	335633

    Click image for larger version. 

Name:	стенд оборот.jpg 
Views:	77 
Size:	71.2 KB 
ID:	335634
    Can be placed on a table, can be hung on a wall (there is a cord at the top of the frame). The wire for attaching the aircraft is almost invisible from most angles.

    Click image for larger version. 

Name:	стенд и модель в&#.jpg 
Views:	76 
Size:	71.4 KB 
ID:	335636

    Click image for larger version. 

Name:	Стенд модель пр&#1.jpg 
Views:	77 
Size:	63.6 KB 
ID:	335639

    Click image for larger version. 

Name:	модель на стенд&#1.jpg 
Views:	76 
Size:	61.6 KB 
ID:	335643

    Click image for larger version. 

Name:	модель на стенд&#1.jpg 
Views:	75 
Size:	59.3 KB 
ID:	335645

    Click image for larger version. 

Name:	модель на стенд&#1.jpg 
Views:	75 
Size:	87.5 KB 
ID:	335646

    Click image for larger version. 

Name:	магнит на стенд&#1.jpg 
Views:	75 
Size:	80.4 KB 
ID:	335647

    That's probably all for today. I won't bother with assembly anymore. In the near future I will try to photograph and display the remaining, older models.
    Last edited by flash; 02-14-2024 at 01:35. Reason: pic tidy

  22. #22

    Default

    Very nice touch with the framed postcard.

  23. #23

    Default

    Hi all. I'll continue the photo shoot. Today the legendary Fokker E2 from the amazing designer F. Prudenziati. As I remember, this is one of the very first models. Sorry for the heat and cobwebs. Go...
    Click image for larger version. 

Name:	P2100007.jpg 
Views:	71 
Size:	49.0 KB 
ID:	335650

    Click image for larger version. 

Name:	колёса.jpg 
Views:	71 
Size:	74.0 KB 
ID:	335651

    Click image for larger version. 

Name:	P2100018.jpg 
Views:	76 
Size:	48.8 KB 
ID:	335652
    Last edited by flash; 02-14-2024 at 01:32. Reason: pic tidy

  24. #24

    Default

    It's kind of hard to insert photos. You have to insert them into different messages.
    Click image for larger version. 

Name:	P2100017.jpg 
Views:	66 
Size:	65.1 KB 
ID:	335653

    Click image for larger version. 

Name:	P2100026.jpg 
Views:	66 
Size:	92.3 KB 
ID:	335654

    Click image for larger version. 

Name:	P2100029.jpg 
Views:	71 
Size:	88.3 KB 
ID:	335655

    Click image for larger version. 

Name:	P2100030.jpg 
Views:	71 
Size:	64.7 KB 
ID:	335656

    Click image for larger version. 

Name:	P2100032.jpg 
Views:	67 
Size:	50.7 KB 
ID:	335657

    Click image for larger version. 

Name:	P2110035.jpg 
Views:	66 
Size:	69.5 KB 
ID:	335658

    Click image for larger version. 

Name:	P2110042.jpg 
Views:	66 
Size:	48.8 KB 
ID:	335659
    Last edited by flash; 02-14-2024 at 01:35.

  25. #25

    Default

    Very nice work Alex. Thanks for sharing!

  26. #26

    Default

    Yes, superb workmanship!
    I laugh in the face of danger - then I hide until it goes away!

  27. #27

    Default

    Beautiful work on the Fokker, Alex!

  28. #28

    Default

    Much more detail and shaping work than I did on my Fokker Dr.1! I really like some of your ideas, especially for the wing rib forming.

    The engine construction I think I will pass on, though. Beautiful work.

    And your display stand idea is pretty awesome, too.

    Thank you ever so much for sharing.
    Last edited by OldGuy59; 02-14-2024 at 08:50.
    Mike
    "Flying is learning to throw yourself at the ground and miss" Douglas Adams
    "Wings of Glory won't skin your elbows and knees while practicing." OldGuy59

  29. #29

    Default

    I'm very glad you like it. Today I will continue the exhibition with a rare model by Anthony Fokker. Design by Zio Prudenziatti. From me - reworking the engine and that's it. For braces, thicker monofilament. It is used for sewing on beads. Although it does not fit the scale and is more difficult to glue, it is more noticeable on the model.
    Click image for larger version. 

Name:	P2110043.jpg 
Views:	58 
Size:	33.1 KB 
ID:	335774

  30. #30

    Default

    For those who will assemble: do not forget that the Oberursel U.III has two rows of cylinders!
    Click image for larger version. 

Name:	Вид на мотор сни&#.jpg 
Views:	58 
Size:	68.2 KB 
ID:	335775

    Click image for larger version. 

Name:	Анфас со спичко&#1.jpg 
Views:	55 
Size:	36.2 KB 
ID:	335776

    Click image for larger version. 

Name:	три четверти сз&#1.jpg 
Views:	58 
Size:	41.6 KB 
ID:	335777

    Click image for larger version. 

Name:	Сзади со спичко&#1.jpg 
Views:	59 
Size:	44.3 KB 
ID:	335778

    While I was preparing the photo, I noticed how terribly crooked the wings were mounted. I remember that there were problems with the installation. They didn't want to stand at 90 degrees to the body. In the end I spat and stuck it as best I could.
    Last edited by flash; 02-14-2024 at 01:34.

  31. #31

    Default

    It's time to fly!
    Click image for larger version. 

Name:	На карточке све&#1.jpg 
Views:	54 
Size:	42.3 KB 
ID:	335779

    Click image for larger version. 

Name:	На карточке све&#1.jpg 
Views:	59 
Size:	55.5 KB 
ID:	335780

    While working on the postcard, I was once again amazed by the drama of the First World War. I tried, as best I could, to express it on paper.
    Click image for larger version. 

Name:	Открытка оборо&#10.jpg 
Views:	54 
Size:	69.6 KB 
ID:	335781

    Click image for larger version. 

Name:	Открытка разво&#10.jpg 
Views:	56 
Size:	127.9 KB 
ID:	335782

    Click image for larger version. 

Name:	Открытка фронт &#1.jpg 
Views:	57 
Size:	75.3 KB 
ID:	335783

    Click image for larger version. 

Name:	Открытка от мот&#1.jpg 
Views:	54 
Size:	59.7 KB 
ID:	335784

    Click image for larger version. 

Name:	Открытка фронт &#1.jpg 
Views:	56 
Size:	62.9 KB 
ID:	335785
    Last edited by flash; 02-14-2024 at 01:34.

  32. #32

  33. #33

  34. #34

    Default

    They are ridiculously good, I just can’t fathom out how you do it.

    Never Knowingly Undergunned !!

  35. #35

    Default

    Very talented.
    Piece of art.

  36. #36

    Default

    This is stunning work, Alex, if only I could feel my fingertips I'd have a go !
    If you're happy I can tidy the position/order of your text & images. I've had a go at the propeller post, posting images can be difficult until you get used to it but if you hit return between text and images it will leave spaces and better present your incredible skills.

    Sapiens qui vigilat... "He is wise who watches"

  37. #37

    Default

    Good day. Dear flash, I am an amateur when it comes to the Internet, so do whatever is necessary and possible with my opuses. I will try to sort out the publication of pictures.
    Next, thank you all for the compliments, but in fact my contribution to this matter is limited. The main hero of the occasion is the Epson C 91, everything comes out of this chest, all I have to do is glue it together, I don’t even need to paint it.

    Click image for larger version. 

Name:	P2130073.jpg 
Views:	44 
Size:	98.1 KB 
ID:	335806

    So, the hero of the occasion: Halberstadt Dii. Designed by Batesyboy with Papermodellers. The model is ideal in the range 1:72-1:144.

    Click image for larger version. 

Name:	P2110090.jpg 
Views:	40 
Size:	40.6 KB 
ID:	335807

    Click image for larger version. 

Name:	P2110089.jpg 
Views:	43 
Size:	37.4 KB 
ID:	335808

    Click image for larger version. 

Name:	P2110094.jpg 
Views:	43 
Size:	46.0 KB 
ID:	335809
    This machine taught me that it is ALWAYS necessary to varnish paper. Without varnish, with intensive use such weathering occurs.
    Last edited by flash; 02-14-2024 at 01:18.

  38. #38

    Default

    Click image for larger version. 

Name:	P2110079.jpg 
Views:	44 
Size:	51.2 KB 
ID:	335810

    Click image for larger version. 

Name:	P2110081.jpg 
Views:	40 
Size:	52.7 KB 
ID:	335811

    Click image for larger version. 

Name:	P2110082.jpg 
Views:	44 
Size:	57.4 KB 
ID:	335812

    Do not use a 1mm diameter magnet for fixation. Ideal - 3mm.

    Click image for larger version. 

Name:	P2110085.jpg 
Views:	44 
Size:	32.5 KB 
ID:	335813

    Click image for larger version. 

Name:	P2110101.jpg 
Views:	45 
Size:	40.5 KB 
ID:	335814

  39. #39

  40. #40

    Default

    Alex, congrats on your first medal for reputation, it's well deserved
    I've tidied up your previous posts, so they're easier to follow, hope you're happy how they turned out.

    Sapiens qui vigilat... "He is wise who watches"

  41. #41

    Default

    Quote Originally Posted by flash View Post
    Alex, congrats on your first medal for reputation, it's well deserved
    Yes, your work is brilliant, Alex!

  42. #42

    Default

    All of your planes are wonderful. Amazing detail work Alex!

  43. #43

    Default

    Thanks for your help in creating the posts. I hope to continue to help you in identifying and eliminating errors. Adjusting my award with a trembling hand, I present today’s airplane. This is Phoenix D1 from Paperdiorama, original scale 1:64. An excellent choice for simple modeling. I just added cylinders to the engine and glued the headrest, as in the historical original. But this is not at all necessary. The model perfectly combines appearance and ease of assembly.

    Click image for larger version. 

Name:	P2140013.jpg 
Views:	30 
Size:	43.8 KB 
ID:	335828

    Click image for larger version. 

Name:	P2140011.jpg 
Views:	27 
Size:	38.4 KB 
ID:	335829

    Click image for larger version. 

Name:	P2140010.jpg 
Views:	27 
Size:	41.6 KB 
ID:	335830

    Click image for larger version. 

Name:	P2140014.jpg 
Views:	30 
Size:	42.6 KB 
ID:	335831

    Click image for larger version. 

Name:	P2140015.jpg 
Views:	30 
Size:	62.7 KB 
ID:	335832

    Click image for larger version. 

Name:	P2140017.jpg 
Views:	30 
Size:	38.7 KB 
ID:	335833

  44. #44

    Default

    I'm taking off!

    Click image for larger version. 

Name:	P2140021.jpg 
Views:	28 
Size:	38.0 KB 
ID:	335834

    Click image for larger version. 

Name:	P2140024.jpg 
Views:	29 
Size:	35.4 KB 
ID:	335835

    Click image for larger version. 

Name:	P2140019.jpg 
Views:	30 
Size:	30.4 KB 
ID:	335836

  45. #45

    Default

    Well, time for a postcard. The basis is a historical photo of those years.

    Click image for larger version. 

Name:	P2140042.jpg 
Views:	29 
Size:	63.5 KB 
ID:	335837

    Click image for larger version. 

Name:	P2140004.jpg 
Views:	29 
Size:	66.5 KB 
ID:	335838

    Click image for larger version. 

Name:	P2140041.jpg 
Views:	29 
Size:	57.6 KB 
ID:	335839

    Click image for larger version. 

Name:	P2140038.jpg 
Views:	29 
Size:	54.5 KB 
ID:	335840

  46. #46

  47. #47

    Default

    Thank you, there are still a few models to photograph, so I hope to continue...

  48. #48

    Default

    Hi all. Today I prepared DH2 from the designer
    djackso1. This is the author of amazingly simple models of aircraft paint schemes. Original scale 1:87. Improved the engine, profile and wing camber, Lewis. I tried to reproduce a complete set of cables.
    Click image for larger version. 

Name:	P2150021.jpg 
Views:	24 
Size:	50.0 KB 
ID:	335844

    Click image for larger version. 

Name:	P2150023.jpg 
Views:	21 
Size:	47.4 KB 
ID:	335845

    Click image for larger version. 

Name:	Профиль спичка.jpg 
Views:	24 
Size:	45.7 KB 
ID:	335846
    When I cut out the propeller I missed the size. Laziness prevented me from redoing it.

    Click image for larger version. 

Name:	сзади спичка.jpg 
Views:	22 
Size:	57.2 KB 
ID:	335847

    Click image for larger version. 

Name:	P2150027.jpg 
Views:	20 
Size:	61.7 KB 
ID:	335848

  49. #49

    Default

    When installing a magnet inside a very short body, you should try to place it as close to the stern as possible. Otherwise, the gaming stand easily catches on the chassis cables.

    Click image for larger version. 

Name:	P2150031.jpg 
Views:	22 
Size:	45.5 KB 
ID:	335851

    Click image for larger version. 

Name:	P2150034.jpg 
Views:	20 
Size:	32.0 KB 
ID:	335852

    Click image for larger version. 

Name:	P2150039.jpg 
Views:	21 
Size:	53.5 KB 
ID:	335853

    Click image for larger version. 

Name:	P2150040.jpg 
Views:	21 
Size:	43.0 KB 
ID:	335854

  50. #50

    Default

    Postcard.

    Click image for larger version. 

Name:	P2150001.jpg 
Views:	24 
Size:	56.6 KB 
ID:	335855

    Click image for larger version. 

Name:	P2150006.jpg 
Views:	24 
Size:	48.7 KB 
ID:	335856

    Click image for larger version. 

Name:	P2150012.jpg 
Views:	22 
Size:	54.4 KB 
ID:	335858

    Click image for larger version. 

Name:	P2150007.jpg 
Views:	25 
Size:	53.8 KB 
ID:	335859
    Last edited by Teaticket; 02-15-2024 at 15:17.

Page 1 of 2 12 LastLast


Similar Missions

  1. WGF Selling my small WWI Wings of Glory collection
    By G-Two in forum Sale/Trade/Wanted Classifieds
    Replies: 5
    Last Post: 09-03-2019, 23:35
  2. National A small dog fight.
    By Flying Officer Kyte in forum UK Wing
    Replies: 13
    Last Post: 10-17-2015, 06:36
  3. Small Spads
    By Zakopious in forum Paper Card Models
    Replies: 1
    Last Post: 09-24-2013, 10:17
  4. Gratitude in a Thread with Three Posts
    By Blackronin in forum Officer's Club
    Replies: 69
    Last Post: 06-10-2013, 14:15
  5. WGF Small WWI Book Collection For Sale
    By OrlokSubedei in forum Sale/Trade/Wanted Classifieds
    Replies: 8
    Last Post: 05-07-2012, 17:01

Bookmarks

Posting Permissions

  • You may not post new threads
  • You may not post replies
  • You may not post attachments
  • You may not edit your posts
  •