Ares Games
Page 1 of 2 12 LastLast
Results 1 to 50 of 92

Thread: Taking the plunge - my first go with Shapeways

  1. #1

    Default Taking the plunge - my first go with Shapeways

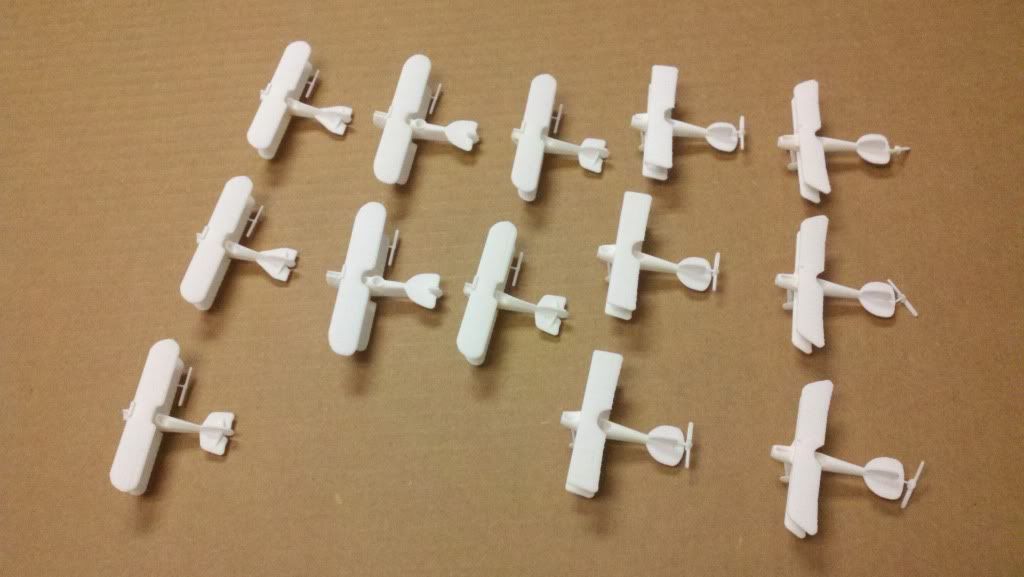
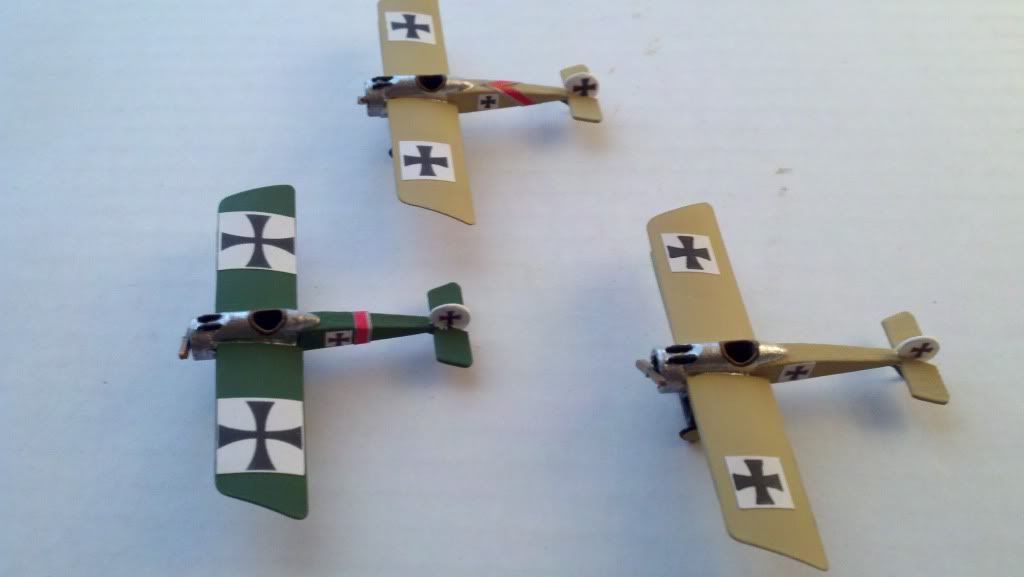
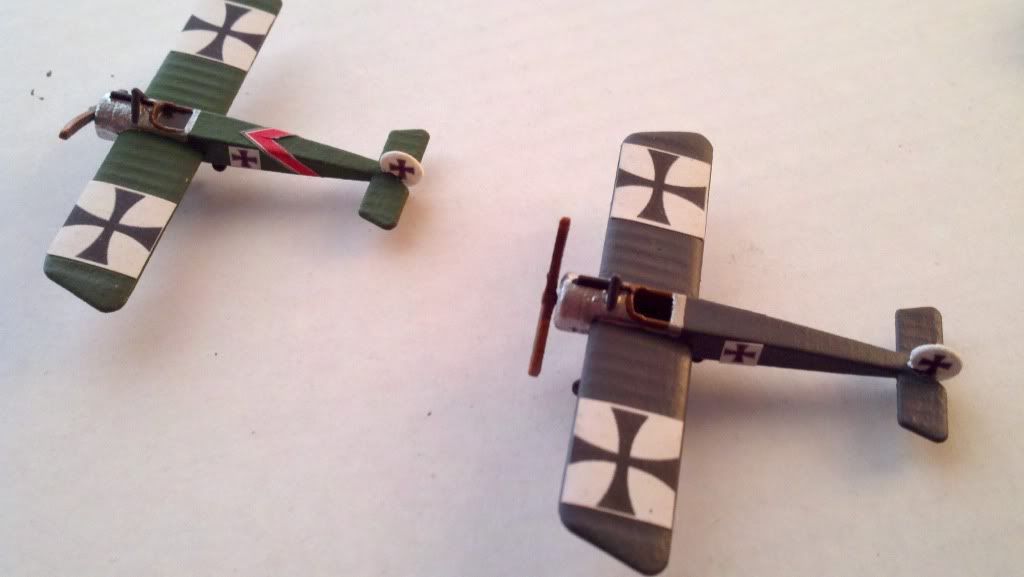
    A couple of years ago, after reading the classic "Sagittarius Rising" by Cecil Lewis, I decided to give Shapeways a go and ordered a Fokker Eindecker E.III and BE.2c so as to re-create in WoG the Fokker Scourge of 1915.

    I received the models but have been procrastinating till now on getting going with them. No longer!

    I lightly sanded, using 220 grit, the wings to remove some (though not all) of the printing artefacts. I am now coating with Pledge Floor Finish, which I understand to be the modern version of Future Floor Polish. I've put on three coats via brush so far and plan to sand again, then wash and do perhaps a few more coats of Pledge.

    The Eindecker is looking pretty good, but the BE.2c still has quite a lot of "squiggles" on the top wing. May not be much to be done for it, and anyways it's just my first effort so I'm not going to get too hung up about it.

    I have some Albatross D.II decals that I believe will be OK for the Eindecker, and am going to look for something to use for the BE.2c. I am interested in printing my own decals via inkjet, if anyone has suggestions I'm all ears.

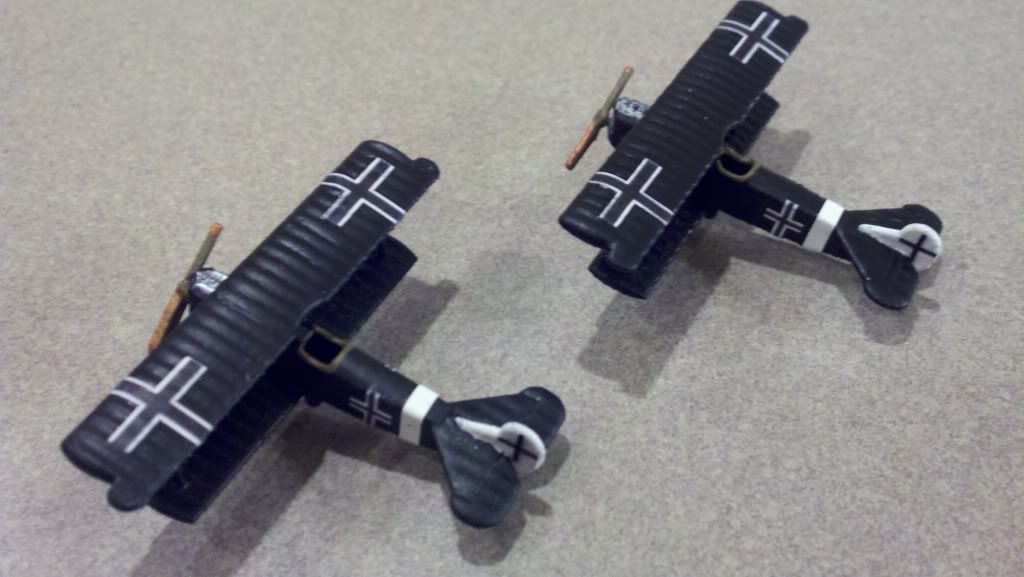
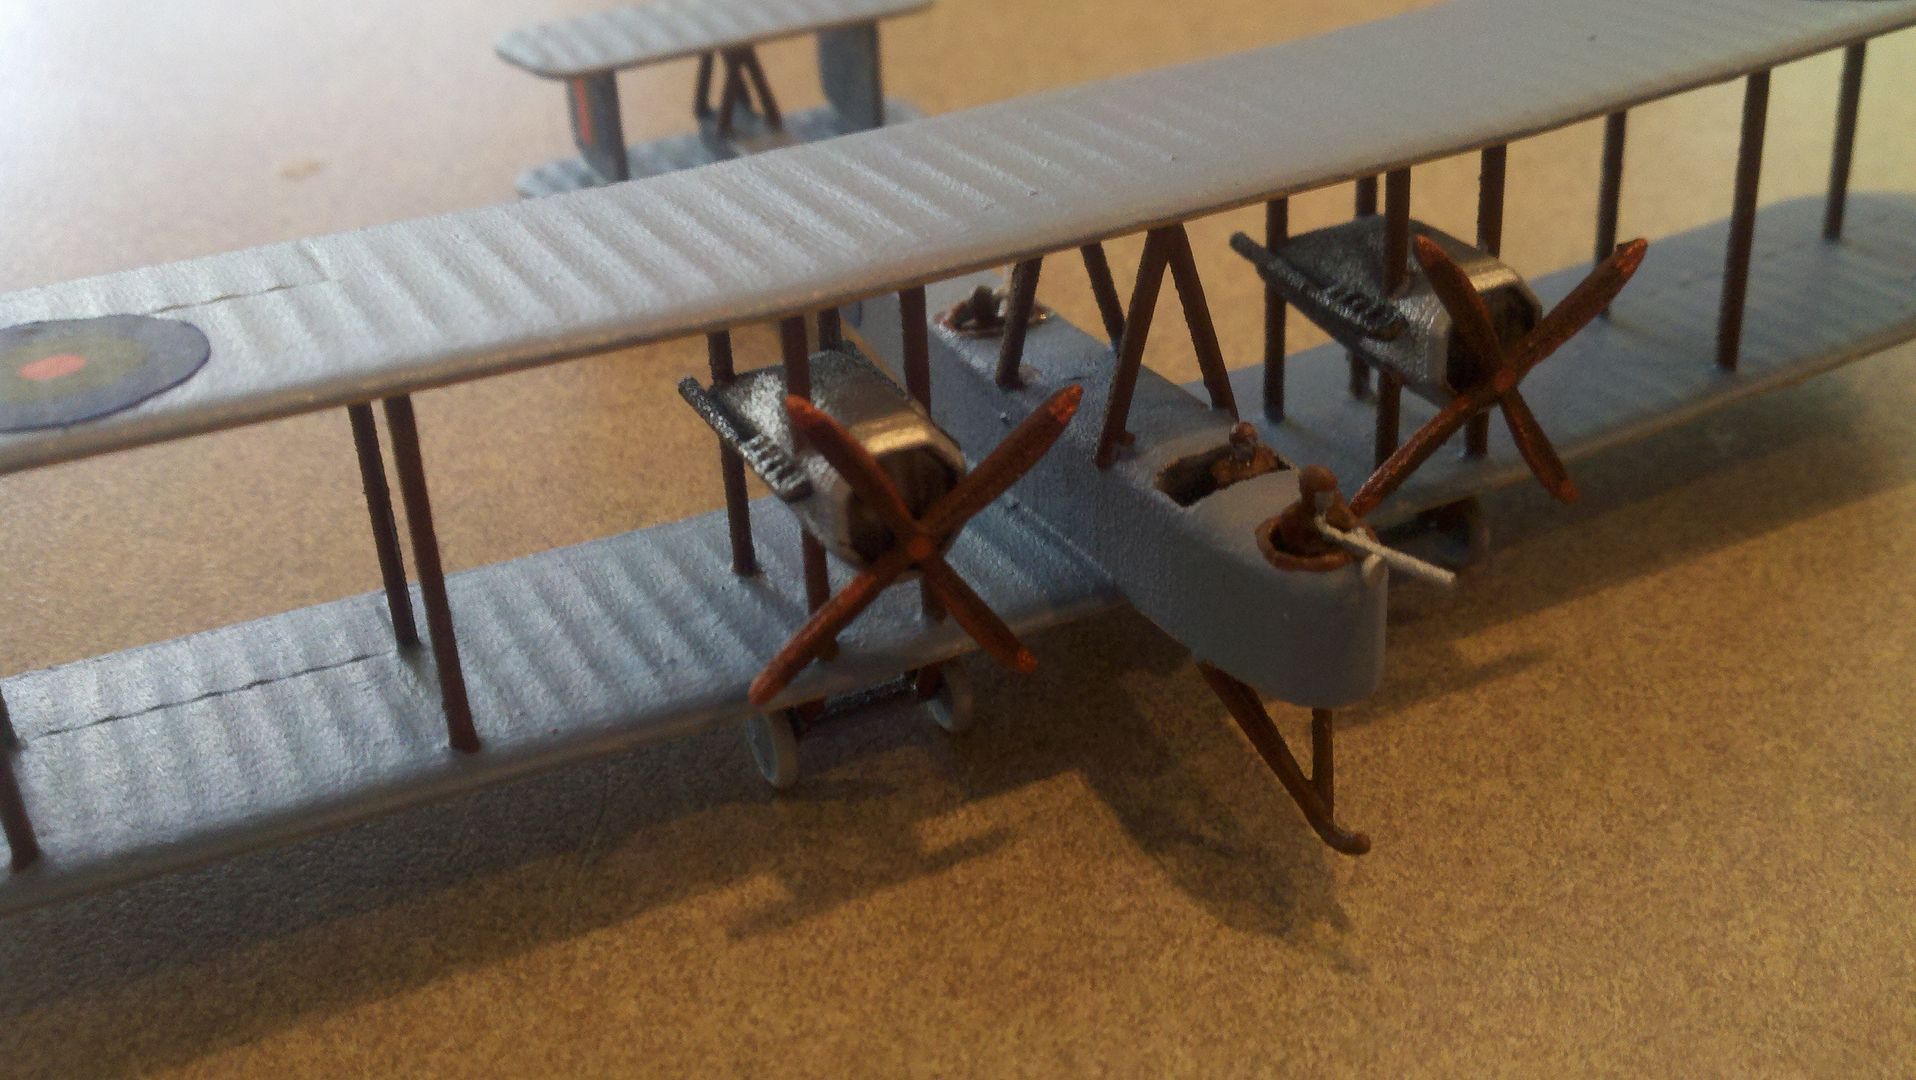
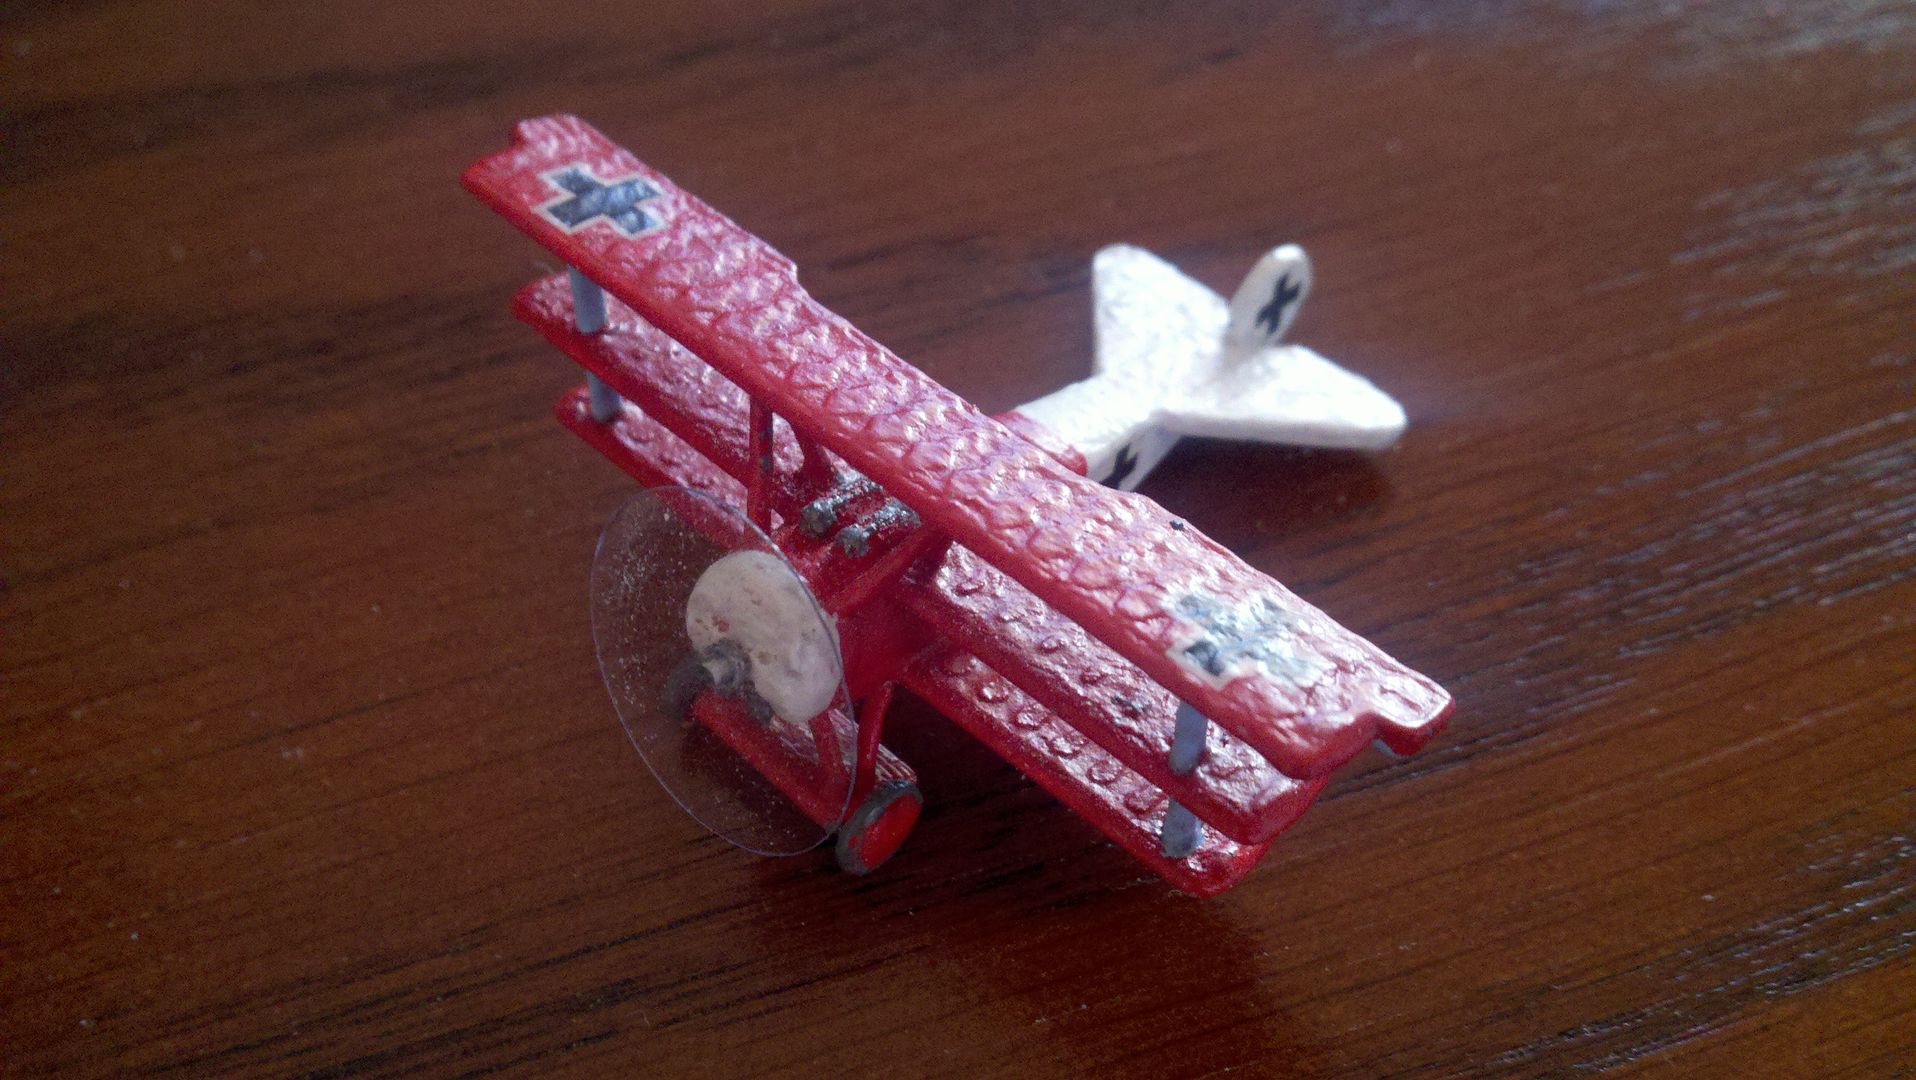
    Anyways, here are some initial photos - will update as I go through this process. Your feedback, tips, and encouragement are most welcome!

    Click image for larger version. 

Name:	fr_4808_size880.jpg 
Views:	306 
Size:	193.7 KB 
ID:	217341

    Click image for larger version. 

Name:	fr_4809_size880.jpg 
Views:	307 
Size:	116.7 KB 
ID:	217342

    Click image for larger version. 

Name:	fr_4810_size880.jpg 
Views:	302 
Size:	105.5 KB 
ID:	217343

    Click image for larger version. 

Name:	fr_4811_size880.jpg 
Views:	303 
Size:	203.4 KB 
ID:	217344
    Last edited by surfimp; 03-08-2017 at 08:56.

  2. #2

    Default

    I've taken a file to the printing 'squiggles' you have on a couple Fokker DVIIs. I did it after several layers of clear sealing coats. It did take them out enough so they weren't noticeable after painting.

  3. #3

    Default

    Whoa Steve! Just caught your post. The surface texture is not correct! I have sent such photos to Shapeways and they have replaced them if they have that much texture, they should be smooth not wavy. Not all is lost though, you will need dozens of coats of wax to even that out. I have had great luck with wall spackle, water based vinyl type, very cheap at the hardware store. Just a light layer applied, let it cure hard then sand most of it off with 100 grit sandpaper or a fingernail file. Repeat until super smooth, then finish with the Future or your favorite primer and paint. Check out some of the great threads and you will see what I mean. I have over 400 Shapeways birds in my collection, they are great and only 1 in 40 have such issues.


    Note the smooth wing surface you need to have!


    Here is a bad print that was painted without the sanding and filling I am talking about . . . shiny but wanky . . .


    Some of my Shapeways "scourge"


  4. #4

    Default

    Thanks both of you for the replies!

    @Clipper, I purchased these planes a few years back and I'd assume it's too late to return them as misprints. But it's OK, it's nice to have a few testers to get started with. The squiggles have been knocked off the Eindecker pretty well, the BE.2 is another story but with 3 coats of Pledge / Future on already, not sure if going with spackle would be a good call at this point - might not stick so well to the relatively smooth floor finish.

    The challenge, of course, is that getting the squiggles off means potentially losing the detail of the wing ribs. Am also considering that a darker paint scheme may hide any remaining squiggles better than a natural / linen one.

    But it's really great to know that something like this can and should be returned to Shapeways as a defect. Will bear than in mind going forward!

    Thank you both for the encouragement and good tips, they're most appreciated.

    P.S. - I have a couple Polikarpov I-16s and Messerschmitt BF-109Bs for SCW WGS from a more recent printing batch (and different designer), and they are much, much smoother than these older examples.
    Last edited by surfimp; 02-21-2017 at 13:02.

  5. #5

    Default

    Dave is correct. When you get a Shapeways order and the models aren't up to snuff let them know. They will replace them if you let them know within a week or two of your order.
    At Christmas I had an order go missing and they replaced the whole order!

    A small round file works nicely on the wings letting you leave the rounded ribbing look. Shouldn't have to do this but I too have on occasion let things go too long and had a few I had to work on.

  6. #6

    Default

    Quote Originally Posted by Teaticket View Post
    A small round file works nicely on the wings letting you leave the rounded ribbing look. Shouldn't have to do this but I too have on occasion let things go too long and had a few I had to work on.
    That's a great suggestion - I've got a jeweler's file set that should be up to the task.

    Thanks again, all!

  7. #7

    Default

    Those squiggles look nasty!

    My recent purchase Shapeways models were much better than that.

    Click image for larger version. 

Name:	Fokker E (1).jpg 
Views:	298 
Size:	192.5 KB 
ID:	217360

    Click image for larger version. 

Name:	Fokker E (14).jpg 
Views:	296 
Size:	113.6 KB 
ID:	217361

    I brushed on 3 coats of Klear floor polish, and did no filing at all.
    I laugh in the face of danger - then I hide until it goes away!

  8. #8

    Default

    Looks great, Tim!

    Question: Are those decals home-made? I need to get hipped to that process, too. I have an injket printer.

  9. #9

    Default

    The decals are from the 'Valom' Fokker E.III twin kit - they are the only white-square-eisnerkreuz decals I have found which are large enough for Eindekker wings.

    Both my attempts at home-made decals were failures. I too have an inkjet printer, and several sheets of decal paper, but no time to experiment.
    I may have another go, but I'm too busy right now.
    I laugh in the face of danger - then I hide until it goes away!

  10. #10

    Default

    Well, I won't subject you all to photos, but let's just say the squiggles look even nastier when there's a coat of paint on top!

    This was after about a half dozen coats of Future, with prodigious sanding and filing in between, to the level that I'd thought I'd gotten it "pretty smooth"... ha.

    I did appreciate having the opportunity to practice (such as it was, with a surface like that) putting paint on an an airplane mini, and I assume if you saw it from a good distance (say 10 feet) it would look like an Eindecker. But... yuck! It makes me really appreciate how easy it is to just get a package from Ares, tell you what!

    Have some Pups and Albie D.IIIs on order, hope they turn up in better shape than this BE.2 and Eindecker.

    Thanks to all of you for the input so far, it is most appreciated and helpful.

  11. #11

    Default

    Nice model Tim

  12. #12

    Thumbs up

    Quote Originally Posted by surfimp View Post
    Well, I won't subject you all to photos, but let's just say the squiggles look even nastier when there's a coat of paint on top!

    This was after about a half dozen coats of Future, with prodigious sanding and filing in between, to the level that I'd thought I'd gotten it "pretty smooth"... ha.

    I did appreciate having the opportunity to practice (such as it was, with a surface like that) putting paint on an an airplane mini, and I assume if you saw it from a good distance (say 10 feet) it would look like an Eindecker. But... yuck! It makes me really appreciate how easy it is to just get a package from Ares, tell you what!

    Have some Pups and Albie D.IIIs on order, hope they turn up in better shape than this BE.2 and Eindecker.

    Thanks to all of you for the input so far, it is most appreciated and helpful.
    Shapeways have improved hugely since your unfortunate experience.
    Its a shame you did not immediately advise them as many of us know they would have replaced them at no cost.

    Why not just scrap them as "Destroyed & shot down" models & re order.

  13. #13

    Default

    Quote Originally Posted by gully_raker View Post
    Why not just scrap them as "Destroyed & shot down" models & re order.
    I've told my kids they're welcome to have a go with them - the younger one actually thinks the Eindecker looks kind of cool with all the squiggles

    I appreciate all the encouragement and feedback in this thread. I'll update when my D.IIIs and Pups show up!

  14. #14

    Default

    Great job on those Steve and thanks all for the tips on the Shapeways models.
    Last edited by BobP; 03-05-2017 at 12:40.

  15. #15

    Default

    Steve,
    I'm in agreement with Barry.
    I have not had a bad batch for years now.

  16. #16

    Default

    I had some Albatros D.Is which were missing the prop - a couple of photos later, and Shapeways provided free replacements.
    I laugh in the face of danger - then I hide until it goes away!

  17. #17

    Default

    I too am glad to see this thread, not only for the tips, but to echo the good customer service by Shapeways. My first Shapeways experience was a Pfalz D.III print received a few weeks ago, unfortunately the rudder was missing! I sent a photo to Shapeways and they sent me a replacement. Other than that my experiments with the Shapeways prints are turning out fairly satisfactory. I should have some pictures soon of my completed "Hans Klein" Pfalz D.III and a Squadron 60 SE5 of "Billy Bishop".

  18. #18

    Default

    So recently I received my next batch of Shapeways WWI models, and happily they're quite a bit better than the first!

    To confirm: Pledge to seal the outer surface, then paint? Should I add a primer step after the Pledge?

    Thanks for all the help!

    Click image for larger version. 

Name:	4892.jpg 
Views:	238 
Size:	130.8 KB 
ID:	218648

    Click image for larger version. 

Name:	4893.jpg 
Views:	237 
Size:	126.8 KB 
ID:	218649

    Click image for larger version. 

Name:	4894.jpg 
Views:	235 
Size:	118.5 KB 
ID:	218650

    Click image for larger version. 

Name:	4895.jpg 
Views:	235 
Size:	136.6 KB 
ID:	218651

    Click image for larger version. 

Name:	4896.jpg 
Views:	237 
Size:	143.1 KB 
ID:	218652

  19. #19

    Default

    My preferred method is a few spray layers of Krylon clear, then a flat black for the primer when I think the surface is where I want it with the clear seal. I have not yet tried the Pledge method but many swear by it. I prefer black prime but it depends on what colors you are painting. Sometimes I go grey or white. Some colors are hard to paint over a black prime unless you first put white down where you want the color. I do this with red and other bright colors.

    Looks like a nice set of opponents. We look forward to seeing the finished product.

  20. #20

    Default

    I use the Pledge method, and yes you will need a primer coat after sealant.
    Karl
    It is impossible for a man to begin to learn what he thinks he knows. -- Epictetus

  21. #21

    Default

    I use Klear floor polish, and don't bother with a primer.
    I suppose I should, but I never have.
    I laugh in the face of danger - then I hide until it goes away!

  22. #22

    Default

    Tim if I could do even a quarter as well as you, I'll be quite happy! (it's probably wishful thinking)

    Sounds like I should try a couple different approaches with respect to primer, and see which works best for me.

    One more question, since you're all so indulgent:
    For the planes which have detached propellers, do you recommend gluing them on before painting, or after? I tried "after" with the Eindecker and it certainly worked, but made me wonder if it really was the best way.

    Thanks again!

  23. #23

    Default

    I attach props "after" - it makes it easier to get at the engine "face" if a rotary,

    Click image for larger version. 

Name:	Fokker E (1).jpg 
Views:	226 
Size:	192.5 KB 
ID:	218664

    Click image for larger version. 

Name:	Fokker E (8).jpg 
Views:	227 
Size:	185.4 KB 
ID:	218665


    and leaves a pleasing "gap" between a spinner and the fuselage of an in-line engine like the Albatros D.I

    Click image for larger version. 

Name:	Jasta 2  (11).jpg 
Views:	227 
Size:	115.4 KB 
ID:	218662

    Click image for larger version. 

Name:	Jasta 2  (36).jpg 
Views:	229 
Size:	95.2 KB 
ID:	218663

    a narrow "gap" which could easily be filled or covered by excess paint.
    I laugh in the face of danger - then I hide until it goes away!

  24. #24

    Default

    And tires... what's the secret to painting those buggers?

  25. #25

  26. #26

    Default

    Tyres - two model types exist.

    Those Nexus planes with a rolling axle allow a simple method; fix the plane in position, put a little paint on your brush, then use your free hand to slowly rotate the OTHER wheel.
    As your "target" wheel rotates, apply the brush. With a bit of practice, you can paint half a tyre in one rotation, then the other half a few seconds later.

    Fixed wheels, such as Shapeways 3D printed ones;
    I use a brush with VERY short bristles - my most frequent errors have always been loss of control of the brush tip while trying to negotiate a curve (the tip can move too far, or straighten a little too much as you relax pressure).
    Very short bristles offer much greater control, and also provide a new lease of life for "dead" brushes, where the tip has widened, or become scraggy, or clumped with paint - simply snip it off, and use the bristle bases still on the brush as your "new" tyre tool!
    I laugh in the face of danger - then I hide until it goes away!

  27. #27

    Default

    Thank you again, Tim! I've also read somewhere about using the butt end of the brush handle, dipped in paint, to "spot" the wheel cover (after having painted the entire wheel/tire in "tire color"). More experimentation

    Last night I used CA glue to affix Columbia Aerodrome short posts (from our own jbmacek) to the bottoms of my Pup and D.III flights. I then washed the planes in warm soapy water followed by a thorough rinse and air dry. Tonight I'll start applying the Pledge aka Future aka Klear sealing coats.

    Thank ALL of you again for the help, it's most appreciated!!

  28. #28

    Default

    So those of you using future etc. As a sealer do not use a primer before or after, you just paint over it? Acrylic and enamel?

  29. #29

    Default

    Quote Originally Posted by BB401 View Post
    So those of you using future etc. As a sealer do not use a primer before or after, you just paint over it? Acrylic and enamel?
    I paint acrylic directly onto the Klear sealed WSF - no primer.
    I laugh in the face of danger - then I hide until it goes away!

  30. #30

    Default

    Quote Originally Posted by BB401 View Post
    So those of you using future etc. As a sealer do not use a primer before or after, you just paint over it? Acrylic and enamel?
    Quote Originally Posted by Flying Helmut View Post
    I paint acrylic directly onto the Klear sealed WSF - no primer.
    And I prime on top of the sealer. I use acrylic. It may be a personal preference thing, but I will grant the greater experience to Tim
    Karl
    It is impossible for a man to begin to learn what he thinks he knows. -- Epictetus

  31. #31

    Default

    Click image for larger version. 

Name:	DCP_7538.jpg 
Views:	207 
Size:	127.9 KB 
ID:	218736

    My first was these Swordfish. Just did a spray of gray primer and the khaki drab.

  32. #32

    Default

    Click image for larger version. 

Name:	DCP_7618.jpg 
Views:	206 
Size:	153.9 KB 
ID:	218737

    My other attempt at Shapeway models.

    I have 6 others I am working on.

  33. #33

    Default

    I'm making "slow and steady" progress

    Thanks to the advice in this thread, I wound up trying a variety of approaches for this first coat of paint.

    All of the planes got a first coat of Future/Klear/Pledge prior to painting.

    Click image for larger version. 

Name:	994.jpg 
Views:	194 
Size:	192.5 KB 
ID:	219156

    The Pups were primed with Krylon grey primer, then sprayed with Tamiya TS-5 Olive Drab. I know the whole PC-10 thing is a can of worms, but I wanted "dark olive green" for my Pups as opposed to "Hershey's chocolate brown", and I'm happy with the outcome in terms of color. TS-5 is supposed to match nicely with XF-62, a color I'd seen recommended for representing PC-10, so I'm content.

    Click image for larger version. 

Name:	995.jpg 
Views:	193 
Size:	181.8 KB 
ID:	219157

    Two of the Albatros D.IIIs were sprayed with Tamiya surface primer. It seems like this primer might have increased the amount of graininess on the surface, not quite sure. The red Albatros (destined to be MvR) was sprayed with Tamiya TS-39 Mica Red directly over the Pledge, and seems to have slightly less texture (though it still definitely has a good deal, due to the 3D printing).

    Click image for larger version. 

Name:	996.jpg 
Views:	191 
Size:	161.6 KB 
ID:	219158

    Next I'm going to start painting the undersides of the wings and then will move on to the details.

    Once all the painting is done, I'm hoping that a few more coats of Pledge will help smooth out the remaining graininess. Once that's done, I'll apply decals (using MicroSol and MicroSet) and then clear coat & dull coat.

    Thanks all for the help! Onwards!

  34. #34

    Default

    So this afternoon, I found my courage and had a go painting up the red Albatros. After some deliberation, I decided to do this one as Kurt Wolff's D.III, with red fuselage, green nose and elevator, and 3 color camo wings.

    I'd never painted a camo scheme before, but just sort of went for it with my brushes, and at the end, I'm pretty pleased with the result. It's certainly not good at all up close, but on the table it looks OK!

    Will be doing some touchups and then clearcoating, decals to follow.

    QUESTION:
    I only did 1 coat of Pledge floor finish before painting, and there's still a good deal of texture left. I'm wondering what my best move is at this point? I assume I can do additional coats of Pledge over the paint, to try to fill in the pores a bit more... any other suggestions?

    It's a learning process.

    Click image for larger version. 

Name:	996.jpg 
Views:	178 
Size:	118.6 KB 
ID:	219483

    Click image for larger version. 

Name:	998.jpg 
Views:	176 
Size:	96.8 KB 
ID:	219484

    Click image for larger version. 

Name:	999.jpg 
Views:	177 
Size:	93.8 KB 
ID:	219485

    Click image for larger version. 

Name:	1000.jpg 
Views:	178 
Size:	93.8 KB 
ID:	219486
    Last edited by surfimp; 03-19-2017 at 19:24.

  35. #35

    Default

    "QUESTION:
    I only did 1 coat of Pledge floor finish before painting, and there's still a good deal of texture left. I'm wondering what my best move is at this point? I assume I can do additional coats of Pledge over the paint, to try to fill in the pores a bit more... any other suggestions?"


    It is my experience that the smoother the surface you put the color on the better. I use Krylon gloss clear until the surface is very smooth, then I paint the color and do a final over spray after the decals are on. You may find the decals will not adhere well to a rough surface, mine eventually flaked off. With a smooth surface the decals adhere without a problem . . . adding the clear gloss after you have painted a rough surface will not correct the rough effect.

  36. #36

    Default

    Quote Originally Posted by clipper1801 View Post
    It is my experience that the smoother the surface you put the color on the better. I use Krylon gloss clear until the surface is very smooth, then I paint the color and do a final over spray after the decals are on. You may find the decals will not adhere well to a rough surface, mine eventually flaked off. With a smooth surface the decals adhere without a problem . . . adding the clear gloss after you have painted a rough surface will not correct the rough effect.
    Thanks, that's sort of what I suspected!

    So, it sounds like I could add Pledge floor polish or clear gloss to what I've got now, until I got a smooth surface, and then re-paint what I've done (camo, etc.) over top of it, and get a nice smooth effect?

    Nothing I did today was particularly difficult so that (re-doing over the top of a smooth surface) wouldn't be the end of the world by any means. I need the practice anyways.

    Sounds like I should probably give it a go and see how it turns out.

    Thank you!

  37. #37

    Default

    That should work, something I learned painting my first car back in the 60's!

  38. #38

    Default

    I use three (or sometimes four) coats of Klear to smooth the surface before painting.

    It should work the other way around - you just end up using more paint as it soaks into the plastic!

    Some folks use a layer of Klear when all the painting is done, to provide a glassy-smooth finish on which to apply decals.
    I use gloss varnish myself, but the result is the same.
    I laugh in the face of danger - then I hide until it goes away!

  39. #39

    Default

    Thanks all for the tips. Painting has always been a bugaboo for me but in the process of researching, I came across this image on the Tamiya website and realize it's applicable to what you are explaining to me:

    Click image for larger version. 

Name:	IMG_7802.GIF 
Views:	163 
Size:	8.1 KB 
ID:	219502

    Live and learn! I appreciate you all sharing your tips!

  40. #40

    Default

    Quote Originally Posted by surfimp View Post
    And tires... what's the secret to painting those buggers?
    I too found painting the tyres difficult. I didn't know about the short bristle tip, so after a disaster on a SE5a, I used a black marker pen on the other four planes I was working on. It looks okay and it is much easier to control and more predictable than a paint brush.

  41. #41

    Default

    Guys, just an update on this, and sorry for not having photos, but I've put another 3 coats of Pledge on these things and they're still quite grainy.

    I'm not diluting the Pledge at all, just applying it - quite liberally - with a decent sized brush.

    I'm still quite a ways off from being "glass smooth" - should I just keep going? I am hoping to get a nice-ish finish on them.

    Thanks!

  42. #42

    Default

    Quote Originally Posted by surfimp View Post
    Guys, just an update on this, and sorry for not having photos, but I've put another 3 coats of Pledge on these things and they're still quite grainy.

    I'm not diluting the Pledge at all, just applying it - quite liberally - with a decent sized brush.

    I'm still quite a ways off from being "glass smooth" - should I just keep going? I am hoping to get a nice-ish finish on them.

    Thanks!
    Looking forward to the responses you gather before I run out and buy bottle. Have a few be2c's awaiting finish.....

  43. #43

    Default

    I put another coat of Pledge on last night, so heavy it was literally dripping off the planes, just for an experiment.

    I believe this is either the fourth or fifth coat I've applied - post painting. I did one coat of Pledge prior to painting.

    There's still a good deal of texture, which I can feel when I run my finger over it. Feels like nothing so much as fine, hard-packed beach sand.

    Question: should I keep going with the Pledge, or maybe switch to something else to try to fill this grain more rapidly?

    I do have some Krylon clear gloss, and I can definitely give it a go.

    Wondering if it wouldn't have been better off to start with some of that wall spackle first, then seal with the Pledge, then paint.

    It's a learning experience and I'm not getting frustrated. I am happy to take my time, and just want to learn what it takes to get a good finish. I am actually really enjoying my time with these, unlike almost all my previous miniature painting efforts. Not sure why I find myself enjoying painting airplane shapes more than human shapes, but hey!

    Click image for larger version. 

Name:	1000.jpg 
Views:	140 
Size:	134.0 KB 
ID:	219726

    Click image for larger version. 

Name:	999.jpg 
Views:	141 
Size:	82.2 KB 
ID:	219727

    Click image for larger version. 

Name:	998.jpg 
Views:	139 
Size:	103.3 KB 
ID:	219728

    Click image for larger version. 

Name:	995.jpg 
Views:	141 
Size:	155.1 KB 
ID:	219729

    Click image for larger version. 

Name:	996.jpg 
Views:	141 
Size:	161.2 KB 
ID:	219730

    Click image for larger version. 

Name:	997.jpg 
Views:	140 
Size:	146.7 KB 
ID:	219731
    Last edited by surfimp; 03-24-2017 at 18:18.

  44. #44

    Default

    Good for your patience! On rare occasions I do wipe the surface with the Spackle, sand and then add the finish. Most of the water based ones dry quickly and fill wonderfully. My first Zeppelins were surface plastered then sealed with polyurethane, then paint. Worked great too. Hang in there, its worth it!

  45. #45

    Default

    I think you have to do the pledge or krylon clear before painting so it can absorb into the material. If you paint when the texture is still extreme the paint will seal the surface and prevent any more absorbtion. It can get to a point where your clear seal can puddle at the rear wing edges. I try to have the planes positioned so the tail is a bit raised (a piece of wood or whatever) to make the wings level to minimise the collection at the rear wing edges.

    When done painting and decalling a flat clear spray coat will cut down the reflection that shows the textuure.

  46. #46

    Default

    To confirm, I did a coat of Pledge before any paint was put on.

    I then painted / primed.

    Subsequently I've put 4+ coats of Pledge on over the paint.

    I have noticed the pooling thing, and am going to need to find some shims to level up the planes while drying. That might help the grain-filling, too.

    There's still a lot of texture, especially on the fuselage.

    One thing I have NOT been doing, is sanding. Part of me wonders if I'm just making the bumps taller with all these layers, as opposed to filling in the gaps between them.

  47. #47

    Default

    I can't vouch for pledge as I have never used it but other swear by it. I use Krylon clear gloss spray first, several coats, then a flat black or grey primer. I can't say that I keep spraying until I have a shhiny smooth surface. There is usually some texture. 1st 3 below is where I take the surface before painting. Last two are results I end up with.

    Click image for larger version. 

Name:	1.JPG 
Views:	134 
Size:	109.2 KB 
ID:	219814

    Click image for larger version. 

Name:	2.JPG 
Views:	134 
Size:	118.8 KB 
ID:	219815

    Click image for larger version. 

Name:	3.JPG 
Views:	132 
Size:	103.0 KB 
ID:	219816

    Click image for larger version. 

Name:	4.JPG 
Views:	132 
Size:	102.2 KB 
ID:	219817

    Click image for larger version. 

Name:	5.JPG 
Views:	131 
Size:	84.2 KB 
ID:	219818

  48. #48

    Default

    Krylon gloss for the win!

    I picked up a couple cans this morning, and used some spare tubing and foam to make some painting stands.

    Now, I probably went a bit overboard, but I was able to get a very glossy surface on the planes with just a bit of effort. BIG difference compared to the Pledge - it all just happened a lot faster.

    I'm quite pleased... we'll see if it winds up being too much, but it's a heck of a lot better than where I'd gotten to previously.

    Click image for larger version. 

Name:	IMG_7828.jpg 
Views:	117 
Size:	101.6 KB 
ID:	219901

    Click image for larger version. 

Name:	IMG_7829.jpg 
Views:	115 
Size:	103.2 KB 
ID:	219903

    Click image for larger version. 

Name:	IMG_7831.jpg 
Views:	114 
Size:	107.1 KB 
ID:	219904

    Click image for larger version. 

Name:	994.jpg 
Views:	111 
Size:	86.5 KB 
ID:	219915

    Click image for larger version. 

Name:	996.jpg 
Views:	111 
Size:	97.7 KB 
ID:	219916

    Click image for larger version. 

Name:	997.jpg 
Views:	109 
Size:	101.7 KB 
ID:	219917

    Click image for larger version. 

Name:	998.jpg 
Views:	107 
Size:	105.5 KB 
ID:	219918

    Click image for larger version. 

Name:	999.jpg 
Views:	108 
Size:	94.3 KB 
ID:	219919

    Click image for larger version. 

Name:	IMG_7836.jpg 
Views:	111 
Size:	187.8 KB 
ID:	219905
    Last edited by surfimp; 03-26-2017 at 15:25.

  49. #49

    Default

    Well done for hanging in there Steve!

    Nice result - now we look forward to seeing the finished articles.
    I laugh in the face of danger - then I hide until it goes away!

  50. #50

    Default

    Glad to see it worked out for you. Now you like others will be a Shapeways junky. Whenever there is a sale I put in an order even when I don't want/need anything!

Page 1 of 2 12 LastLast


Similar Missions

  1. Any Fokker Scourge campaigns?
    By nikiMcBee in forum WGF: Campaign Discussions
    Replies: 19
    Last Post: 04-03-2014, 13:26
  2. Flights of War - The Fokker Scourge (en Francais)
    By Zoe Brain in forum WGF: Historical Discussions
    Replies: 3
    Last Post: 01-04-2013, 02:58
  3. Replies: 0
    Last Post: 10-10-2011, 02:15
  4. Awaiting the Fokker Scourge.
    By Flying Officer Kyte in forum Hobby Room
    Replies: 29
    Last Post: 07-23-2011, 17:35
  5. I just took the plunge!
    By Bartman in forum WGS: General Discussions
    Replies: 13
    Last Post: 05-03-2011, 16:57

Bookmarks

Posting Permissions

  • You may not post new threads
  • You may not post replies
  • You may not post attachments
  • You may not edit your posts
  •