
-
 Forssman Triplane Build
It all started with a picture of a wheel and a happy tease, or was that WWI?
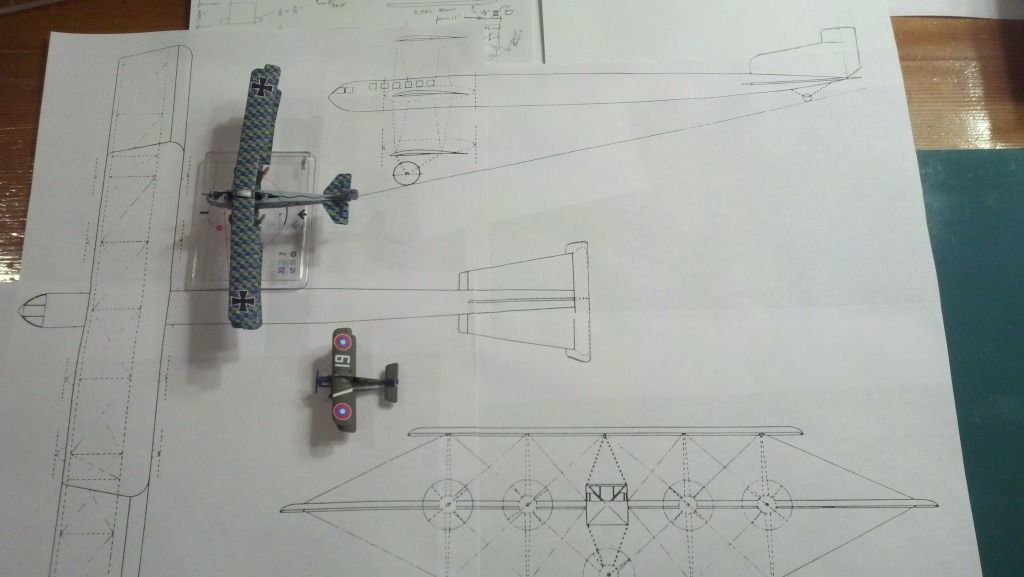
The research was fascinating, all kinds of politics and intrigue, money laundering, disappearances . . . I finally found an academic paper written on the Triplane and it revealed more than any other source, including the "planned" armament, payload, crew, and purposes of the design, very coolrific! I just had to have one no matter the facts!
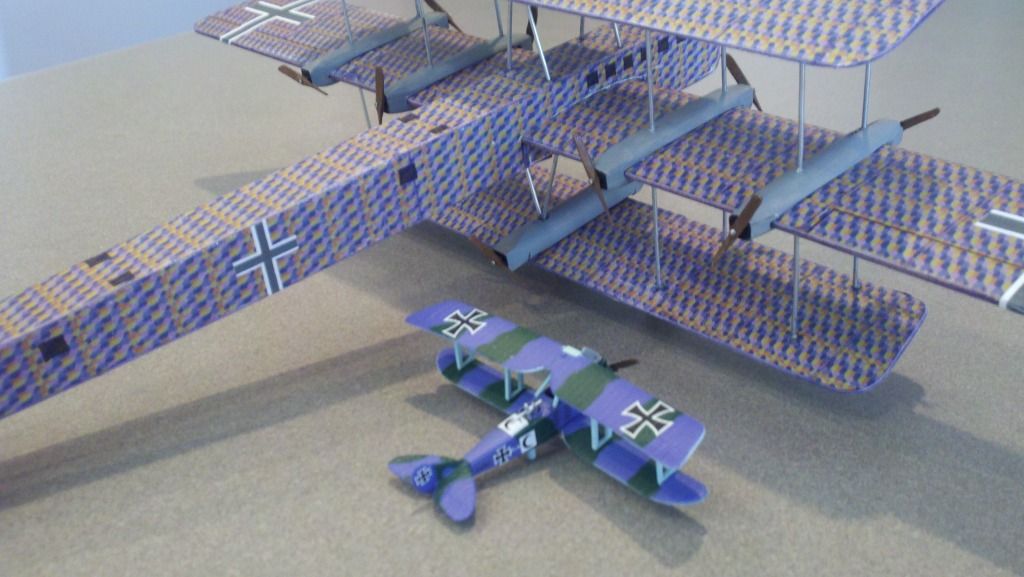
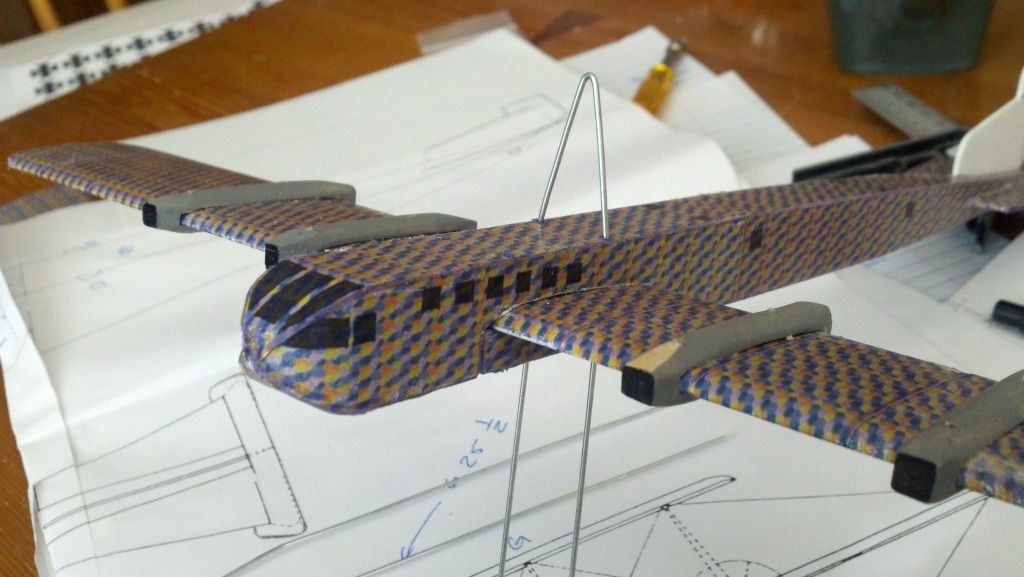
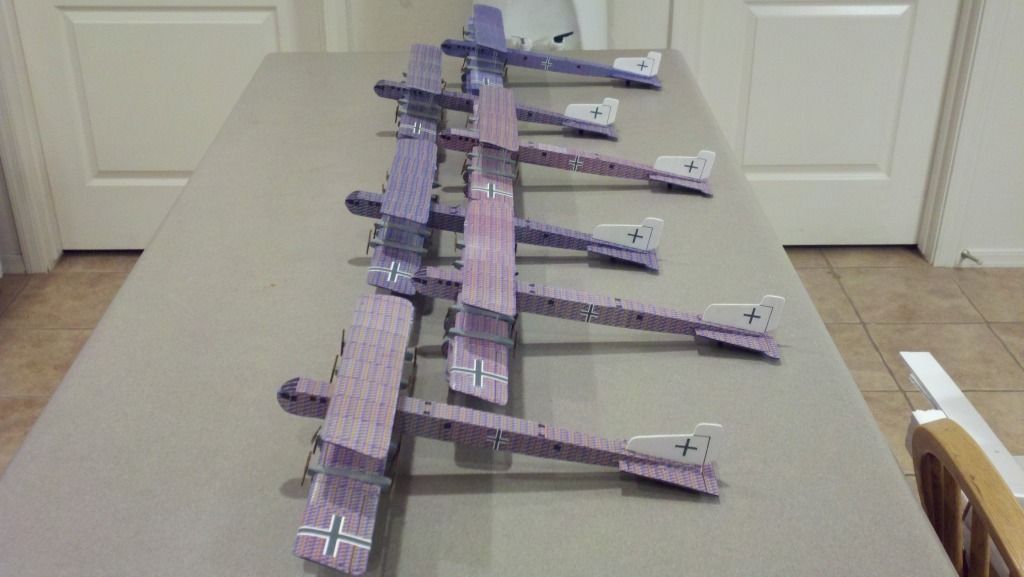
I finally complete the flock, I worked it down to 79 parts and 210 operations and here we are!
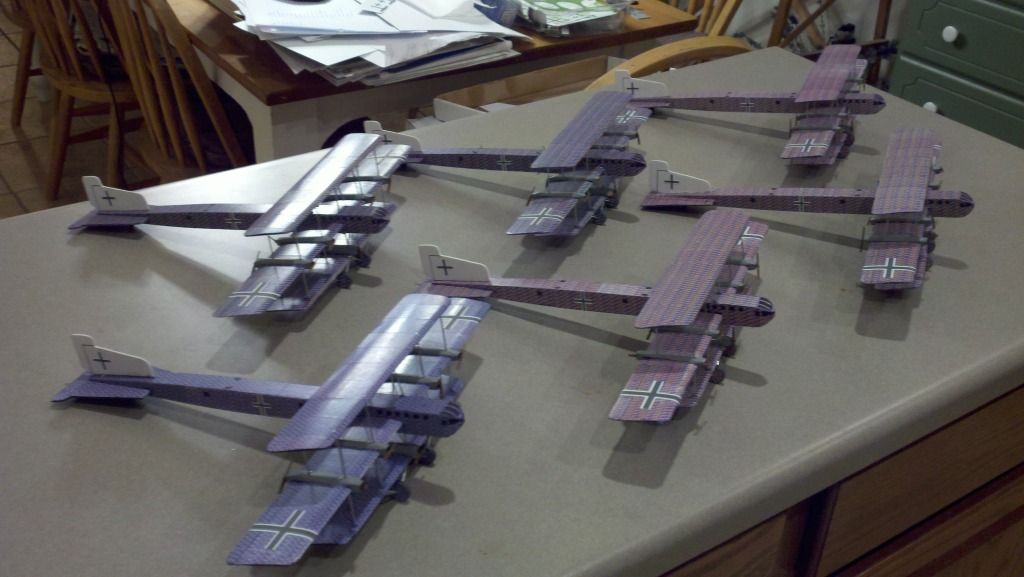
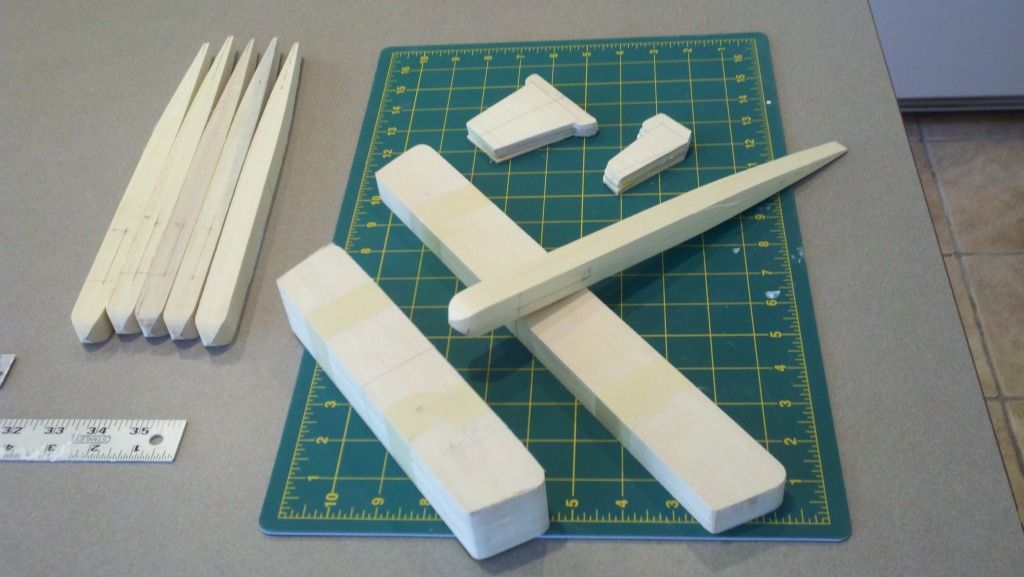
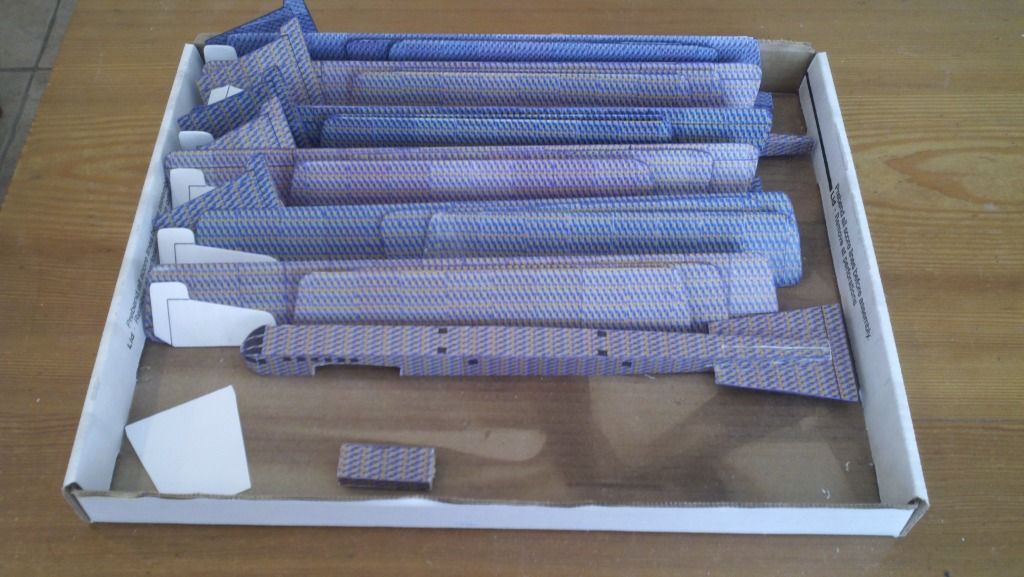
By far my most encompassing project to date. Templates made, parts cut, then the details!
30 engine nacelles that needed to be fitted to the wings, some on centerlines others on the top only . . .
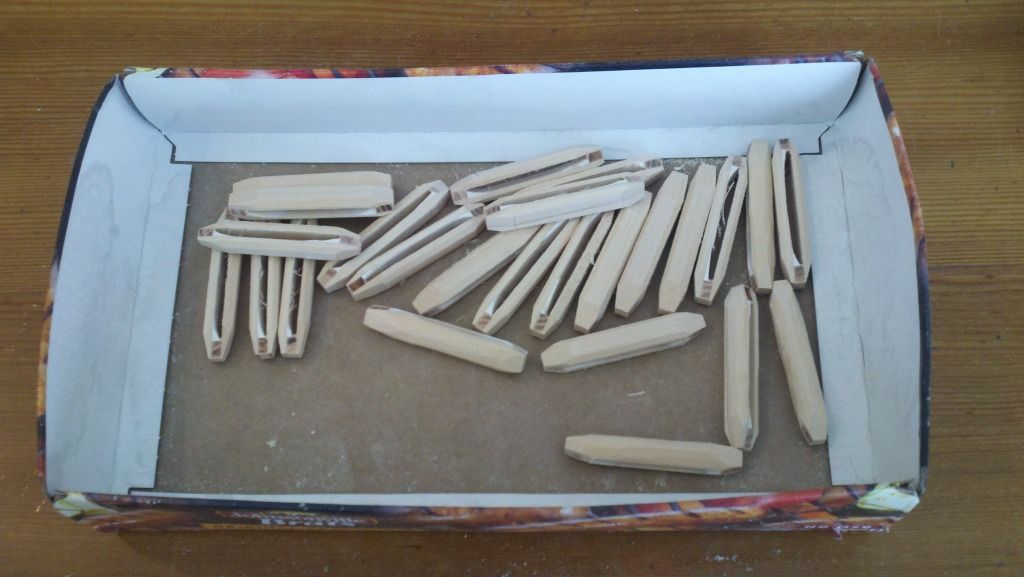
Once the parts were cut out of bass wood and dowels, sanded and sealed, they got covered with various colors of lozenge stickers-a huge job in its own, as I discovered the whole project in every aspect would become . . .
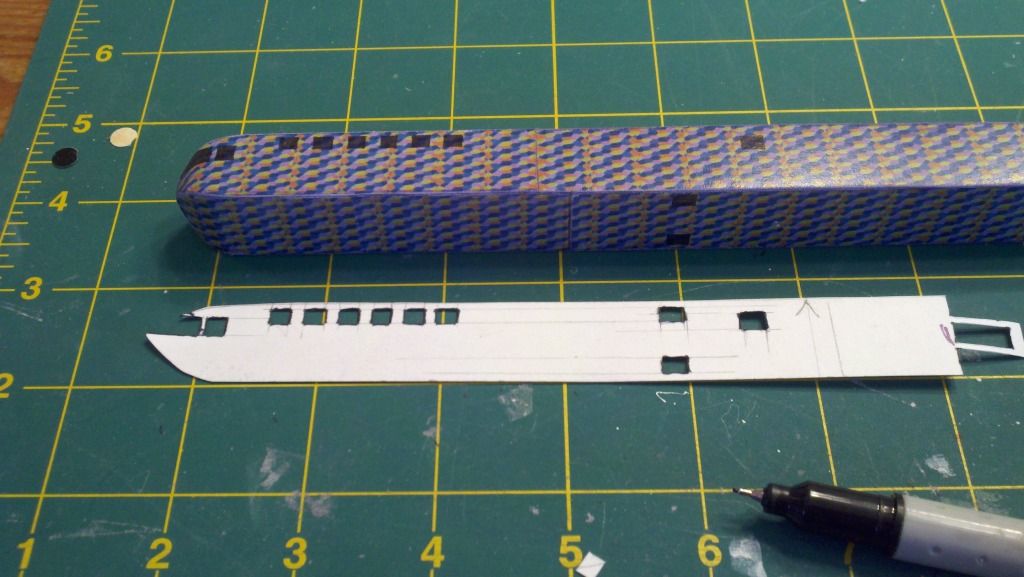
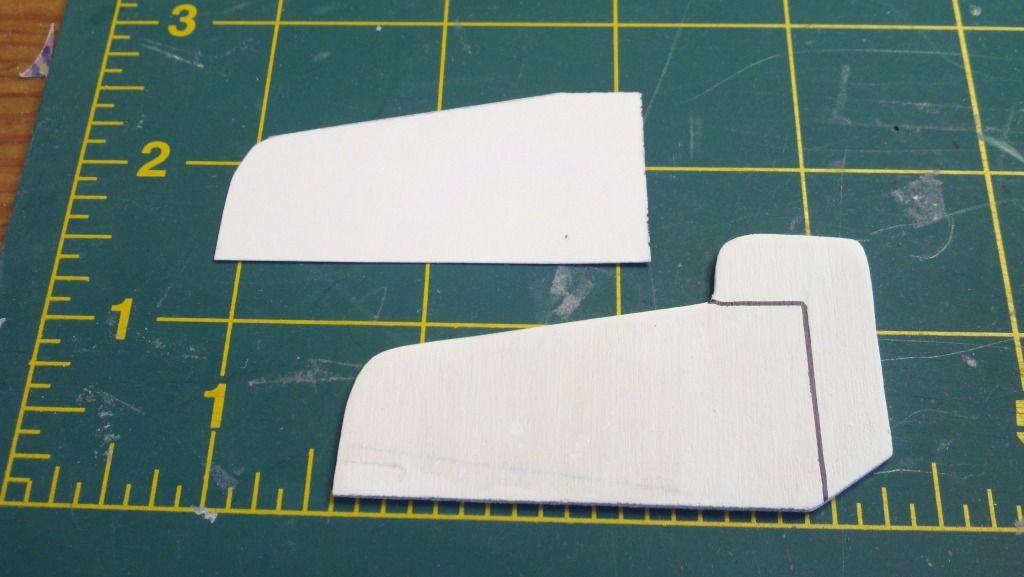
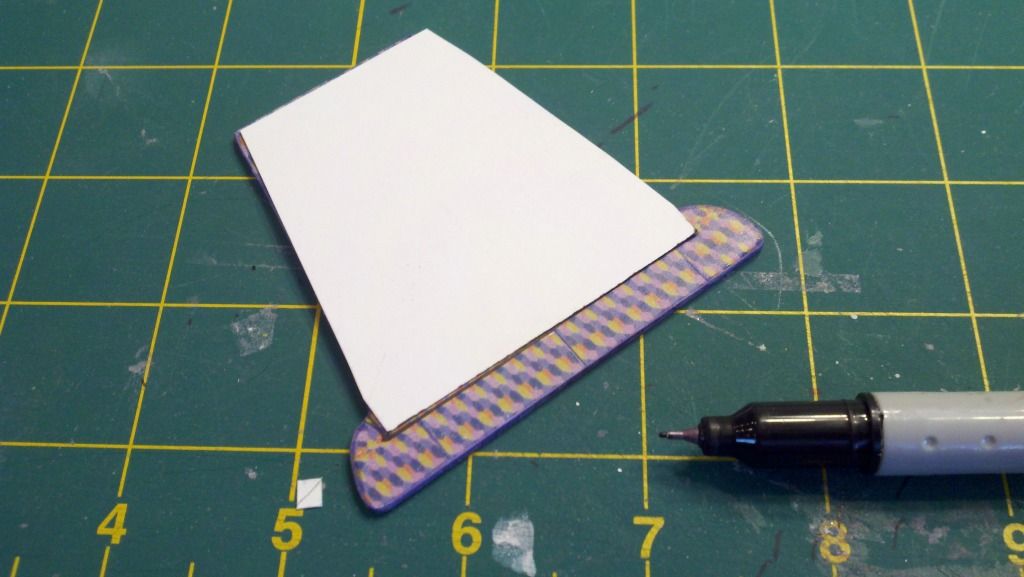
Templates for everything-including the windows and would be gun ports, ailerons, elevators etc, etc, etc . . .
Staging sets of matching lozenges became important since the elves are color blind
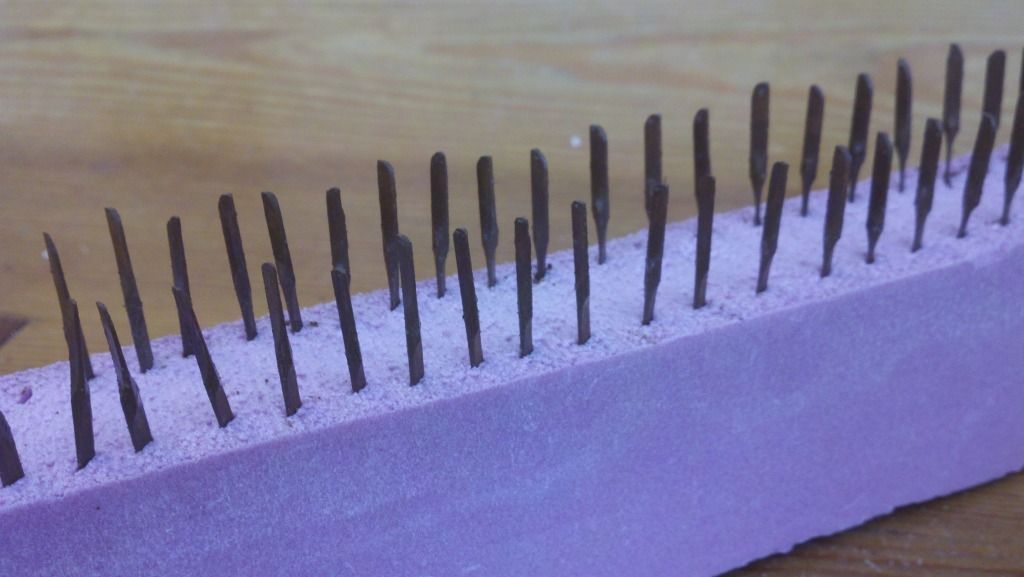
Props! There were LOTS of props to make, 10 per model x 6 = 60 + spares
Much was designed on sprues for building, here the tops of the laminated engine pods are fabricated, filler is added to meet the curves of the leading and trailing edges of the wings, then the lower strip is added and the pods are trimmed to length, then sanded round, and finally squared off on the ends for the radiators, all 60 times!

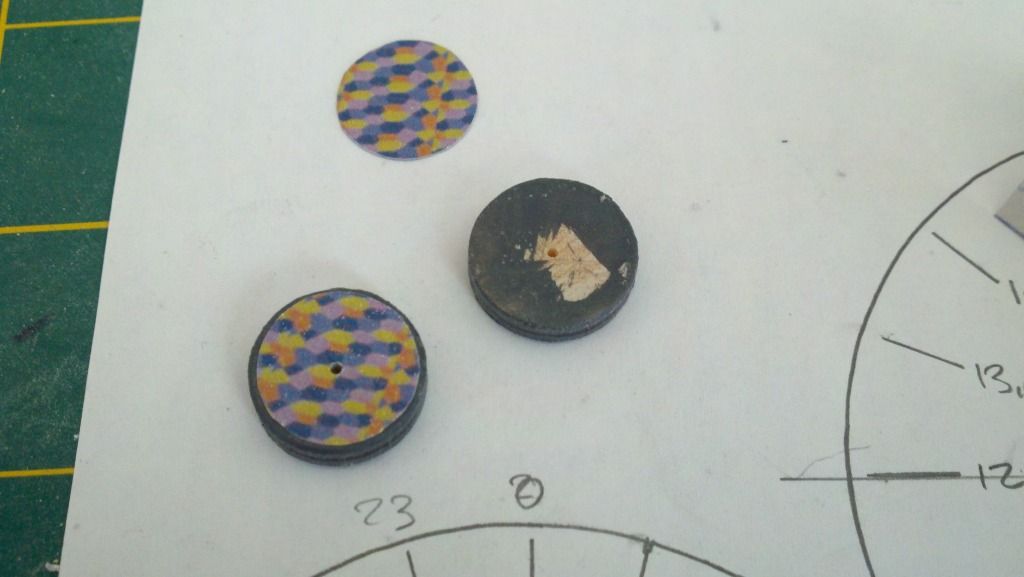
Wheels were cut from 5/8" dowel, in 5/32" thicknesses, sanded, primed, painted, drilled and covered with lozenge hub caps
A prototype was selected to test all the processes and brought to completion before the rest in case disaster might be lurking around the corner!
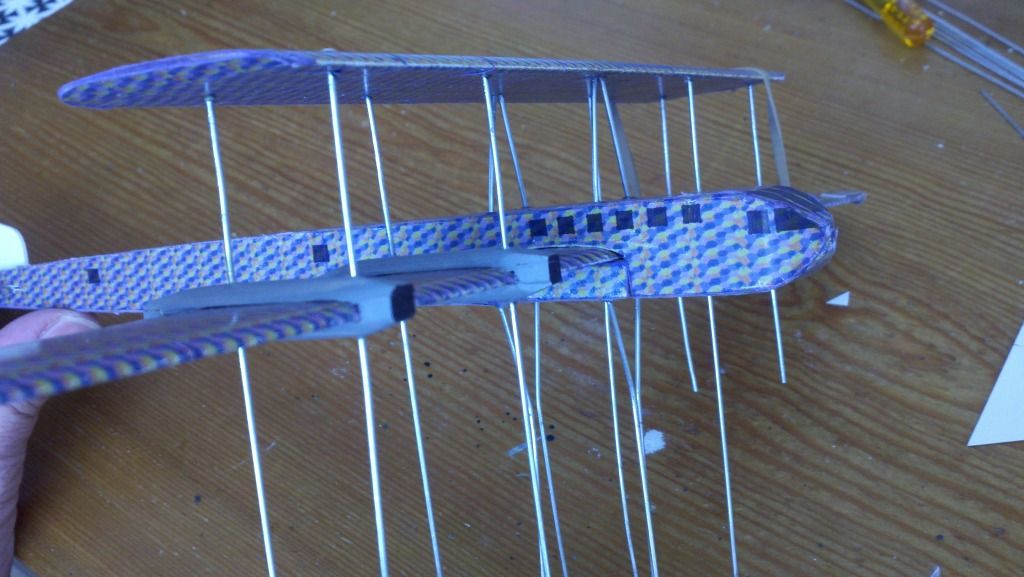
Then production began in earnest, joining the main wings first . . .
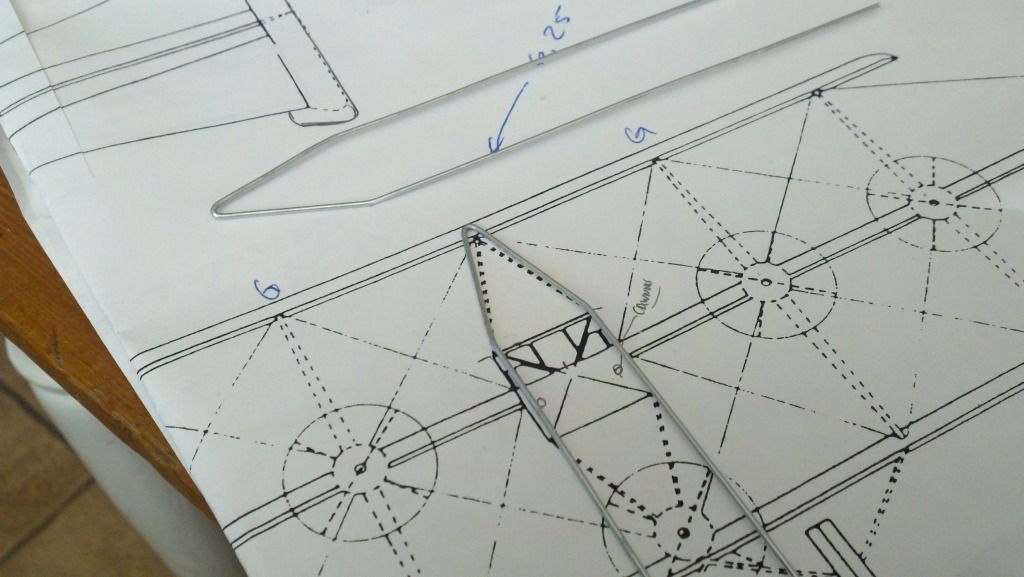
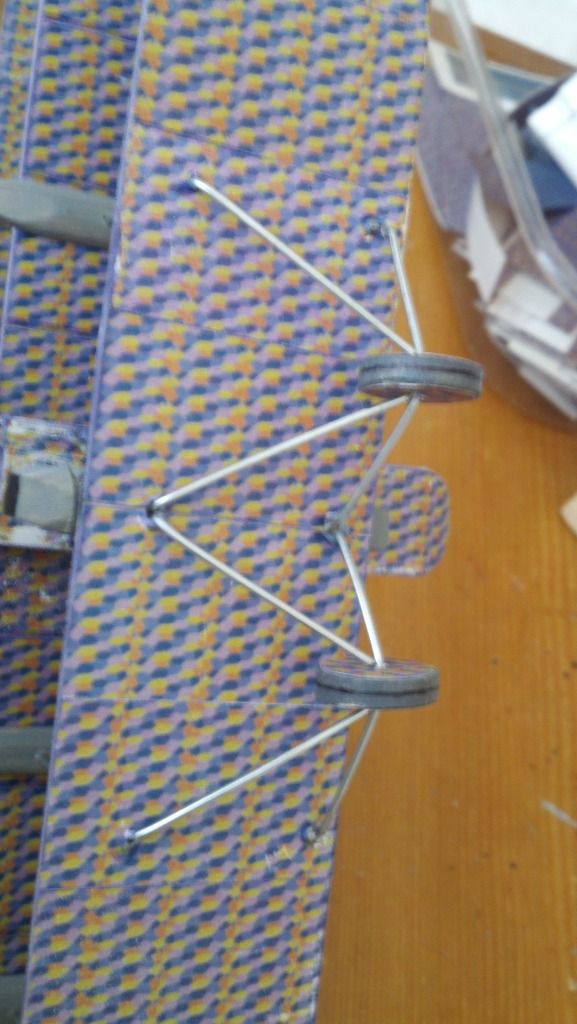
Bending up the wires! One continuous wire forms the central cabaine, upper and lower A frames on the fuselage, then carries down to the central lower engine pod, then through it to spread out and form the first inner landing gear struts, retains the wheels, then continues back up and anchors finally into the bottom of the lower wing. This has to be bent in stages as the parts are added as well as the remaining wing struts are installed too. This took a bottle of liquid courage and several long dark tea times to devise and implement, but it worked great!
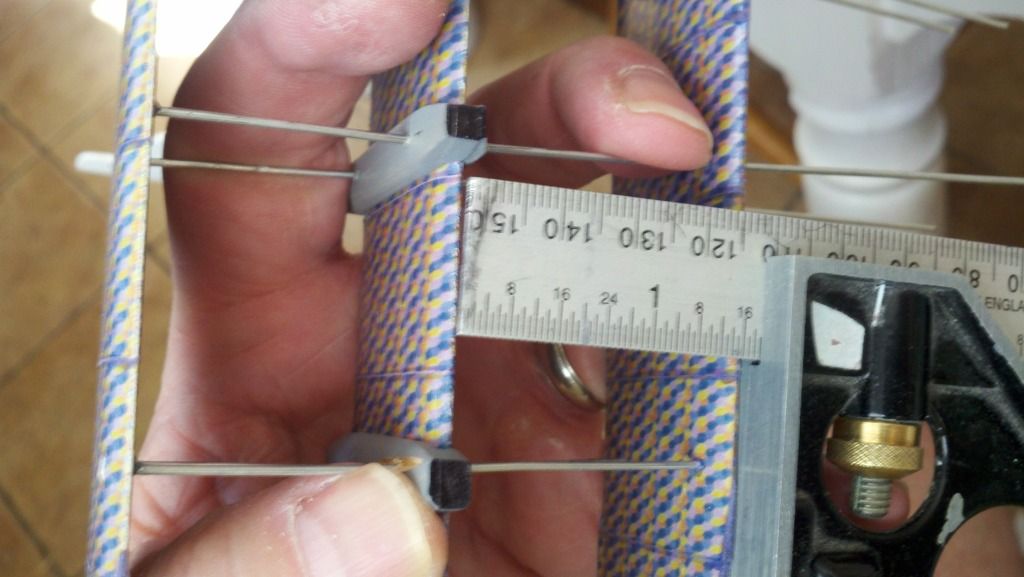
Stage one struts, front and back are bent into place

Final rise measured and glued into place
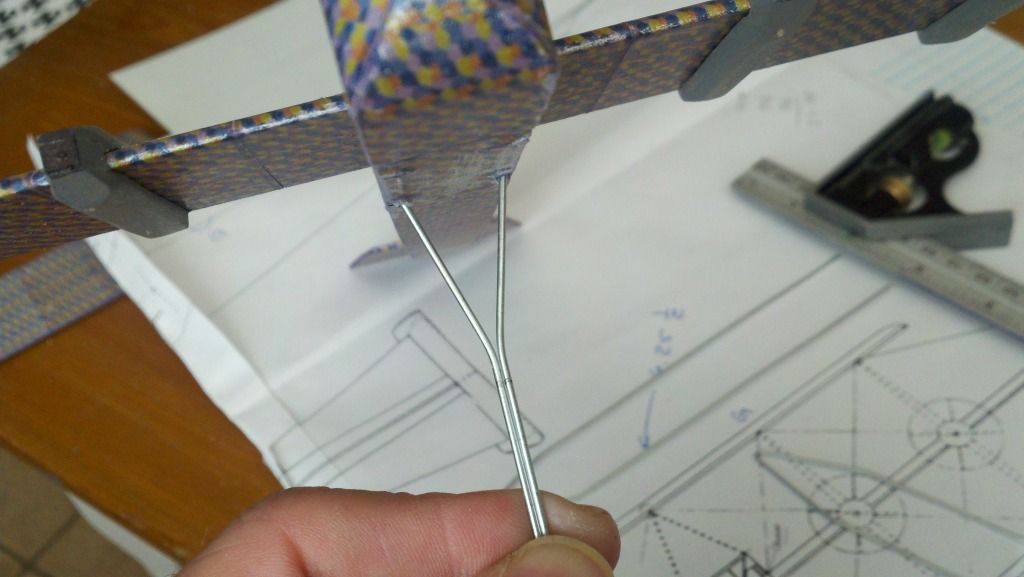
Lower ends bent into A shape and converged into a common dual strut to be inserted into the lower wing engine pod
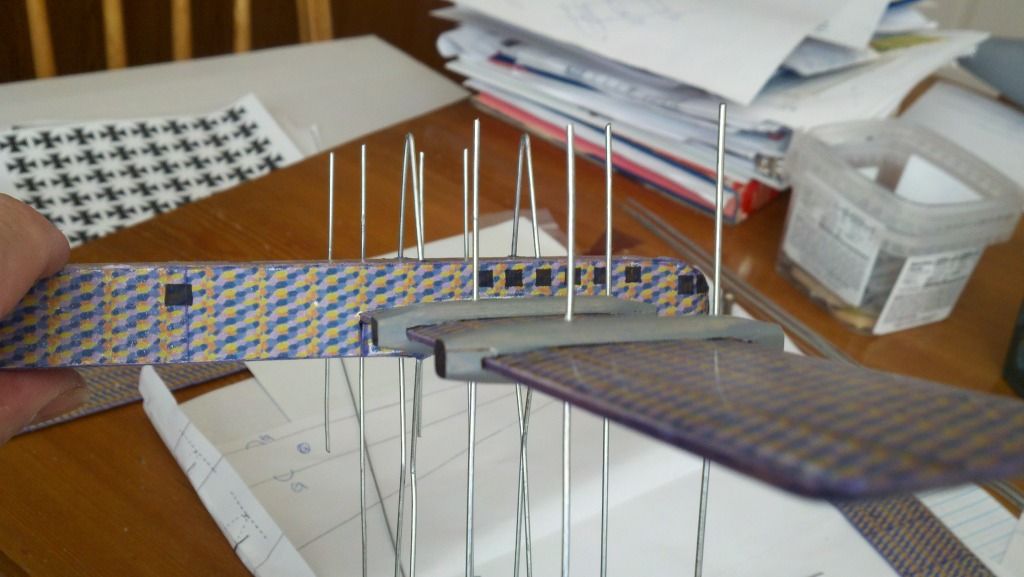
Outer struts installed into center wing
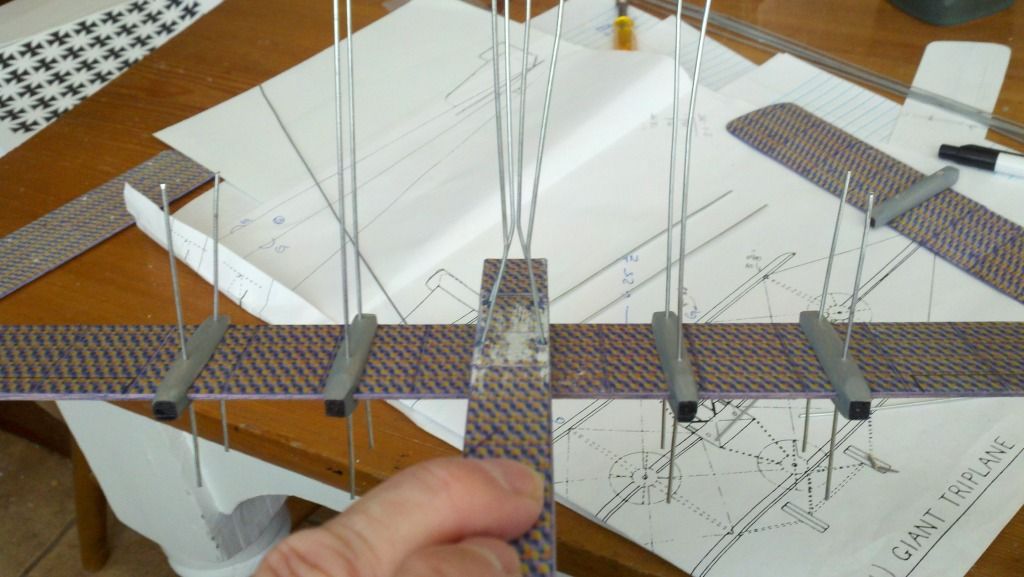
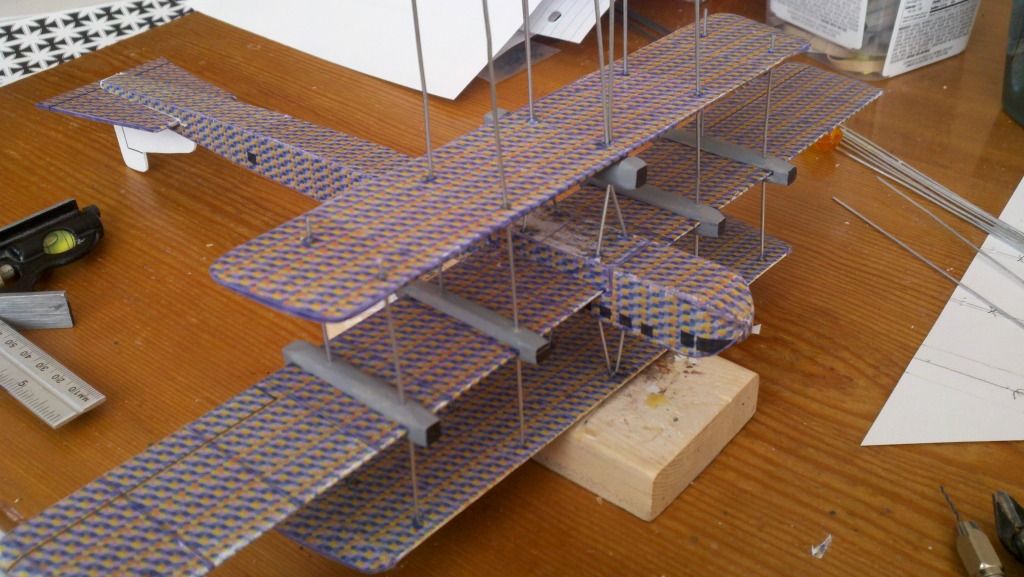
Top wing carefully set in place, measured and glued
Just too weird and cool at the same time not to try!
Now for the bottom wing
A good gap measuring expedition
Set it aside to rest, and do it again 5 x
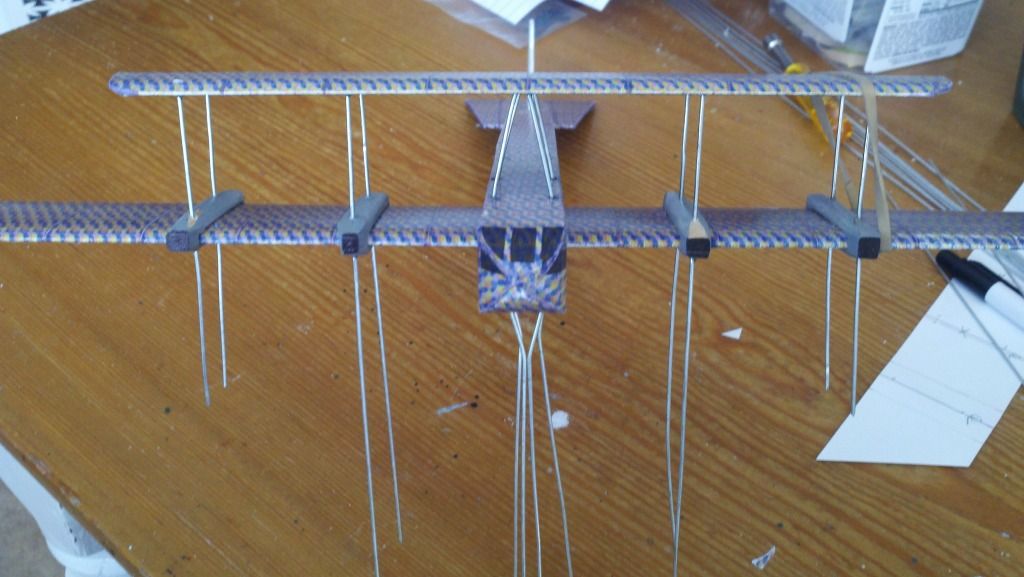
When cured, the bottom center wires are formed into the landing gear struts, wheels slipped on, and more bending!
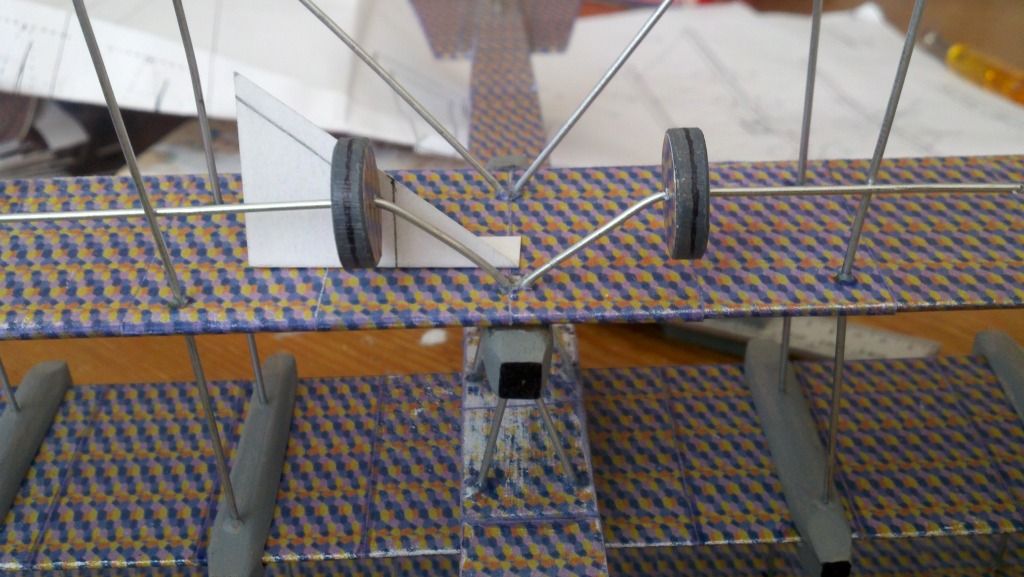
Other mid struts join the fun as brace struts
And it does all make some sense as you go
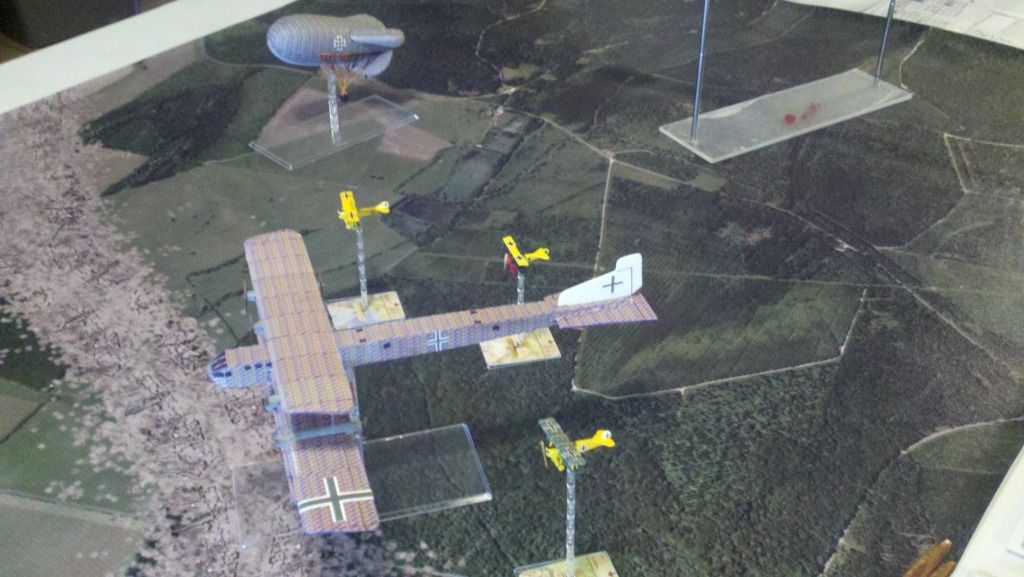
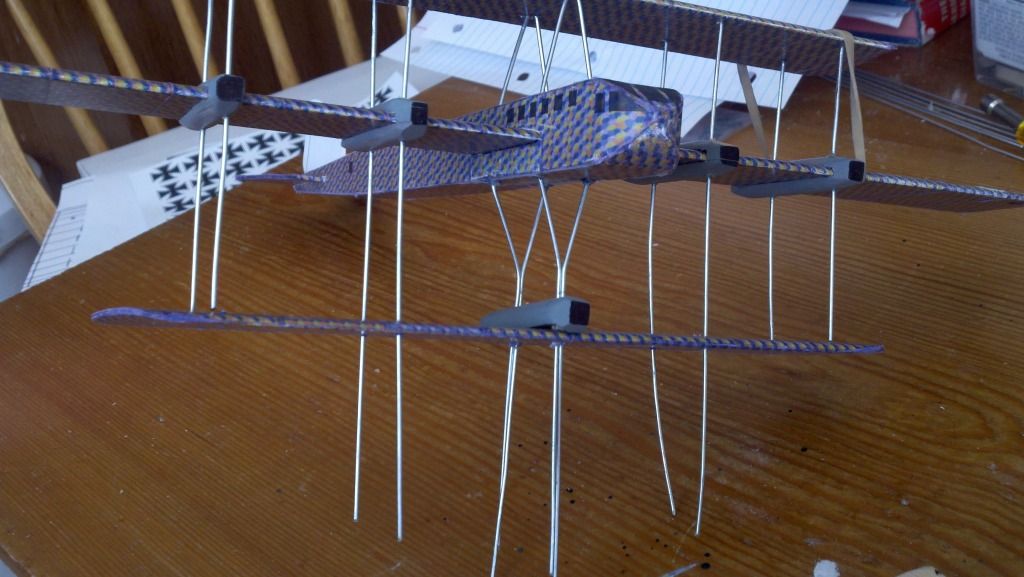
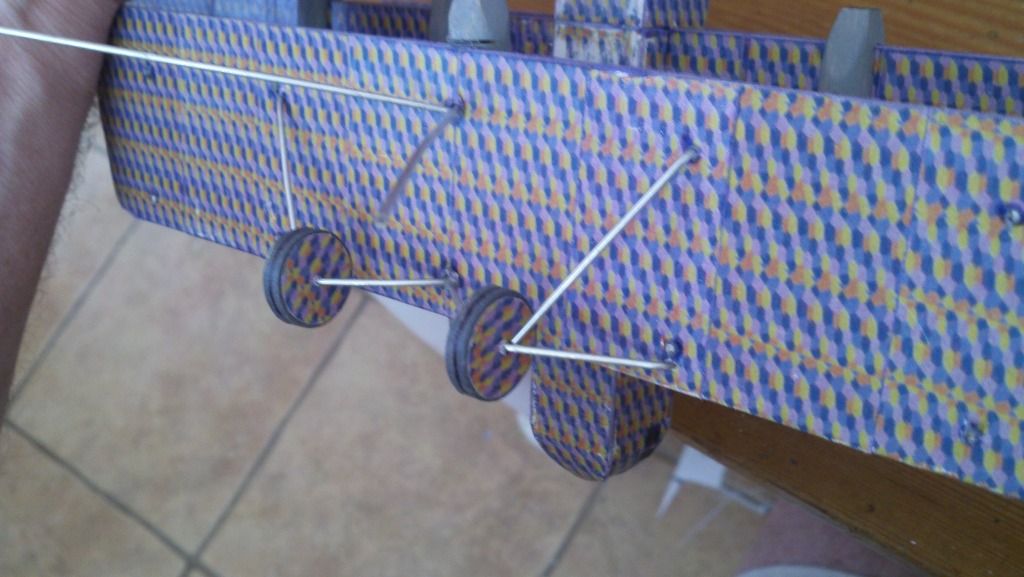
Trim the outer struts flush, add the rudder and stabilizer and sit back and enjoy for a moment
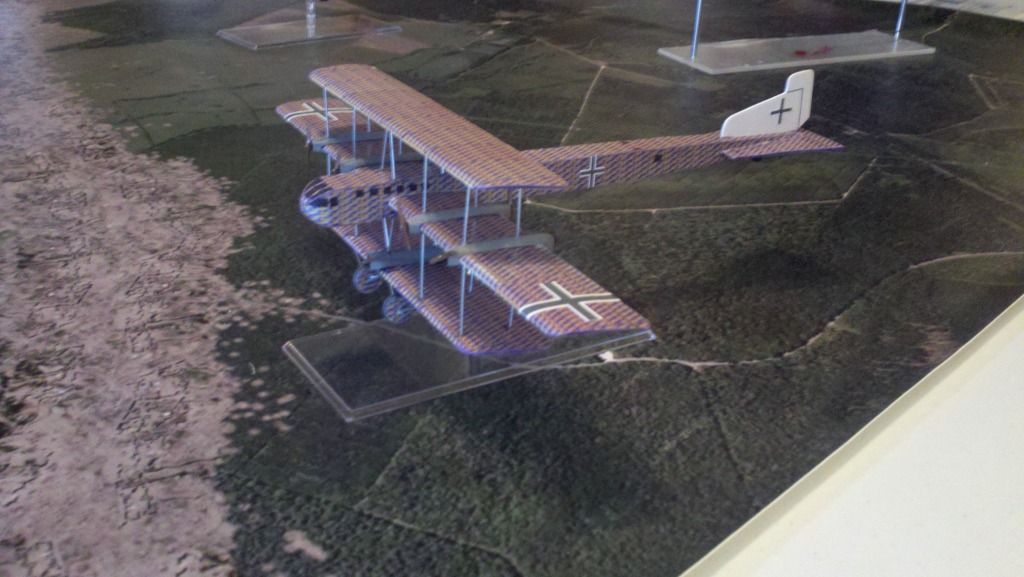
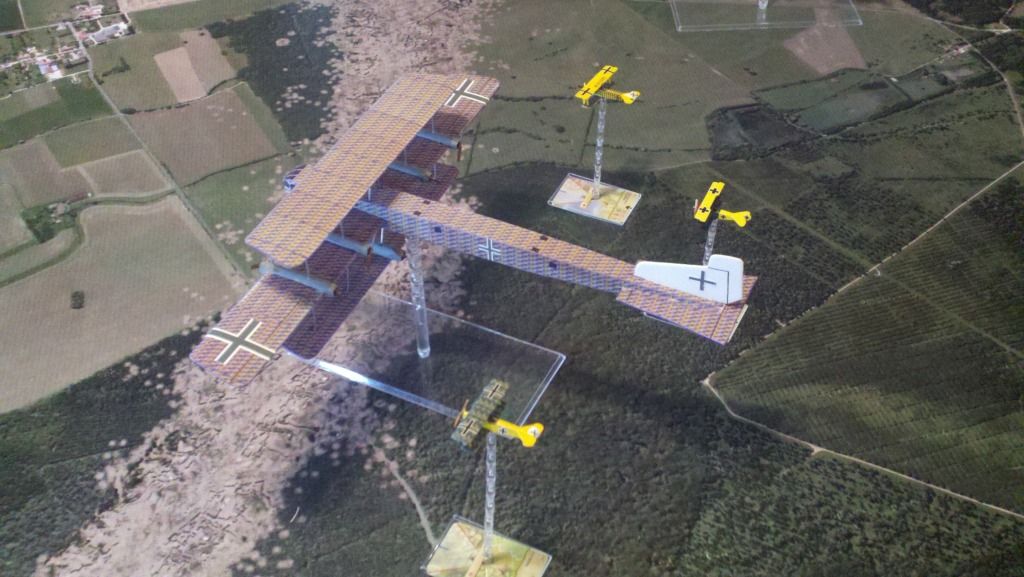
They are a strangely beautiful shape and would fly well as free flight models, as for the possible real ships? Who really knows. I do know they will get a lot of points and stares on the game matt!
Hope you enjoy my flight into fantasy, the elves are still lining up!
Now for something completely different . . . Clipper back drifting
 Posting Permissions
- You may not post new threads
- You may not post replies
- You may not post attachments
- You may not edit your posts
-
Forum Rules


 Reply With Quote
Bookmarks